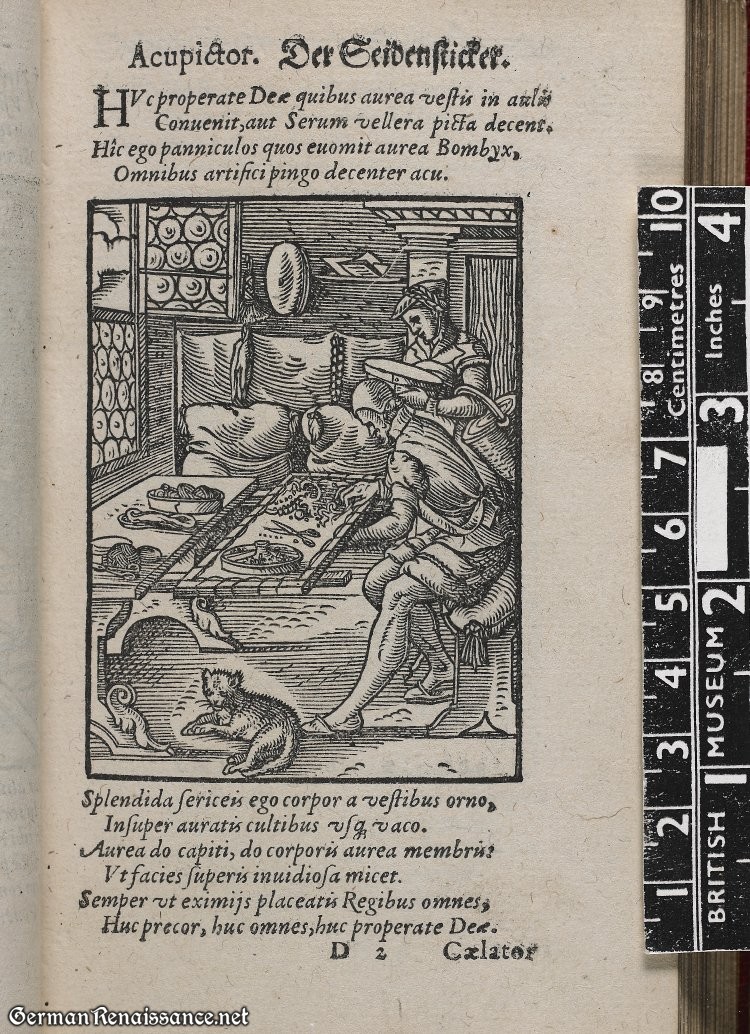
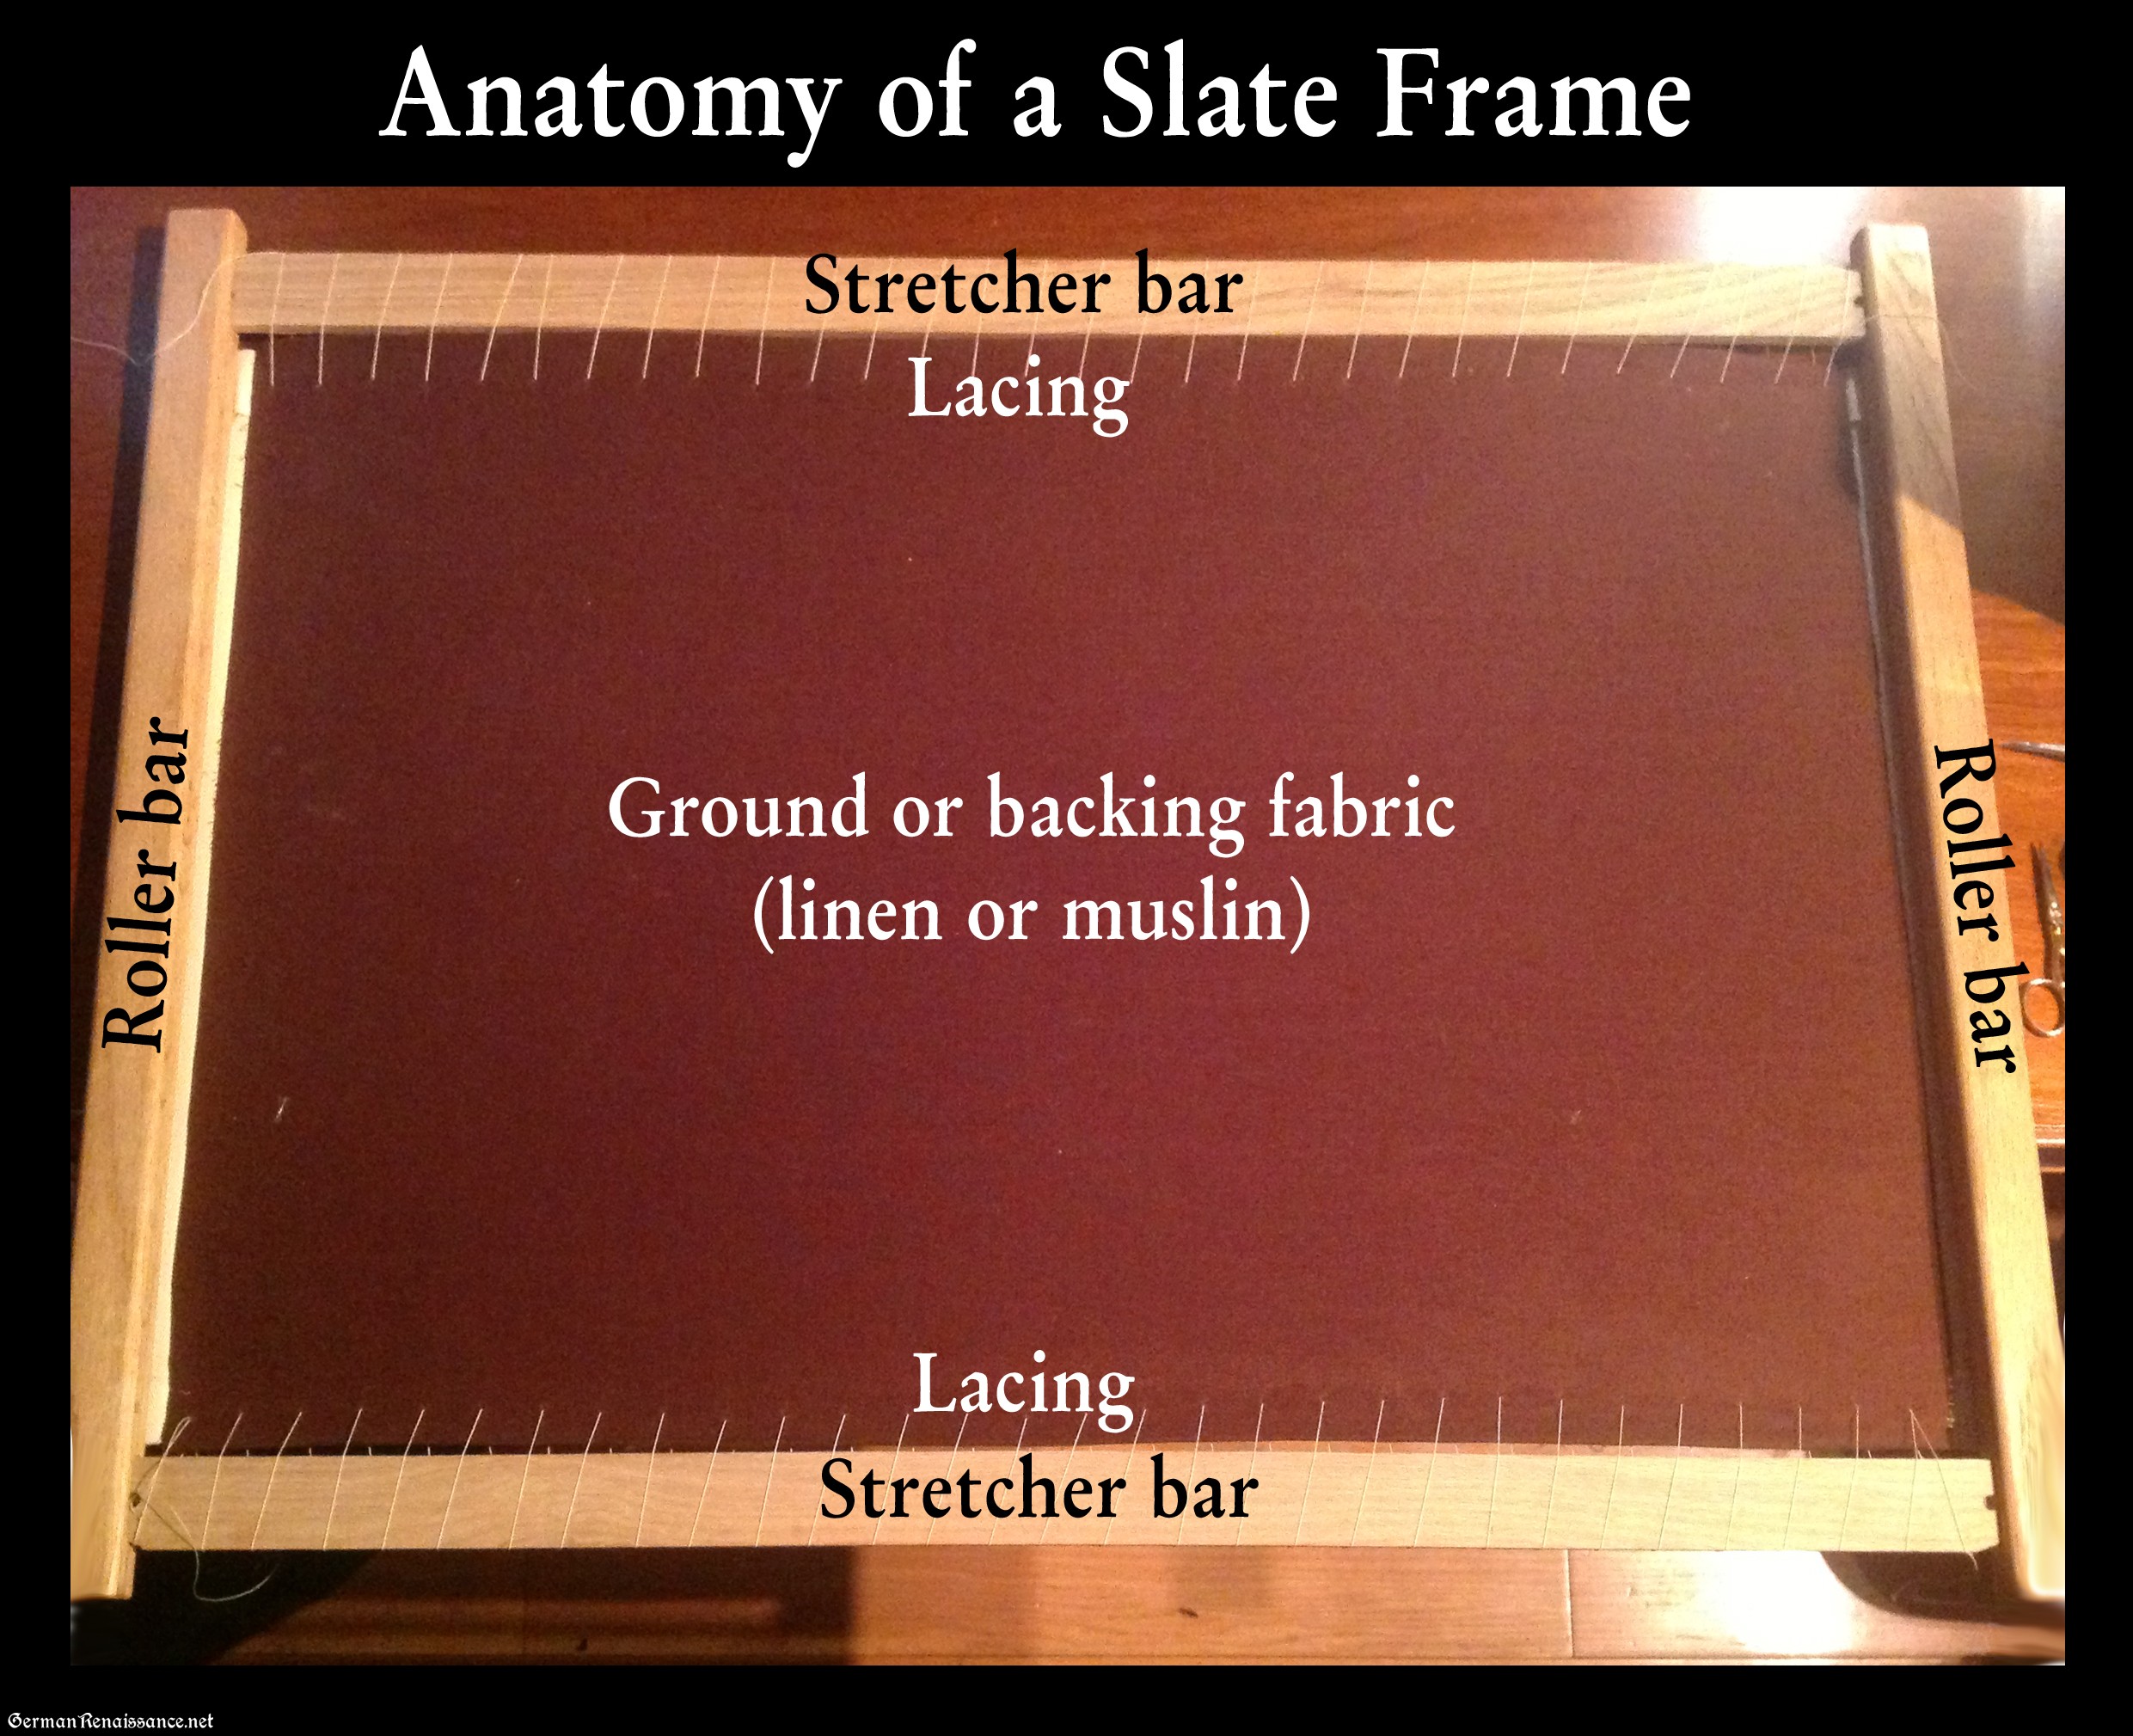
 It’s important to have the right tool for the job, and this is especially true when it comes to the fiber arts. Back in 16th century Germany (and many other European countries and periods prior to this century), Der Seidensticker (embroiderers) used what we call “slate frames” to keep their fabric taut and tensioned while stitching. A slate frame is really just a frame (a square or rectangle) made of slats. And rather than clamp or pinch your fabric between bars as with other embroidery frames or hoops, a slate frame is intended for you to sew your fabric right to the frame, providing the absolute best tension control.
Where do you get slate frames? I bought mine from Hedgehog Handworks more than a year ago, but they are not currently carrying them. Other sources include Tristan Brooks Designs and Spanish Peacock. If you can’t find or afford a slate frame, it is possible to either make one (a topic for another blog post) or use a scroll frame and a pair of dowels.
My current project calls for embroidery and pearl couching on silk, so I’m using a slate frame to get this setup. Here’s what I did:
1. Measured the space I needed for my project. Sadly, it was too large for my 20″ slate frame, so I made new 33″ stretcher bars from some red oak boards at my local home improvement store — if you go this route, make sure you bevel all edges.
2. Pre-washed, dried and ironed my 100% linen (medium-heavy weight), then cut it to size (2″ wider and taller than the inside of my slate frame). Fold over all edges of your linen by one inch and press. Be careful to follow the grain when both cutting and folding — grain is very important in embroidery.
3. Sewed first one edge of my linen to the canvas edge of one roller bar (it’s the bar that usually has canvas attached to it), then the opposite edge to the other roller bar. I used buttonhole thread, which is very strong. Traditionally, the backing material (the linen) is attached with a herringbone stitch. I did this herringbone stitch and decided my stitches weren’t uniform enough, so I did attached the other side to the other roller bar using my sewing machine’s herringbone stitch. Both are fine for this step, but the handstitching is more authentic and versatile. The beauty of herringbone stitch is that it is elastic! The degree of stretch that you can get depends on how closely you make the stitches. This becomes more evident later.
4. Now I turned my fabric and roller bars over so that the seams were underneath. Then I slid my stretcher bars through the holes in my roller bars and put my pegs/pins in holes so that my fabric was reasonably taut but not tight. The pegs/pins are put into the inside of the frame, in case that’s not obvious. Also, I prefer to put them from the bottom up so that when the frame rests on a table, they aren’t as likely to pop out.
5. Using a ruler and an awl, I poked holes in the bottom and top of my linen every 1″, about 1/4″ to 3/8″ from the edge of the fabric. You want the hole to go through both layers of the linen (remember, you folded and pressed the edge in step 2).
6. Using the same buttonhole thread, I “laced” my linen to the top and bottom of the stretcher bars by putting my needle through the holes I made in step 5 and around the bars. Be careful to use enough thread (or string, if you prefer) so you don’t run out halfway through a side. Typically I measure five times the length of my stretcher bar to have enough thread to lace up one side. When lacing, try to keep the fabric perpendicular to the bar. Do not tighten yet. Tie off into a slipknot when done.
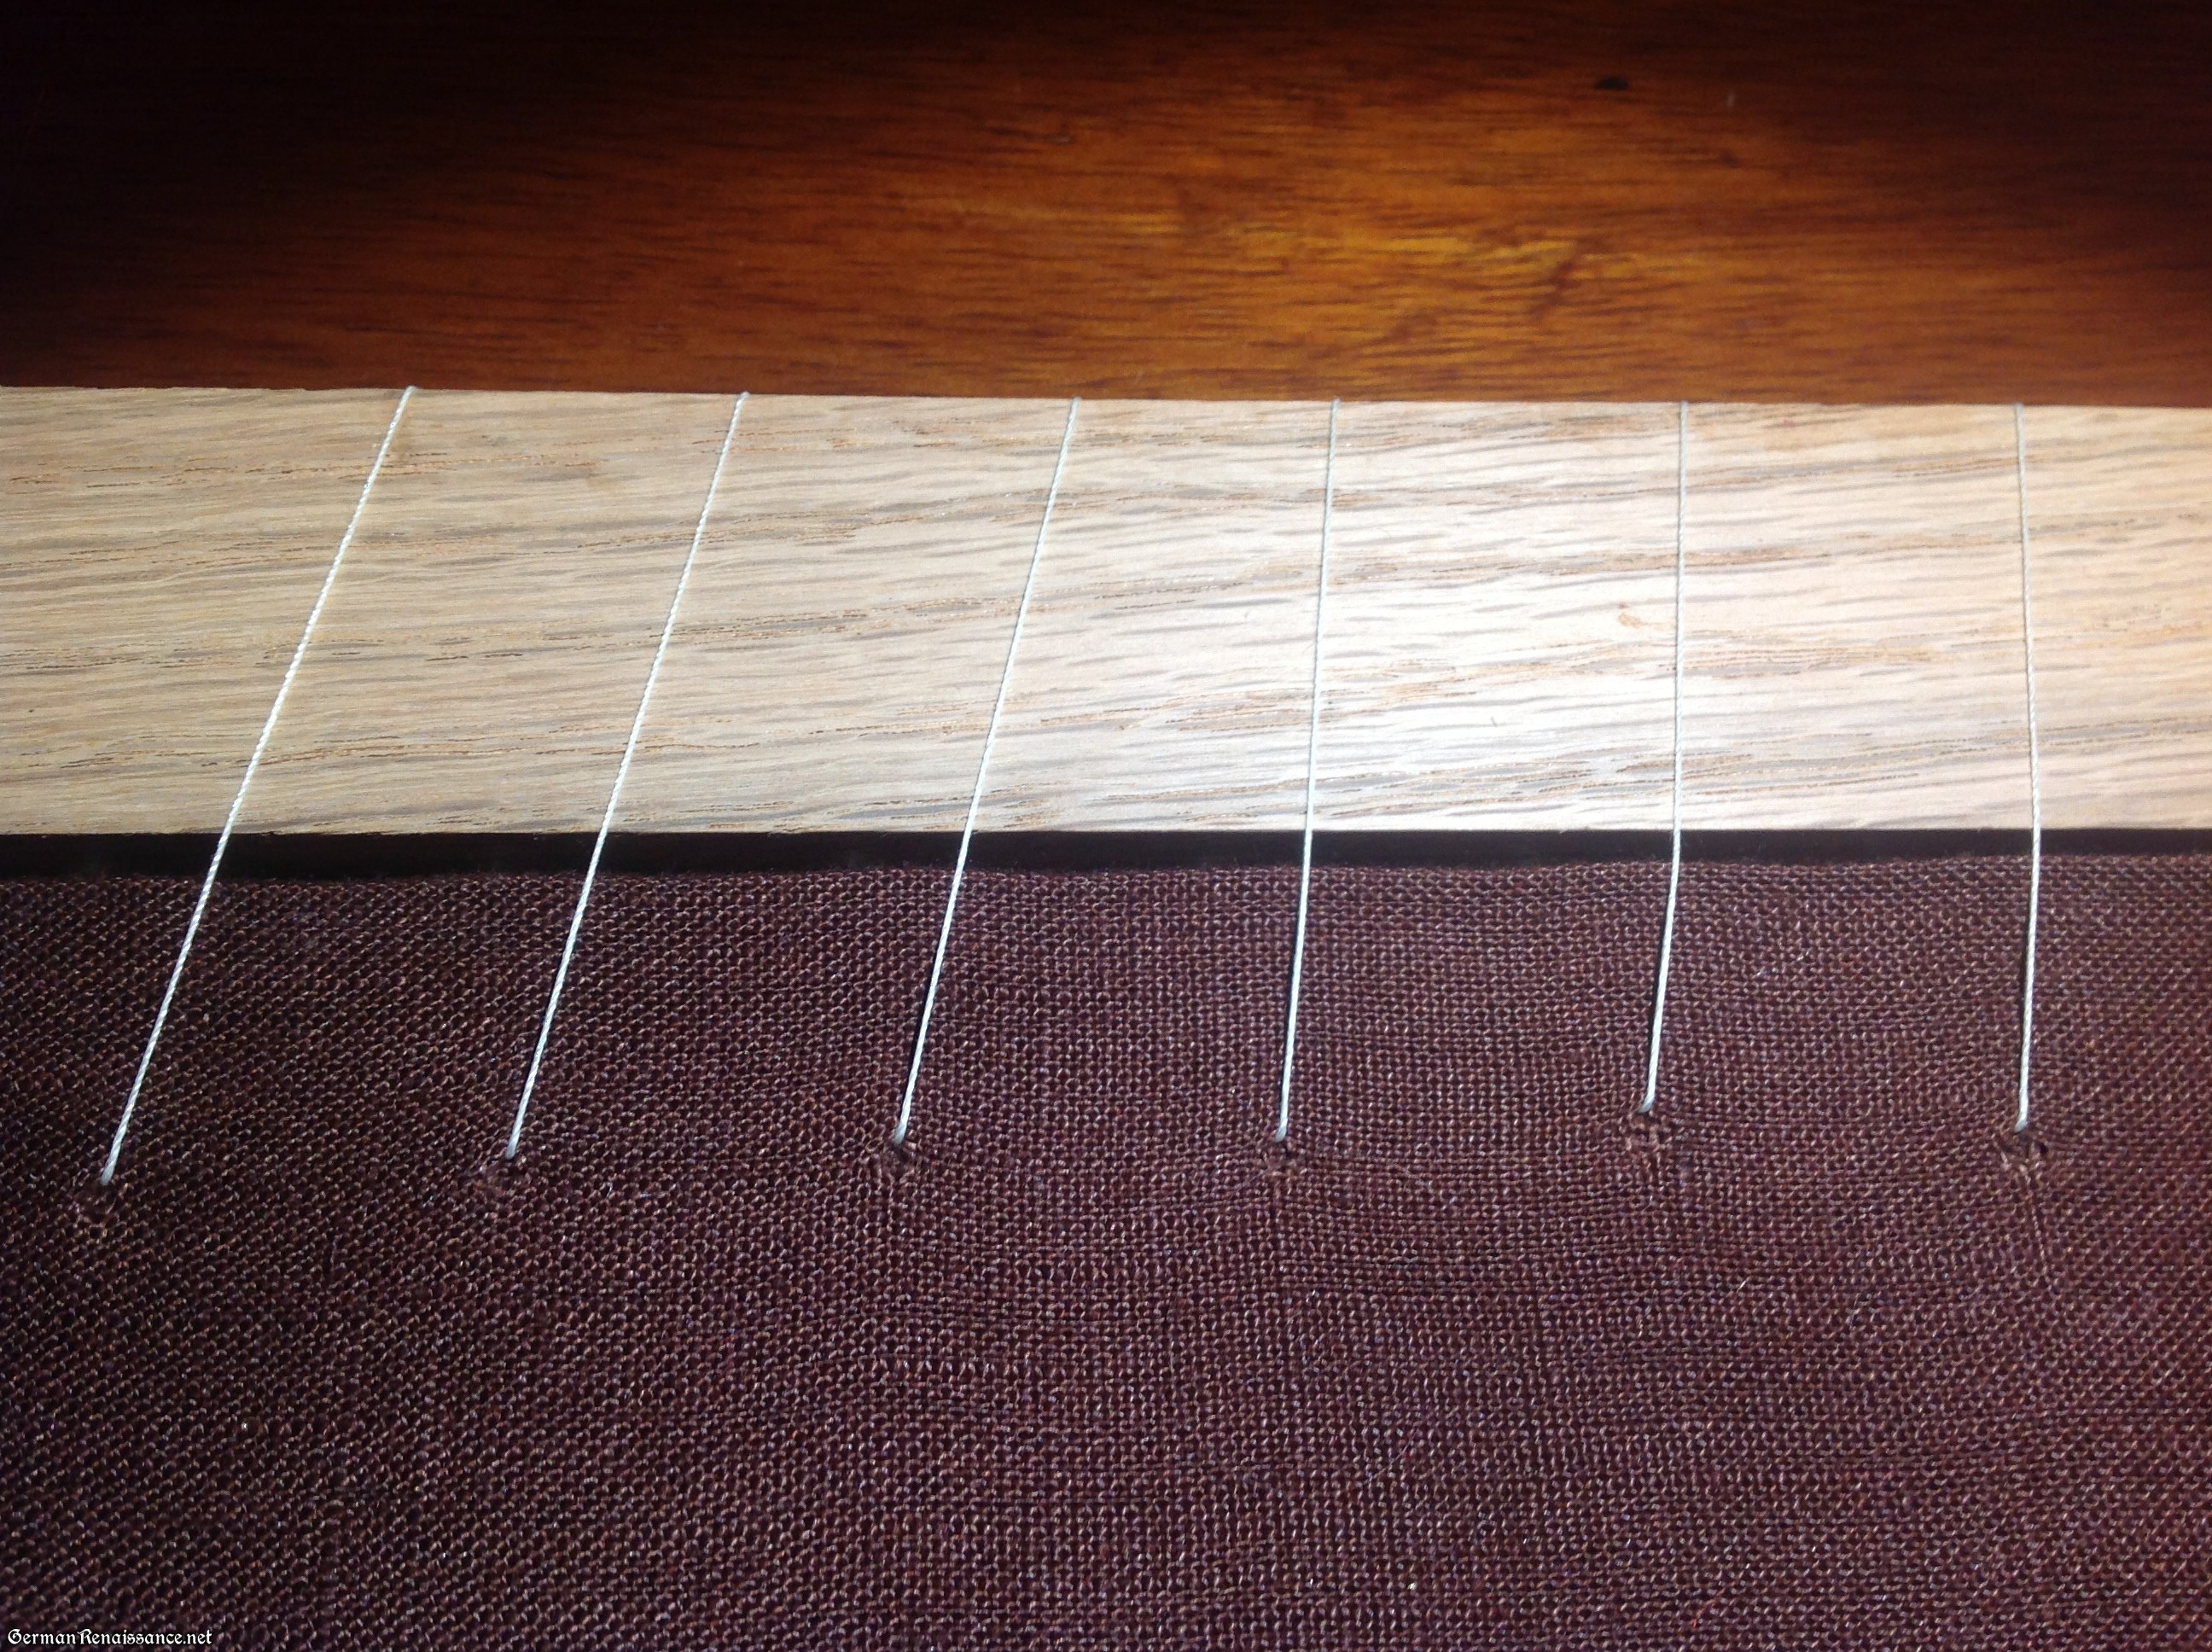
Lacing the linen to the stretcher bars.
7. After I secured all sides, I made sure that my fabric was taut but not tight. You should have it just taut enough so there are no wrinkles. To do this, I tightened my laces a little bit. It’s important that your linen not be too tight at this stage.
8. Now I prepared my silk. I cut it the same size as the visible linen on my frame, then folded in the edges by one 1/2″ and ironed flat carefully. It’s important to also cut your silk on the grain as straight as possible. Mismatched grains will result in funny wrinkles and twists.
9. I laid my prepared silk on the linen backing on my frame and pinned it in place at the edges, starting with center pins in the top, bottom, left, and right, then added more pins in the corners and other empty places until the fabric was reasonably smooth. You won’t get it perfect.
10. Using cotton or linen thread (not silk), I stitched my silk to my linen backing using the herringbone stitch, removing pins as I went. Why not silk thread? Silk is too strong and could cut through your fabric. It’s very important to use the herringbone stitch here because you want your silk to stretch with your linen when you tighten it in the next step. I also recommend you start your stitches in the middle of each side and work out from there.
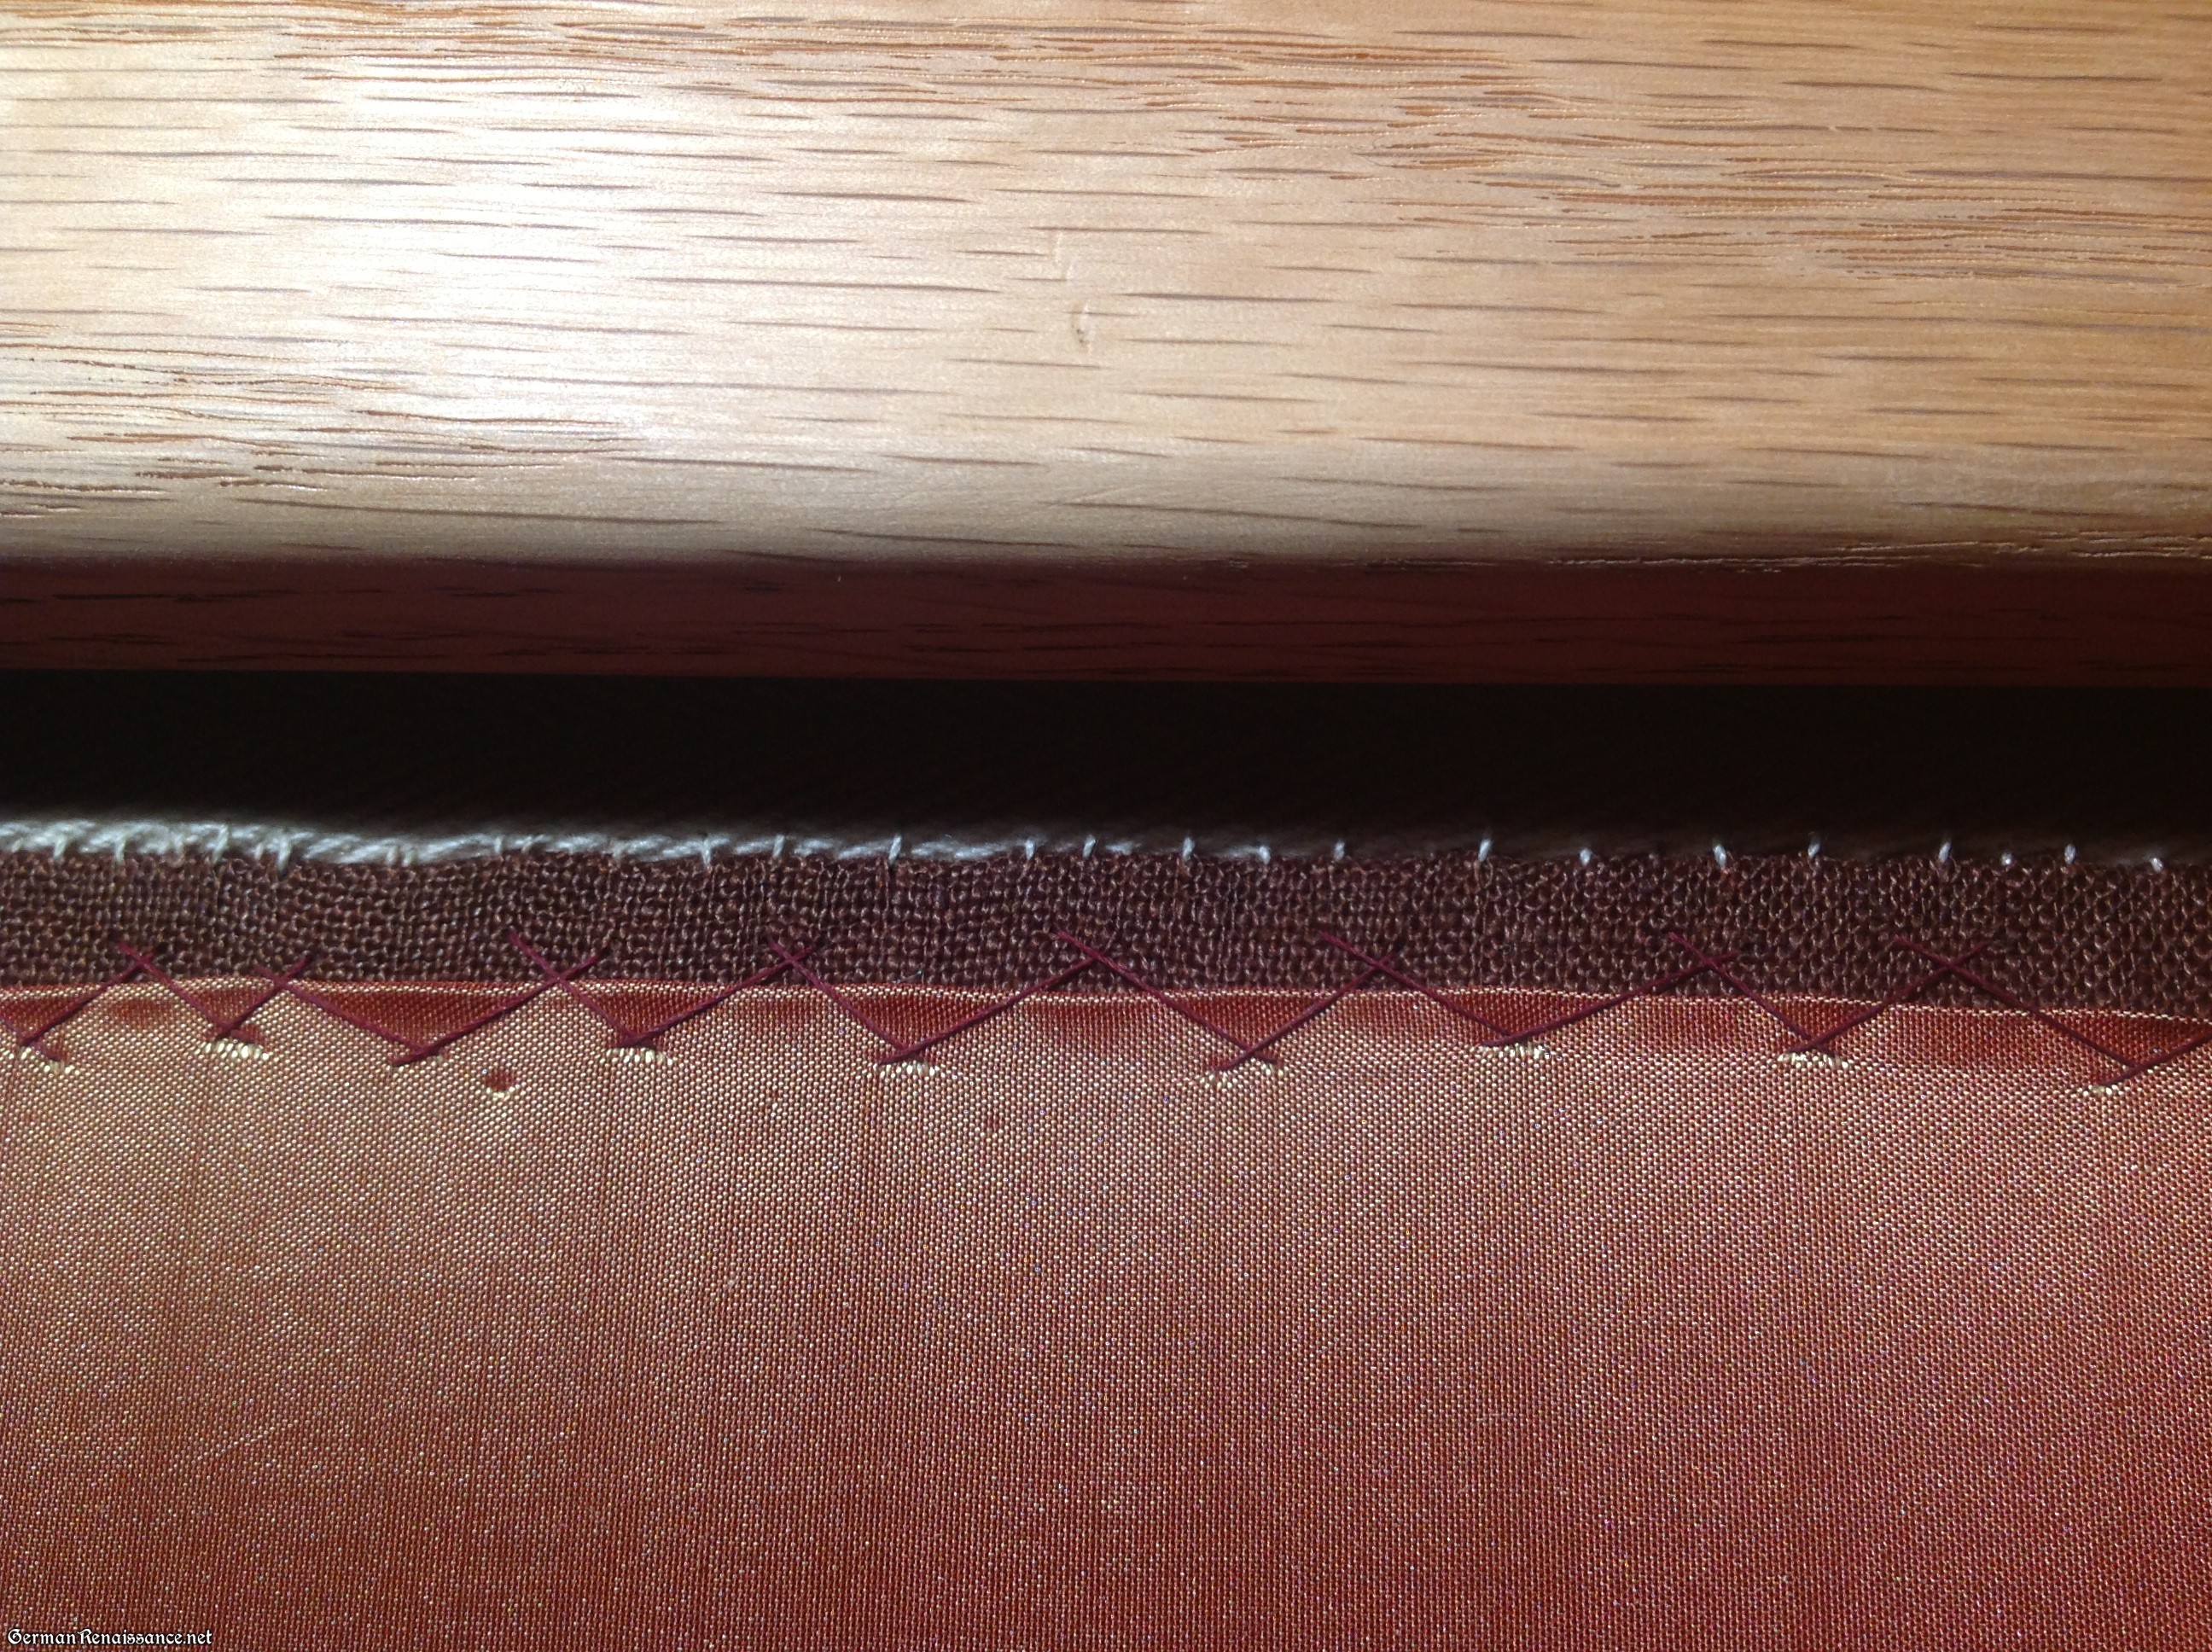
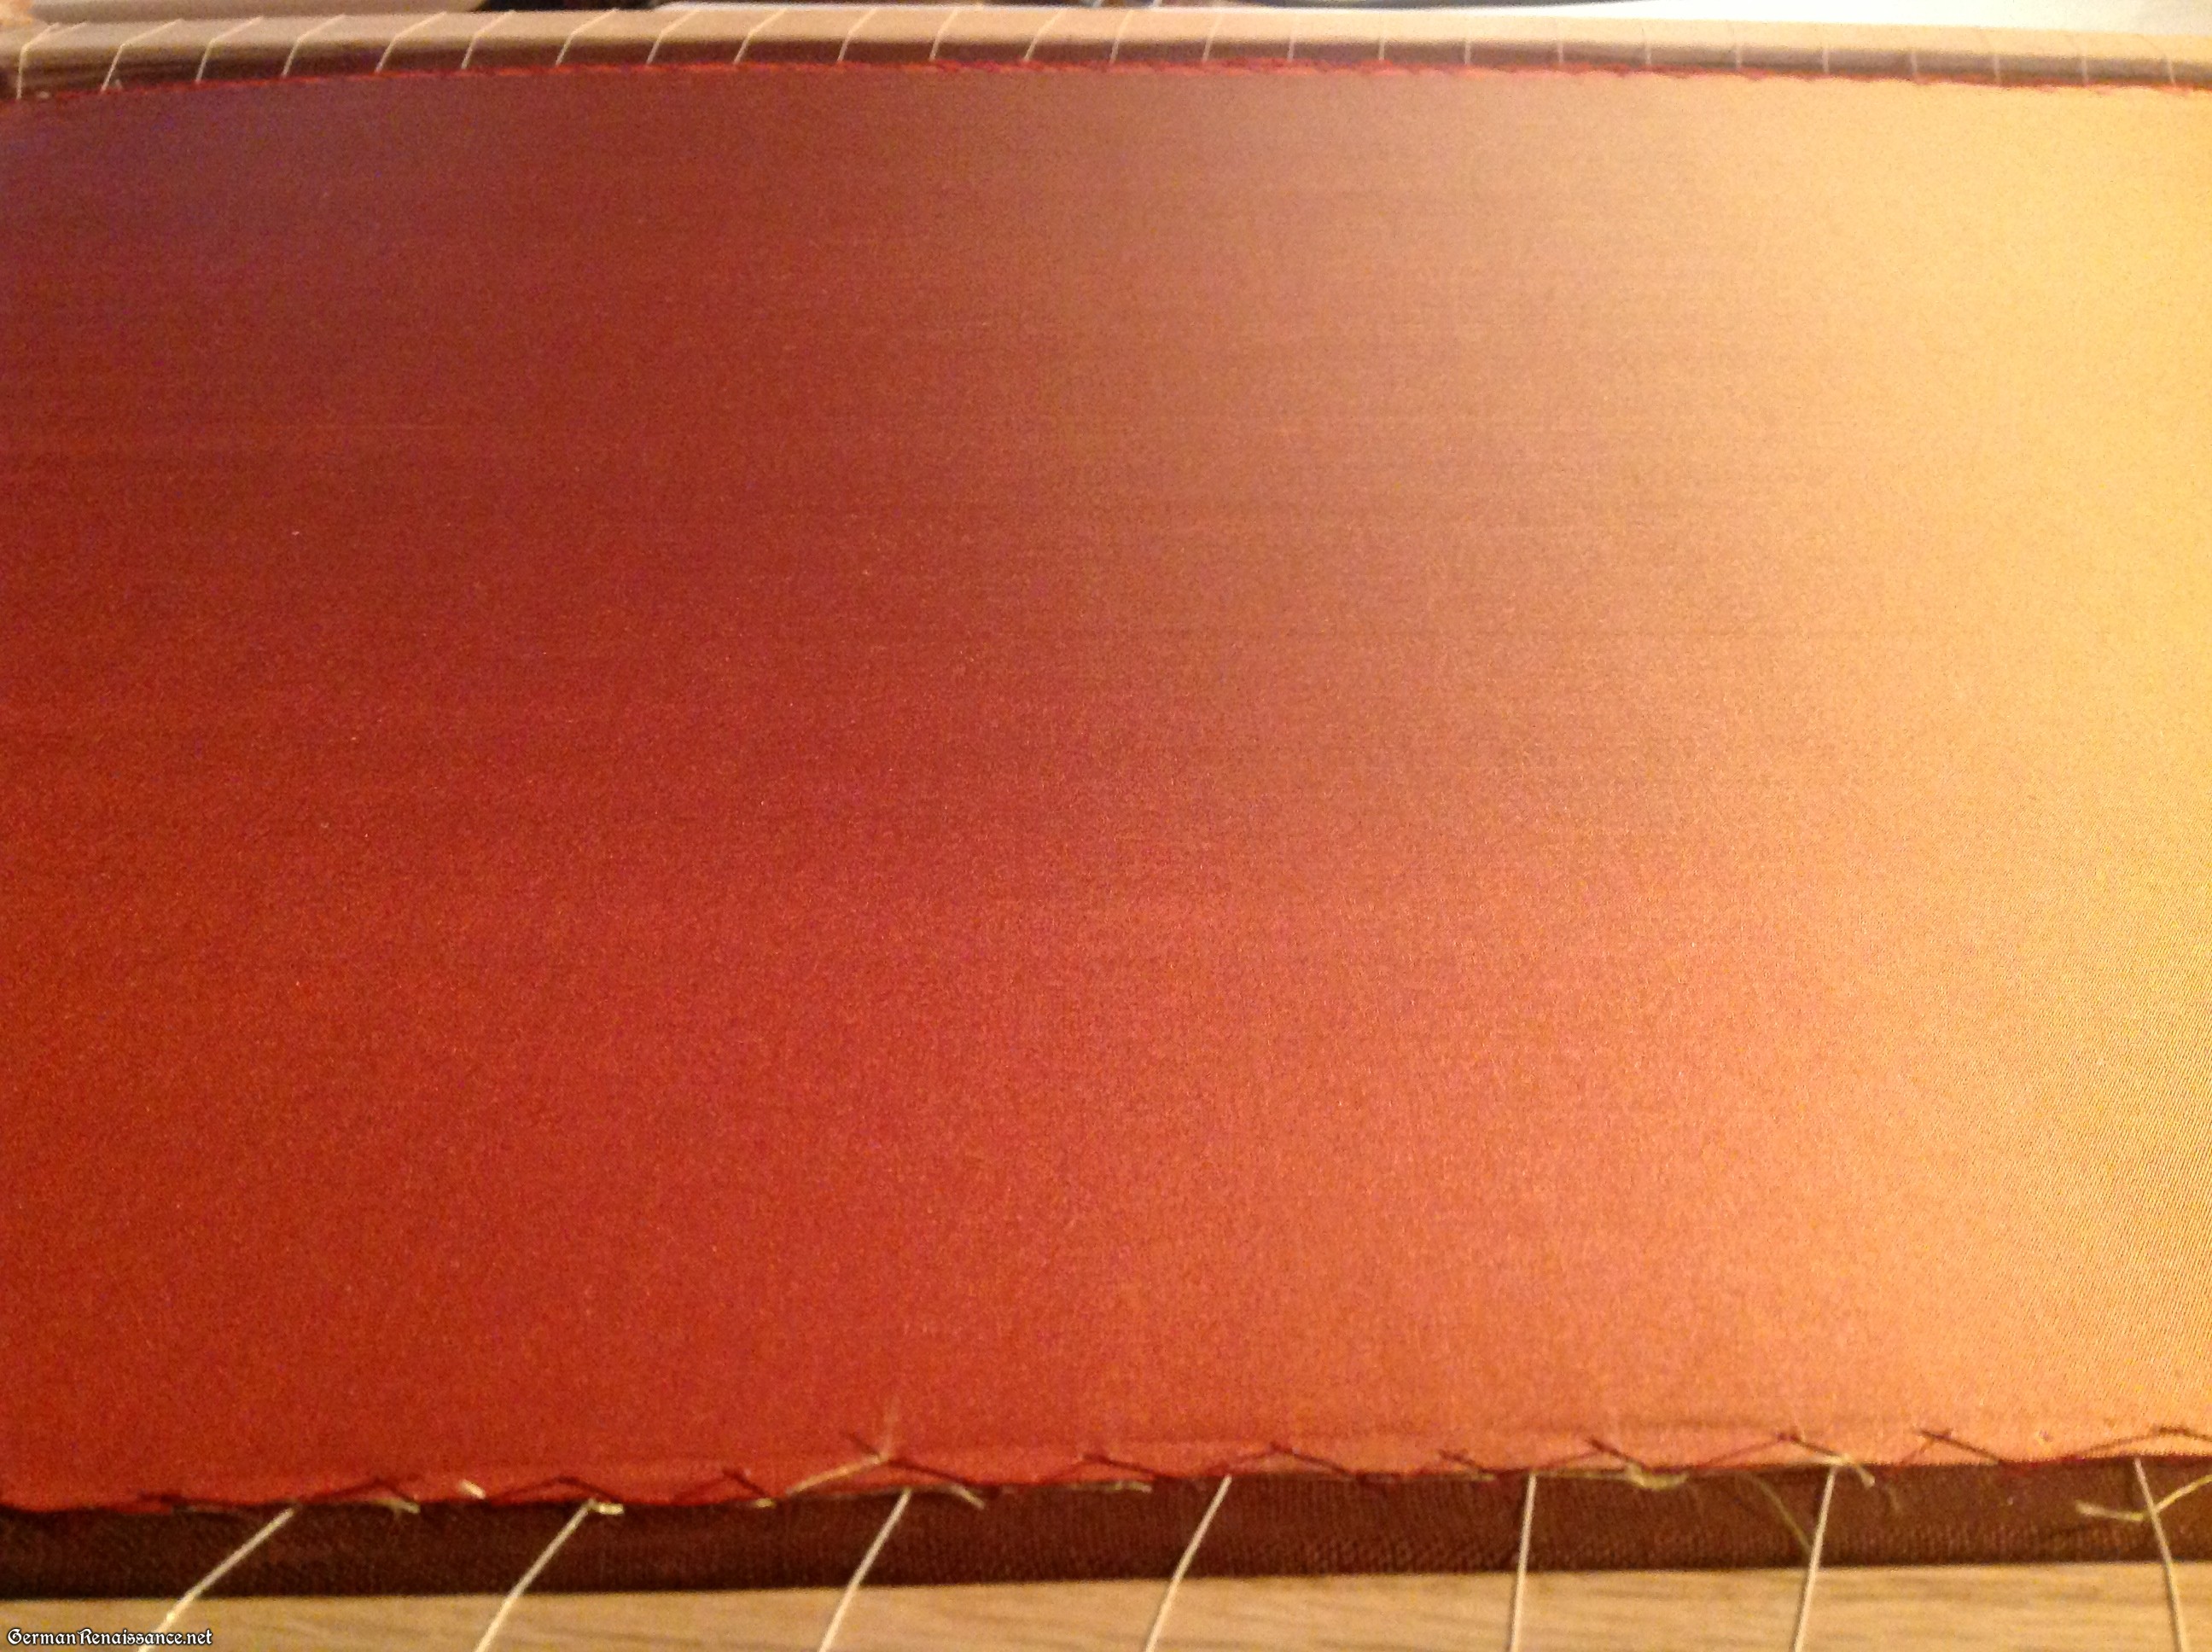
Herribone stitches securing my silk to the backing fabric
11. Once my silk was stitched onto the linen backing and looking much smoother than it did with simple pins, it was time to tighten my frame. To do this, I set my frame on the floor and pulled up on each side until I could get my pegs into another hole in the stretcher bars. I should note that I only needed to tighten it just one hole — the silk stretched taut with only a little tension.
12. I adjusted my lacing on the top and bottom to smooth out the surface.
My silk is beautifully taut and smooth, ready to embroider!
And that’s it. My fabrics are now “framed up” and ready for embroidery. In all, it took about 4 hours to dress the frame, but I had a very large frame and the added work of the silk. That’s a lot of time, but if it’s worth doing, it’s worth doing right.
Notes:
- For my project I will embroider through both layers, but it is possible to trim out the linen behind the top fabric if you wish — just be sure you don’t remove more than 1/4-1/2″ from your stitches to ensure the tension remains.
- The fabrics may loosen over time — if this happens, tighten the laces.
- Most people will lay the frame flat when embroidery with it. If this becomes cumbersome, try setting the frame on a pair of trestle legs (like shown in the woodcut at the top of my blog post) or saw horses, or rest the back of the frame on a chair placed on top of a table.
For a more detailed description on dressing a slate frame from an embroidery expert, visit http://www.needlenthread.com/2008/07/dressing-slate-frame-for-embroidery.html
