[This is section 1.3 of my Pleatwork Guide. See the Introduction (Main Page) or the Table of Contents to learn more.]
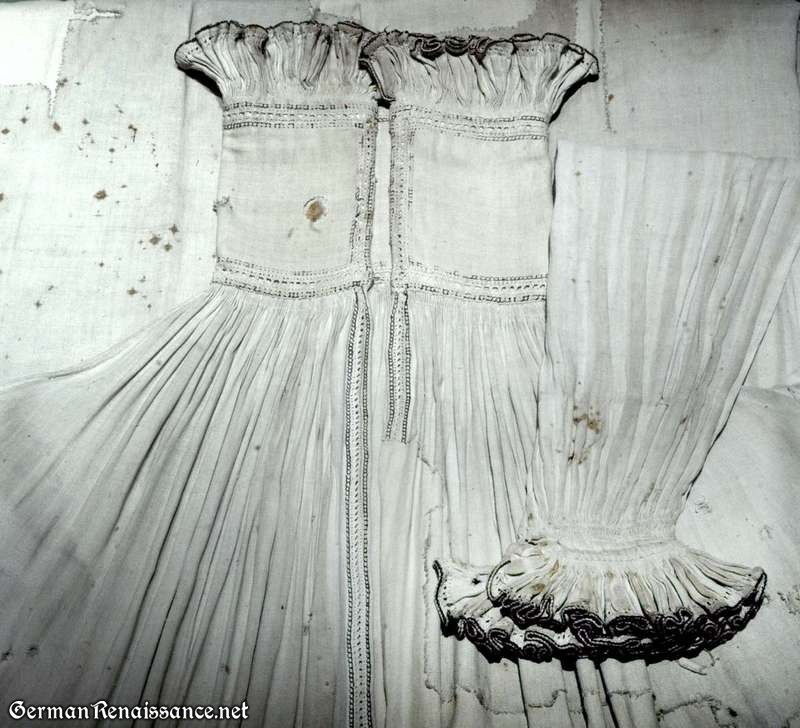
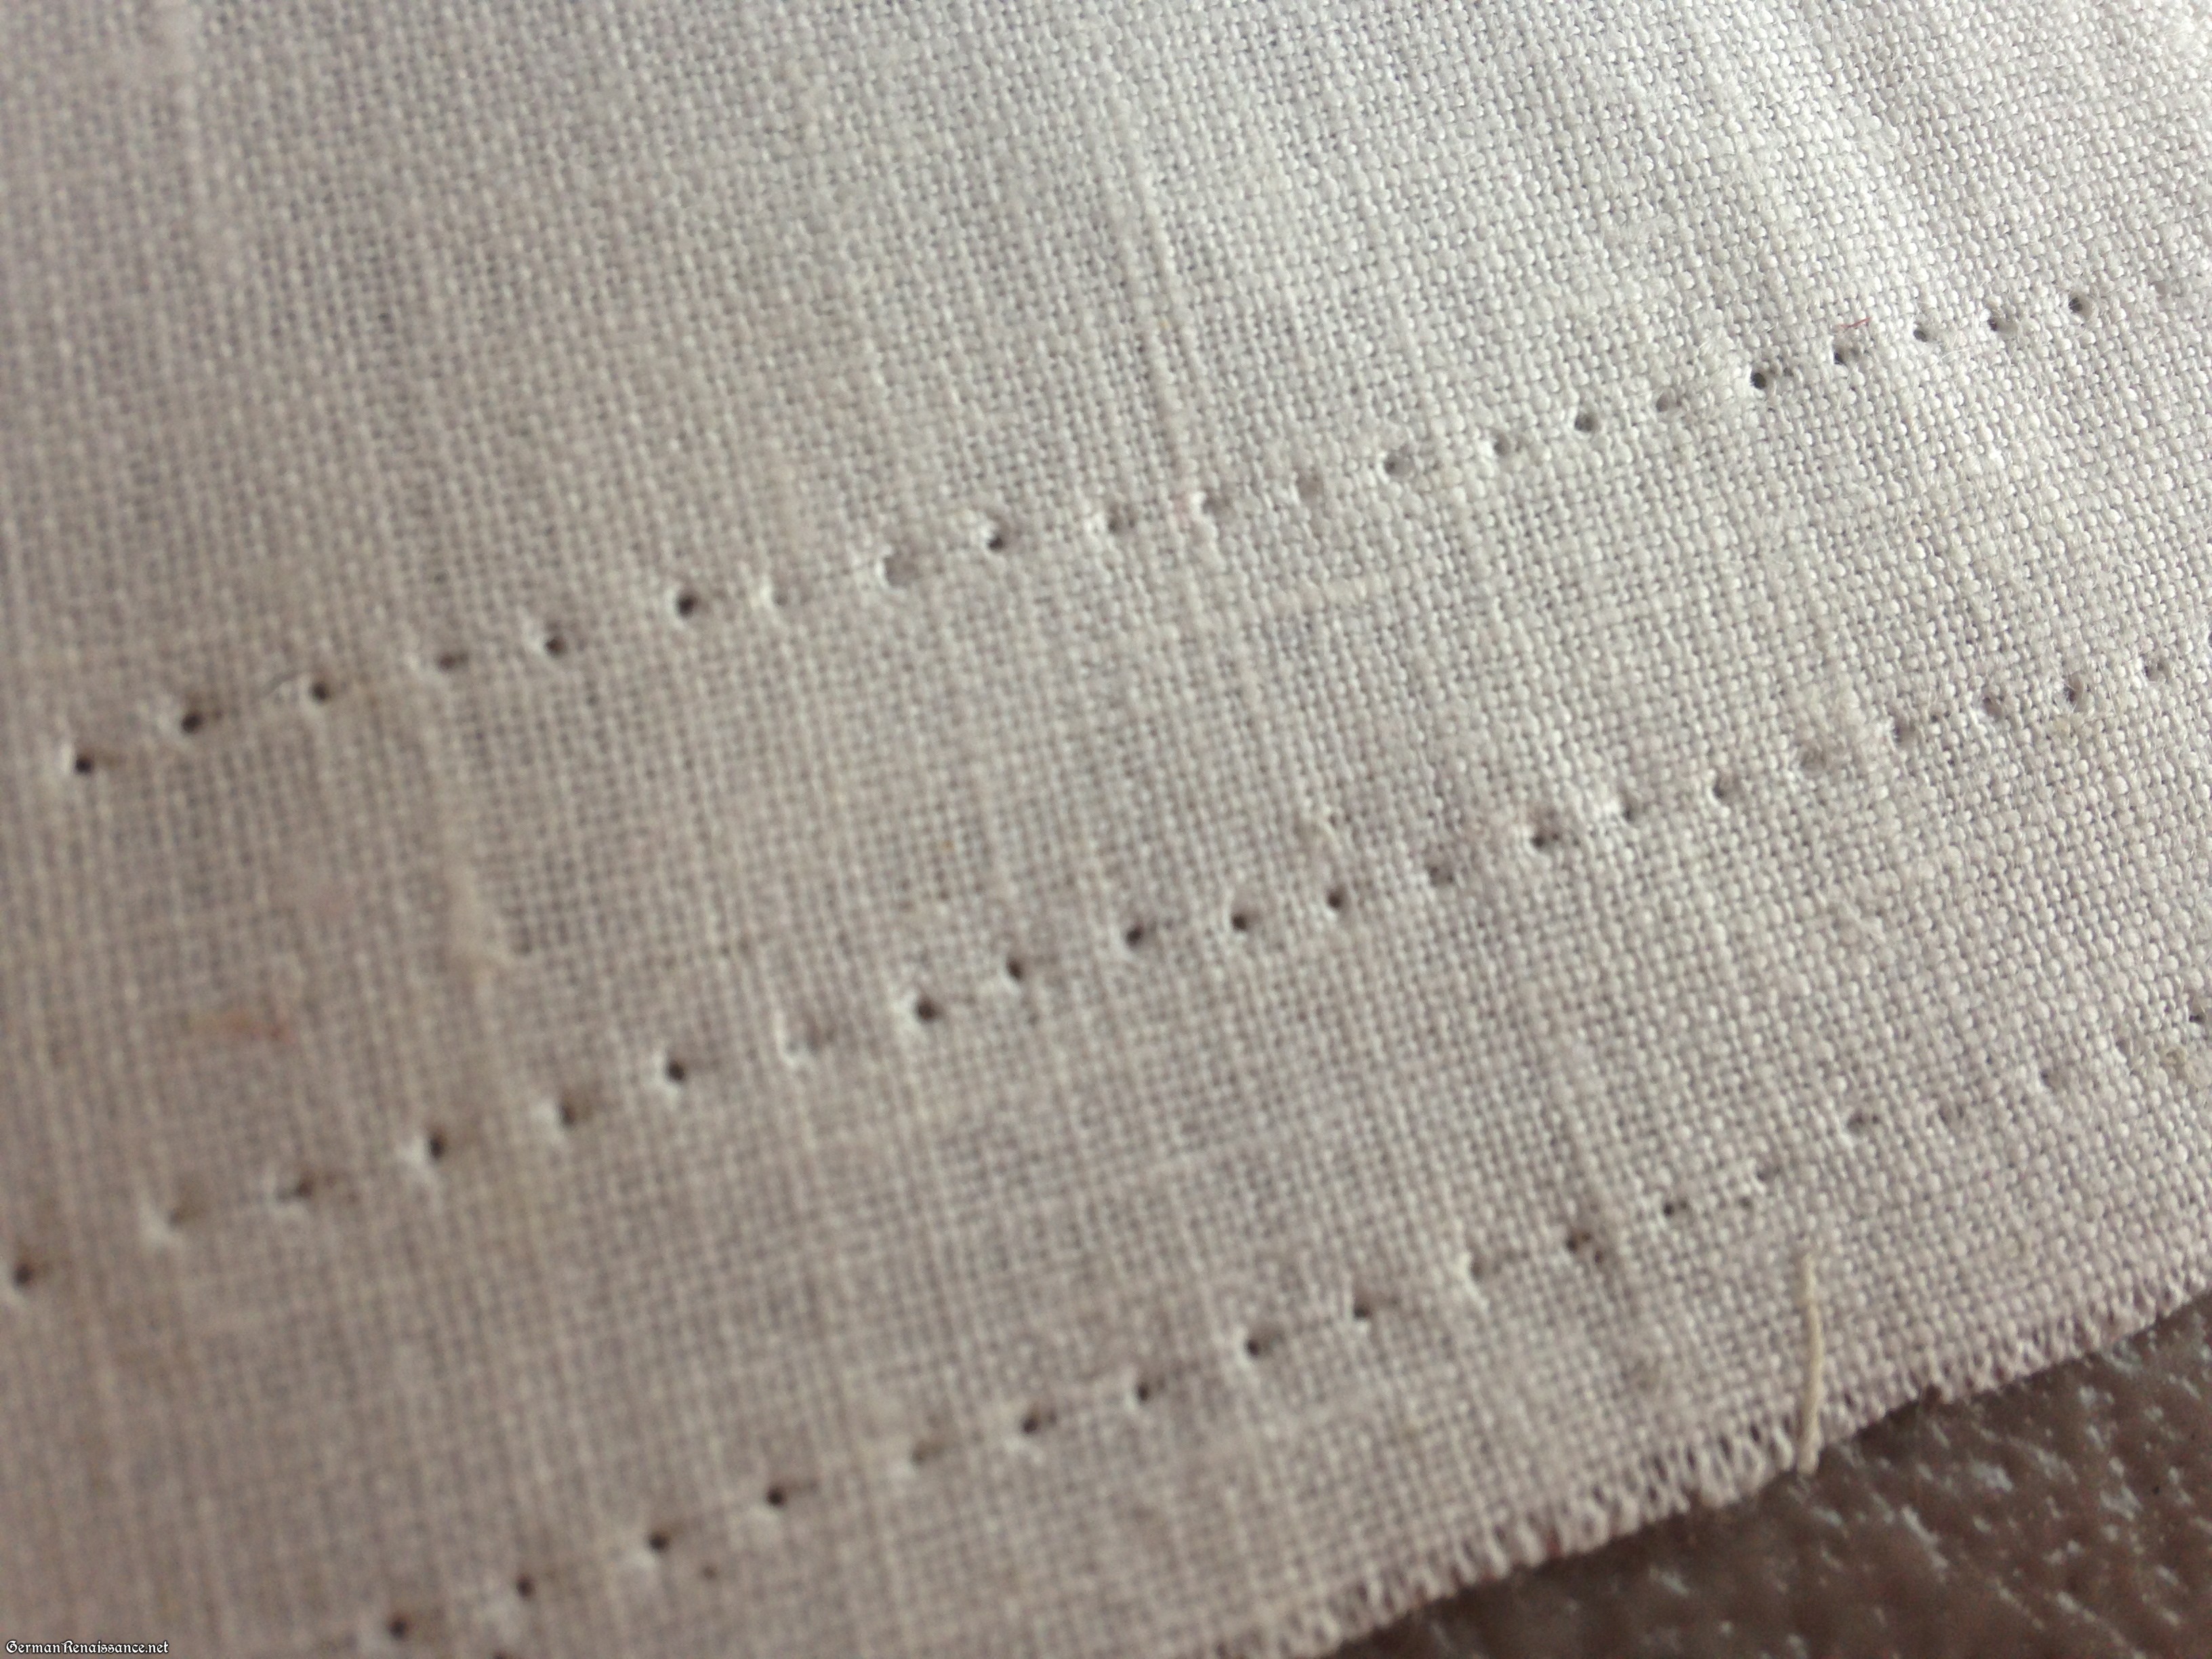
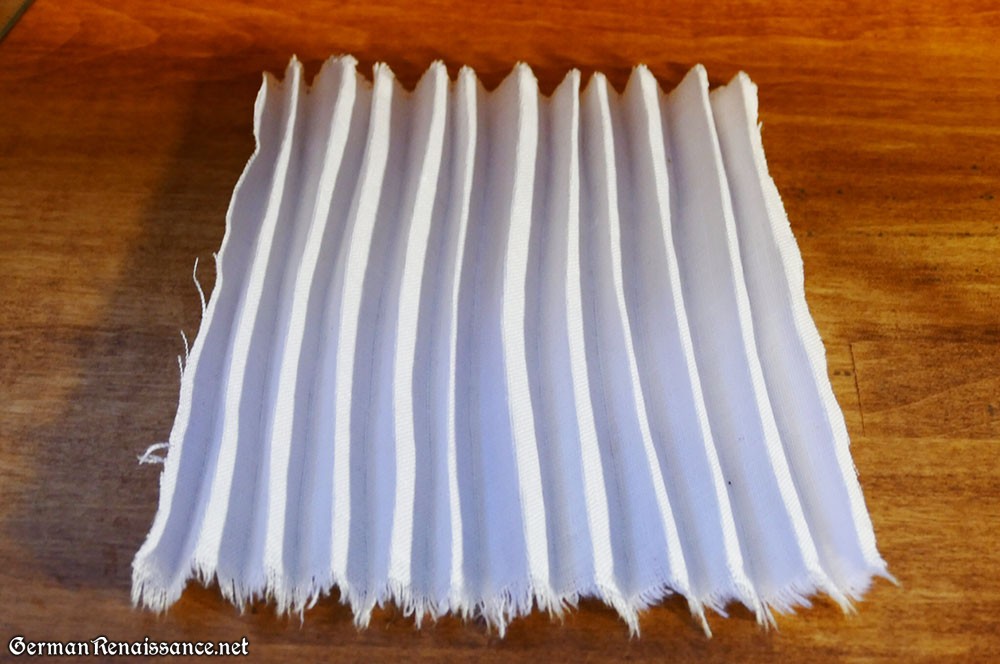
The gather method of creating pleats involves sewing evenly-spaced running stitches in parallel lines to one another and then pulling the threads to gather the material into folds. This method is generally accepted as the most likely method of creating small pleats in linen in renaissance Europe. The gather method allows one to precisely control how wide and deep one sets the folds, allowing for the very fine folds seen in 15th and 16th century European portraiture.
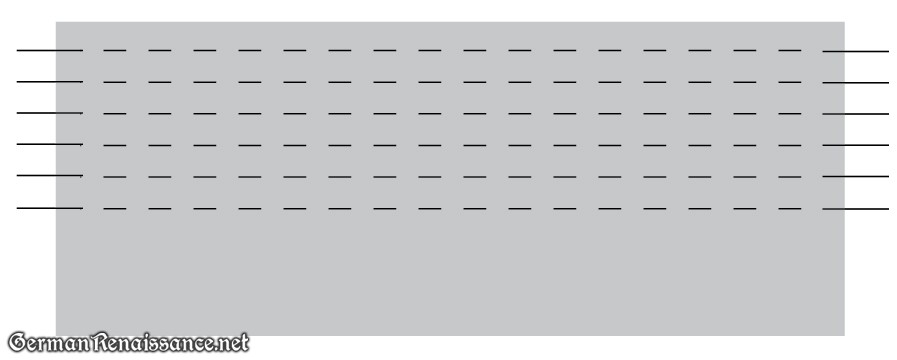
A front view of parallel and even running stitches in fabric. (Illustration copyright Genoveva von Lübeck)
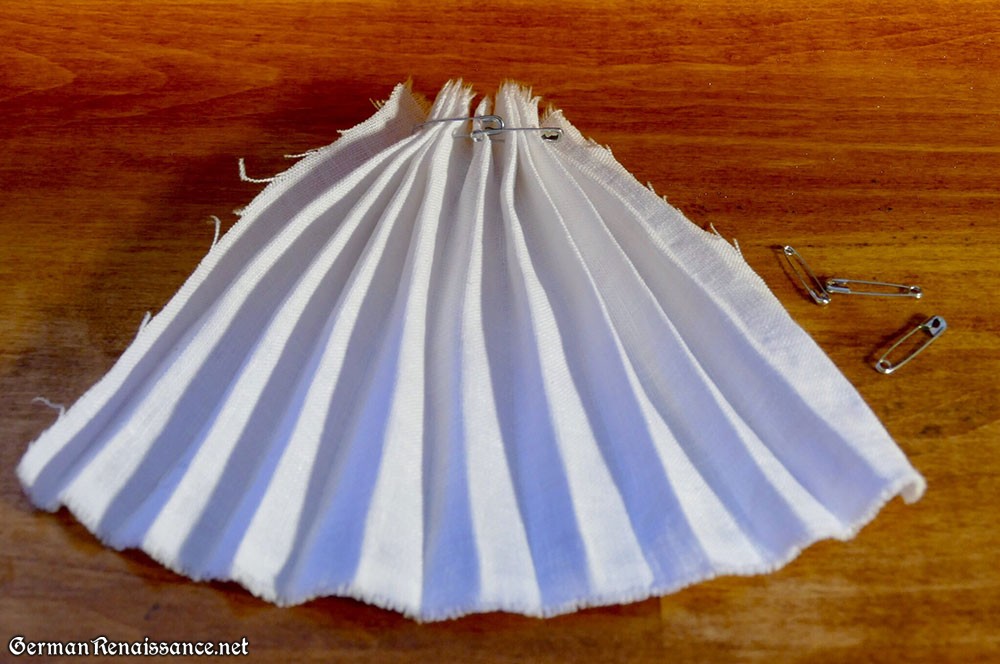
When the threads are pulled, the fabric gathers neatly, as shown below.

A top view of the evenly-stitched thread(s) pulling and gathering the fabric. (Illustration copyright Genoveva von Lübeck)
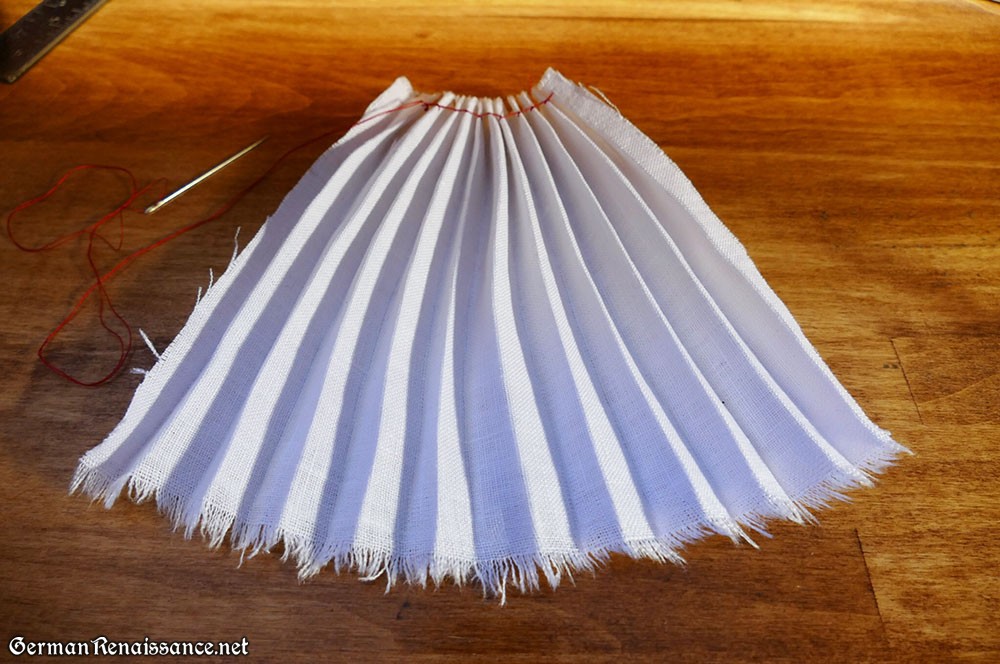
The tighter the threads are pulled, the tighter the fabric doubles upon itself, which you can see in the next illustration.
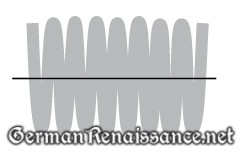
A top view of the evenly-stitched thread(s) pulled tightly and the fabric folded upon itself (Illustration copyright Genoveva von Lübeck).
While it is not essential that the stitches be evenly spaced in the running stitch, it is important to note that if parallel lines of stitches are used (for longer folds), the stitches must exactly mirror the parallel stitches below and/or above it in order for clean, straight folds to form when the fabric is gathered. If an uneven running stitch is employed (see fig. 6), the bulk of the fabric’s folds fan out on one side of the fabric (see next two images). This results in a less stable set of pleats that are later difficult to secure.
Uneven running stitches, paralleled and mirrored. (Illustration copyright Genoveva von Lübeck)

A top view of the thread(s) pulling and gathering the fabric in uneven running stitches. (Illustration copyright Genoveva von Lübeck)

A top view of the thread pulled tightly in uneven running stitches, with the fabric folded upon itself and the bulk of the fabric fanned out on one side. (Illustration copyright Genoveva von Lübeck)
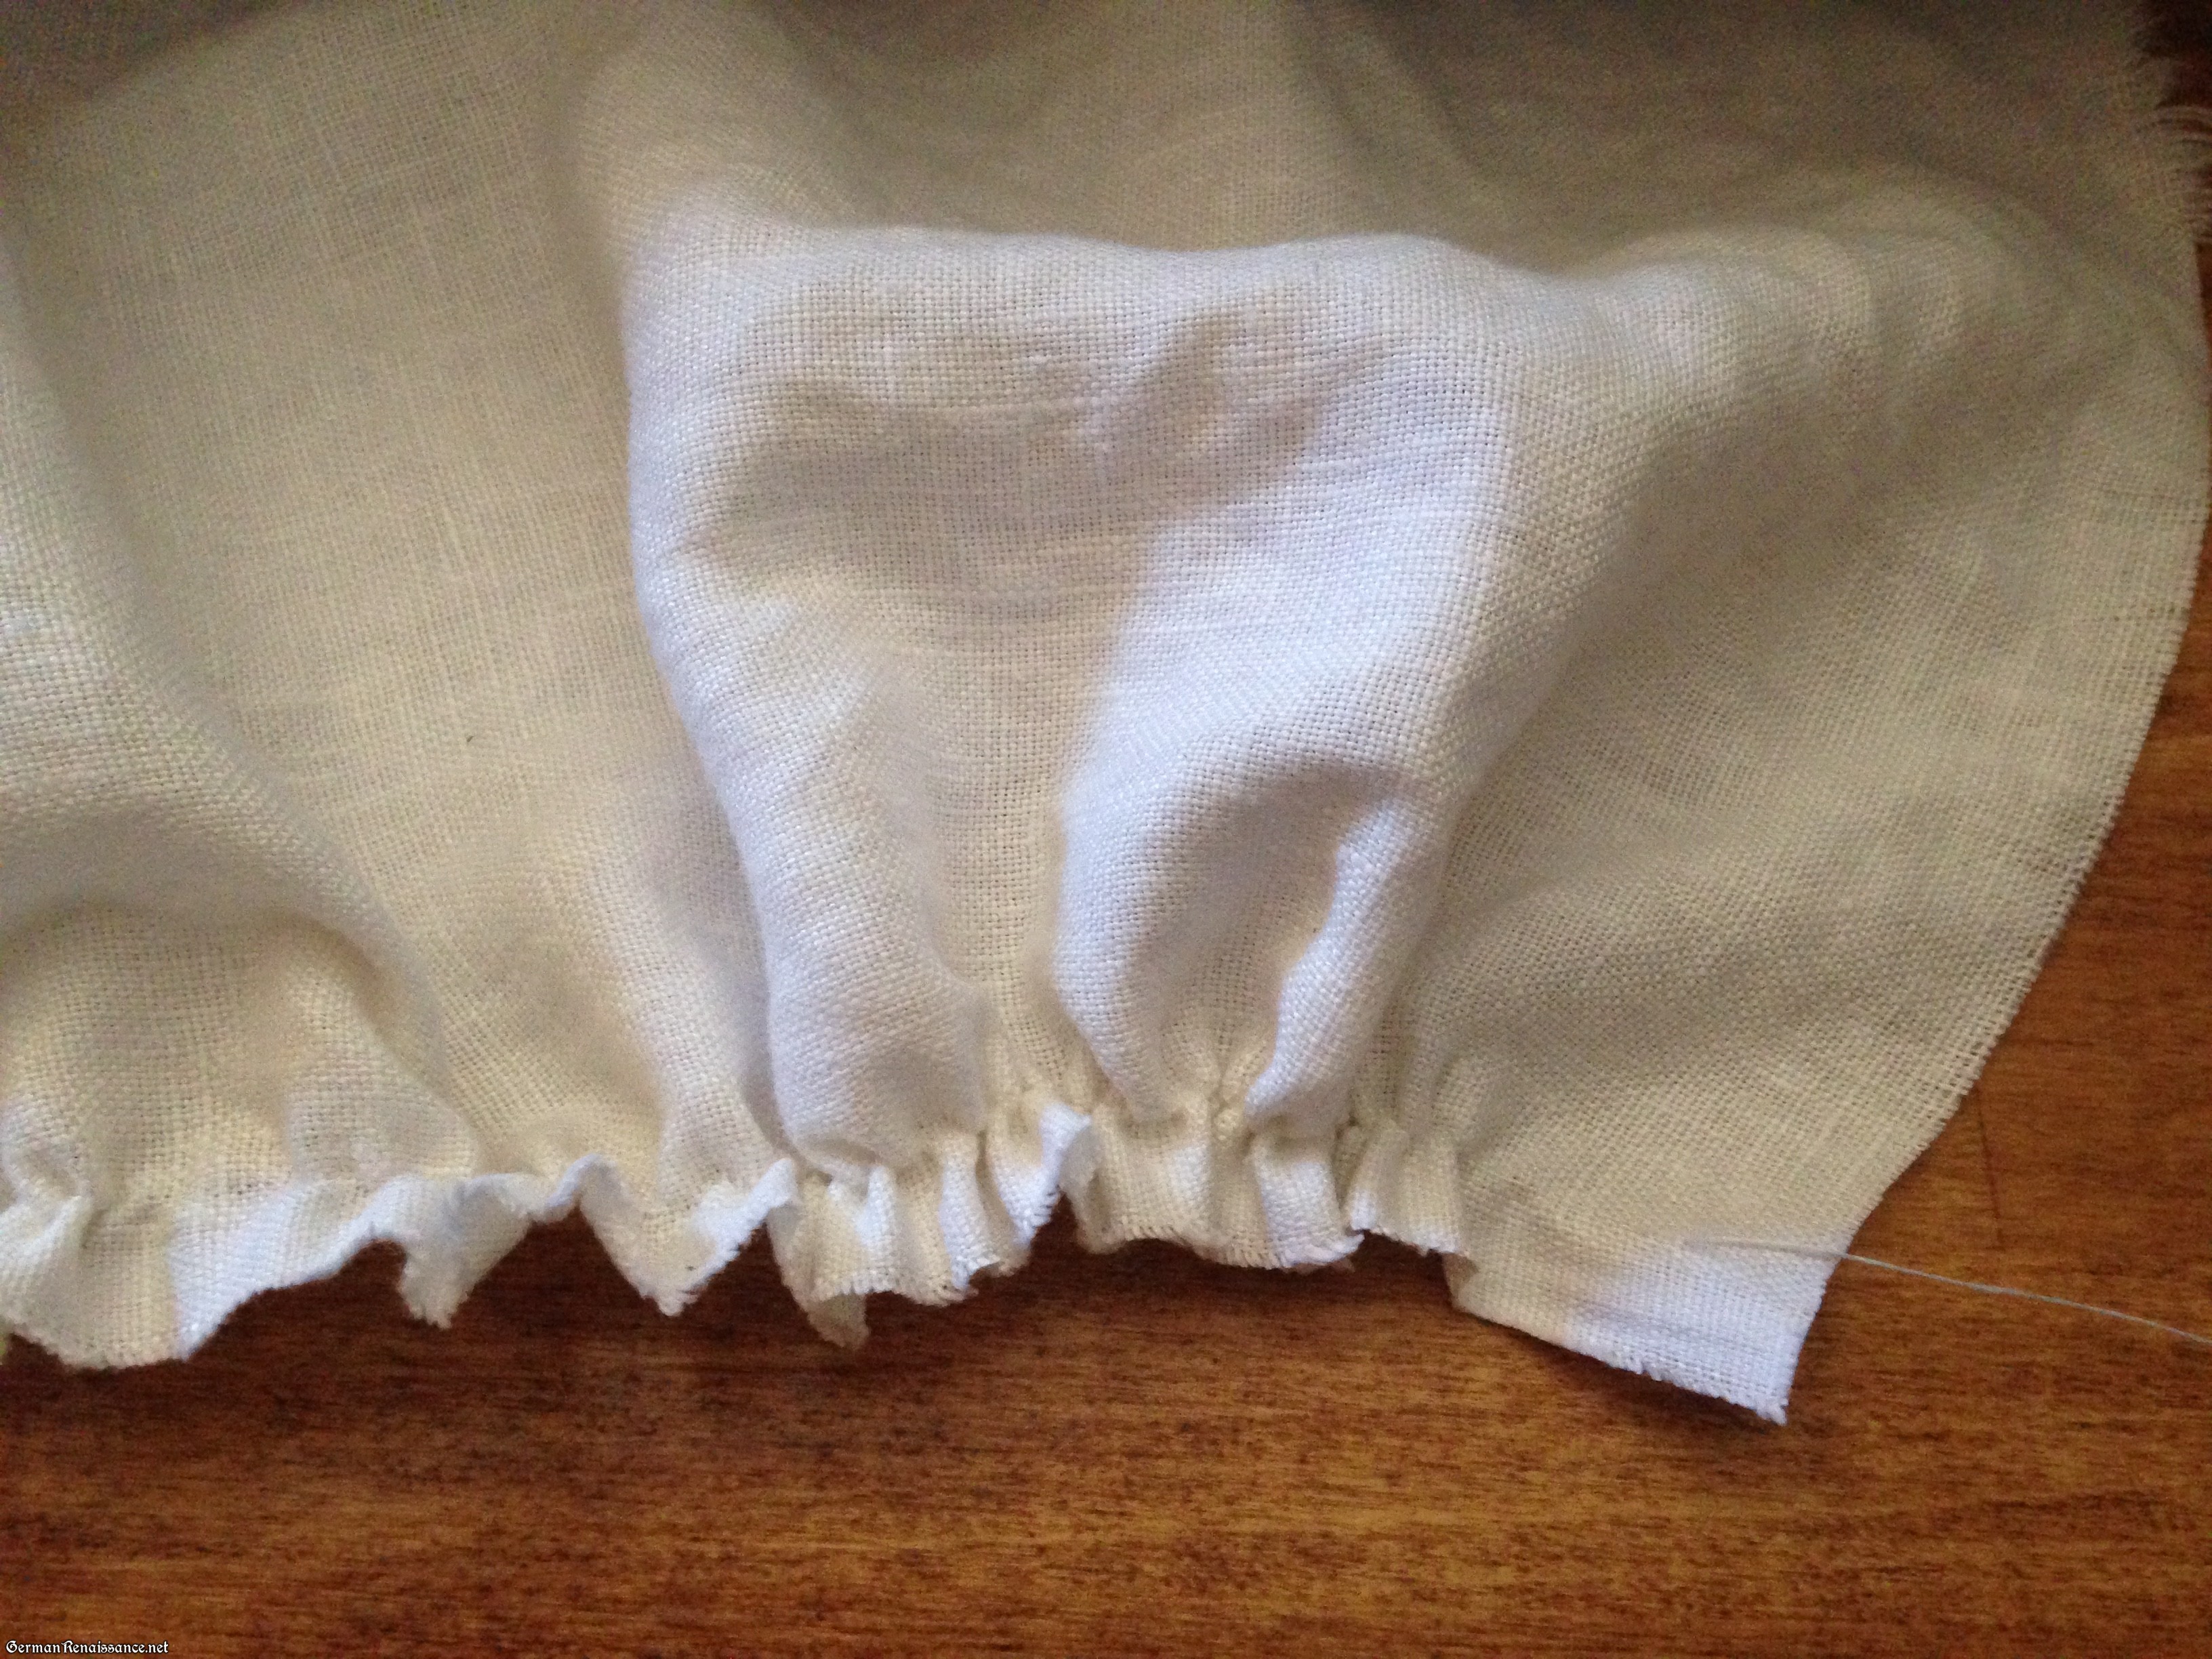
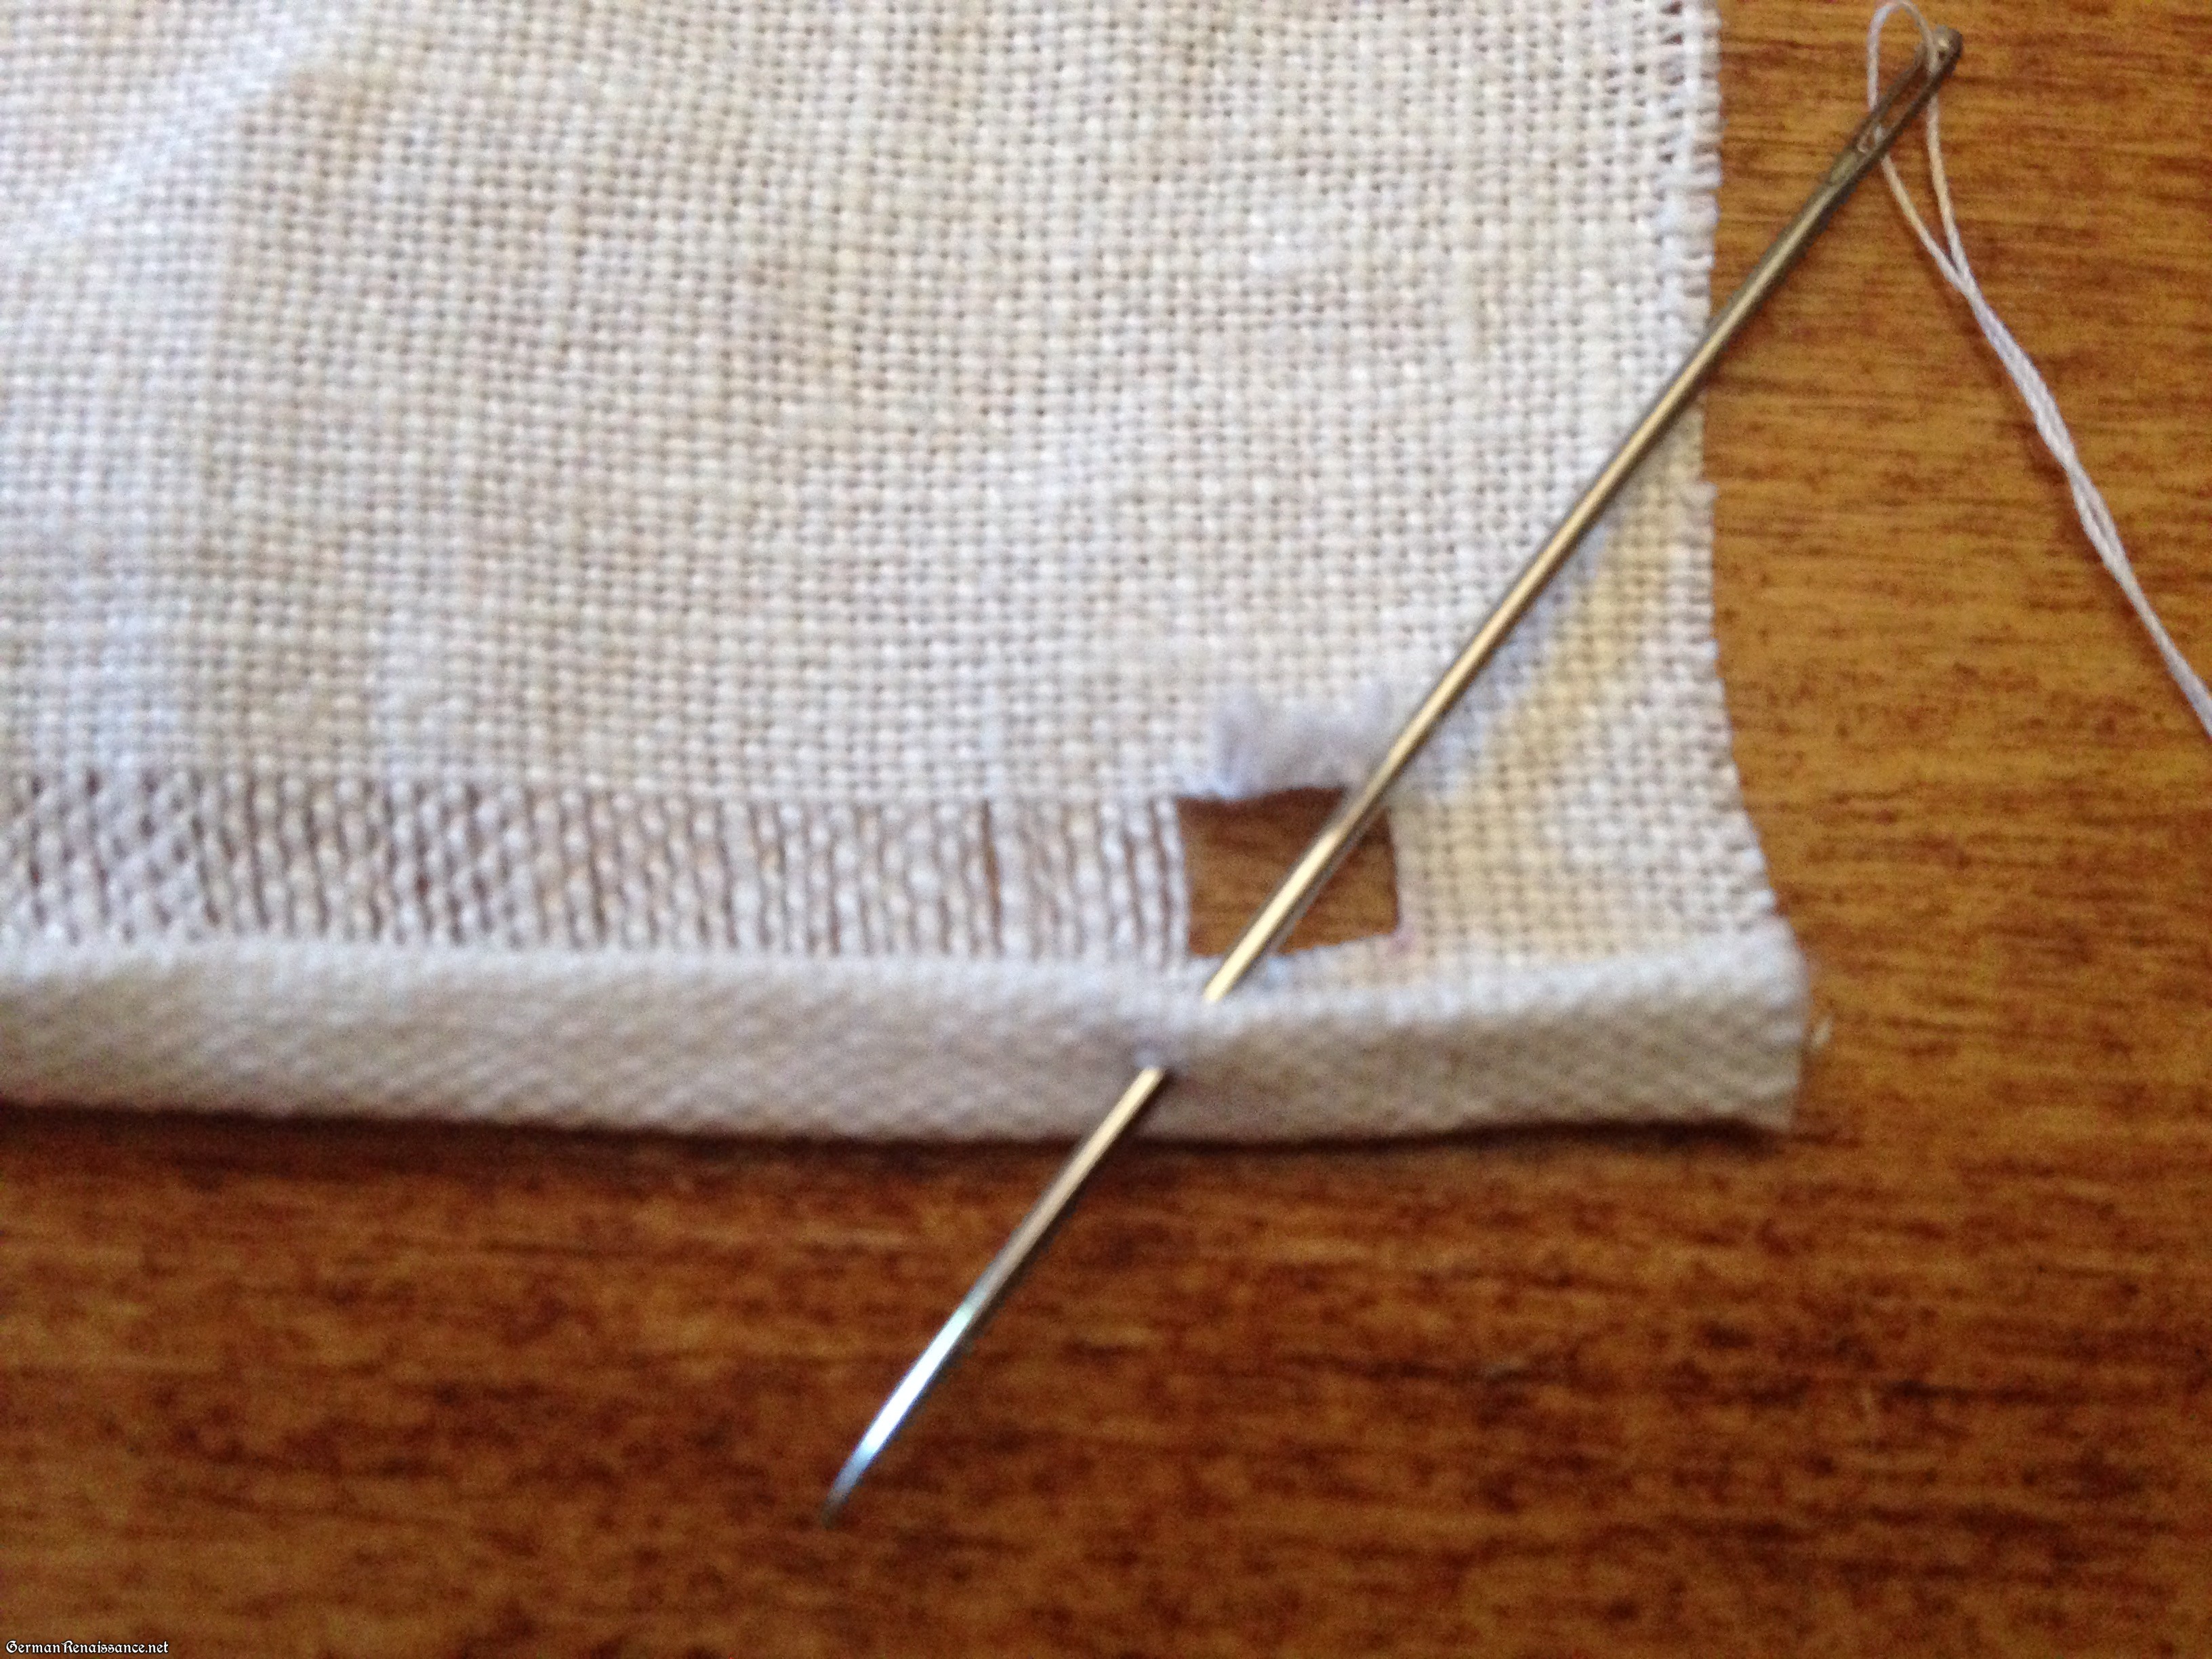
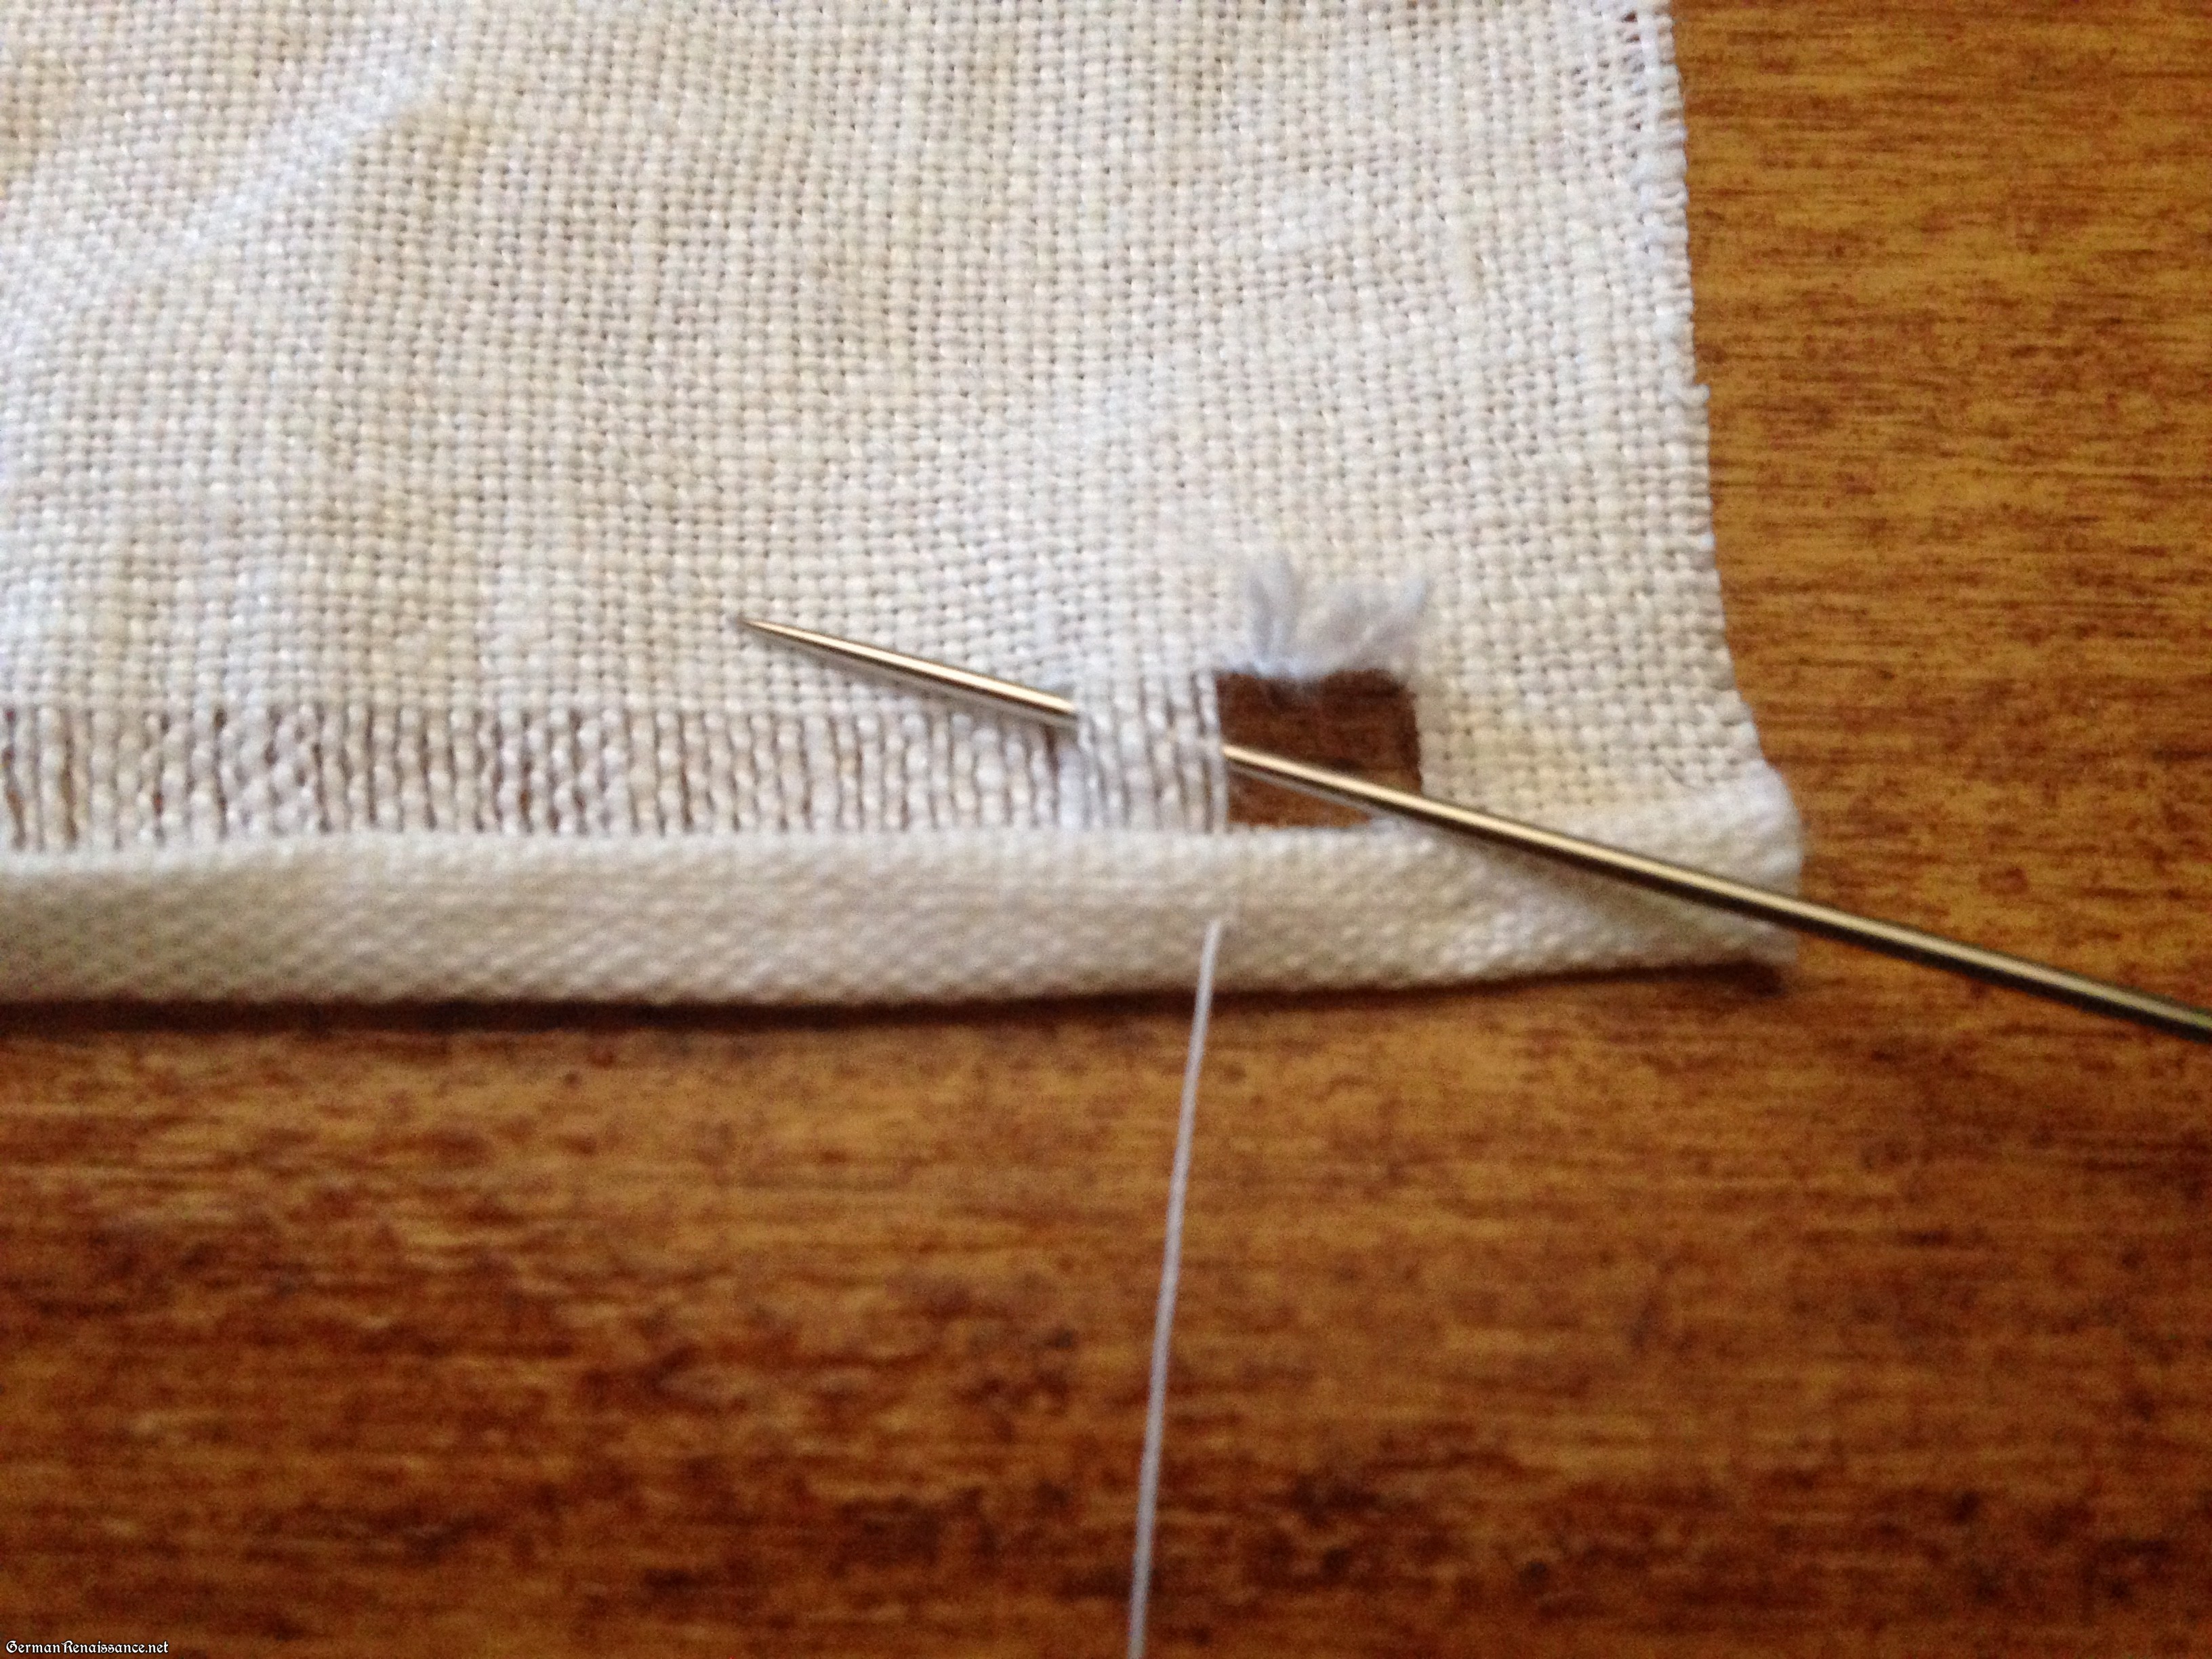
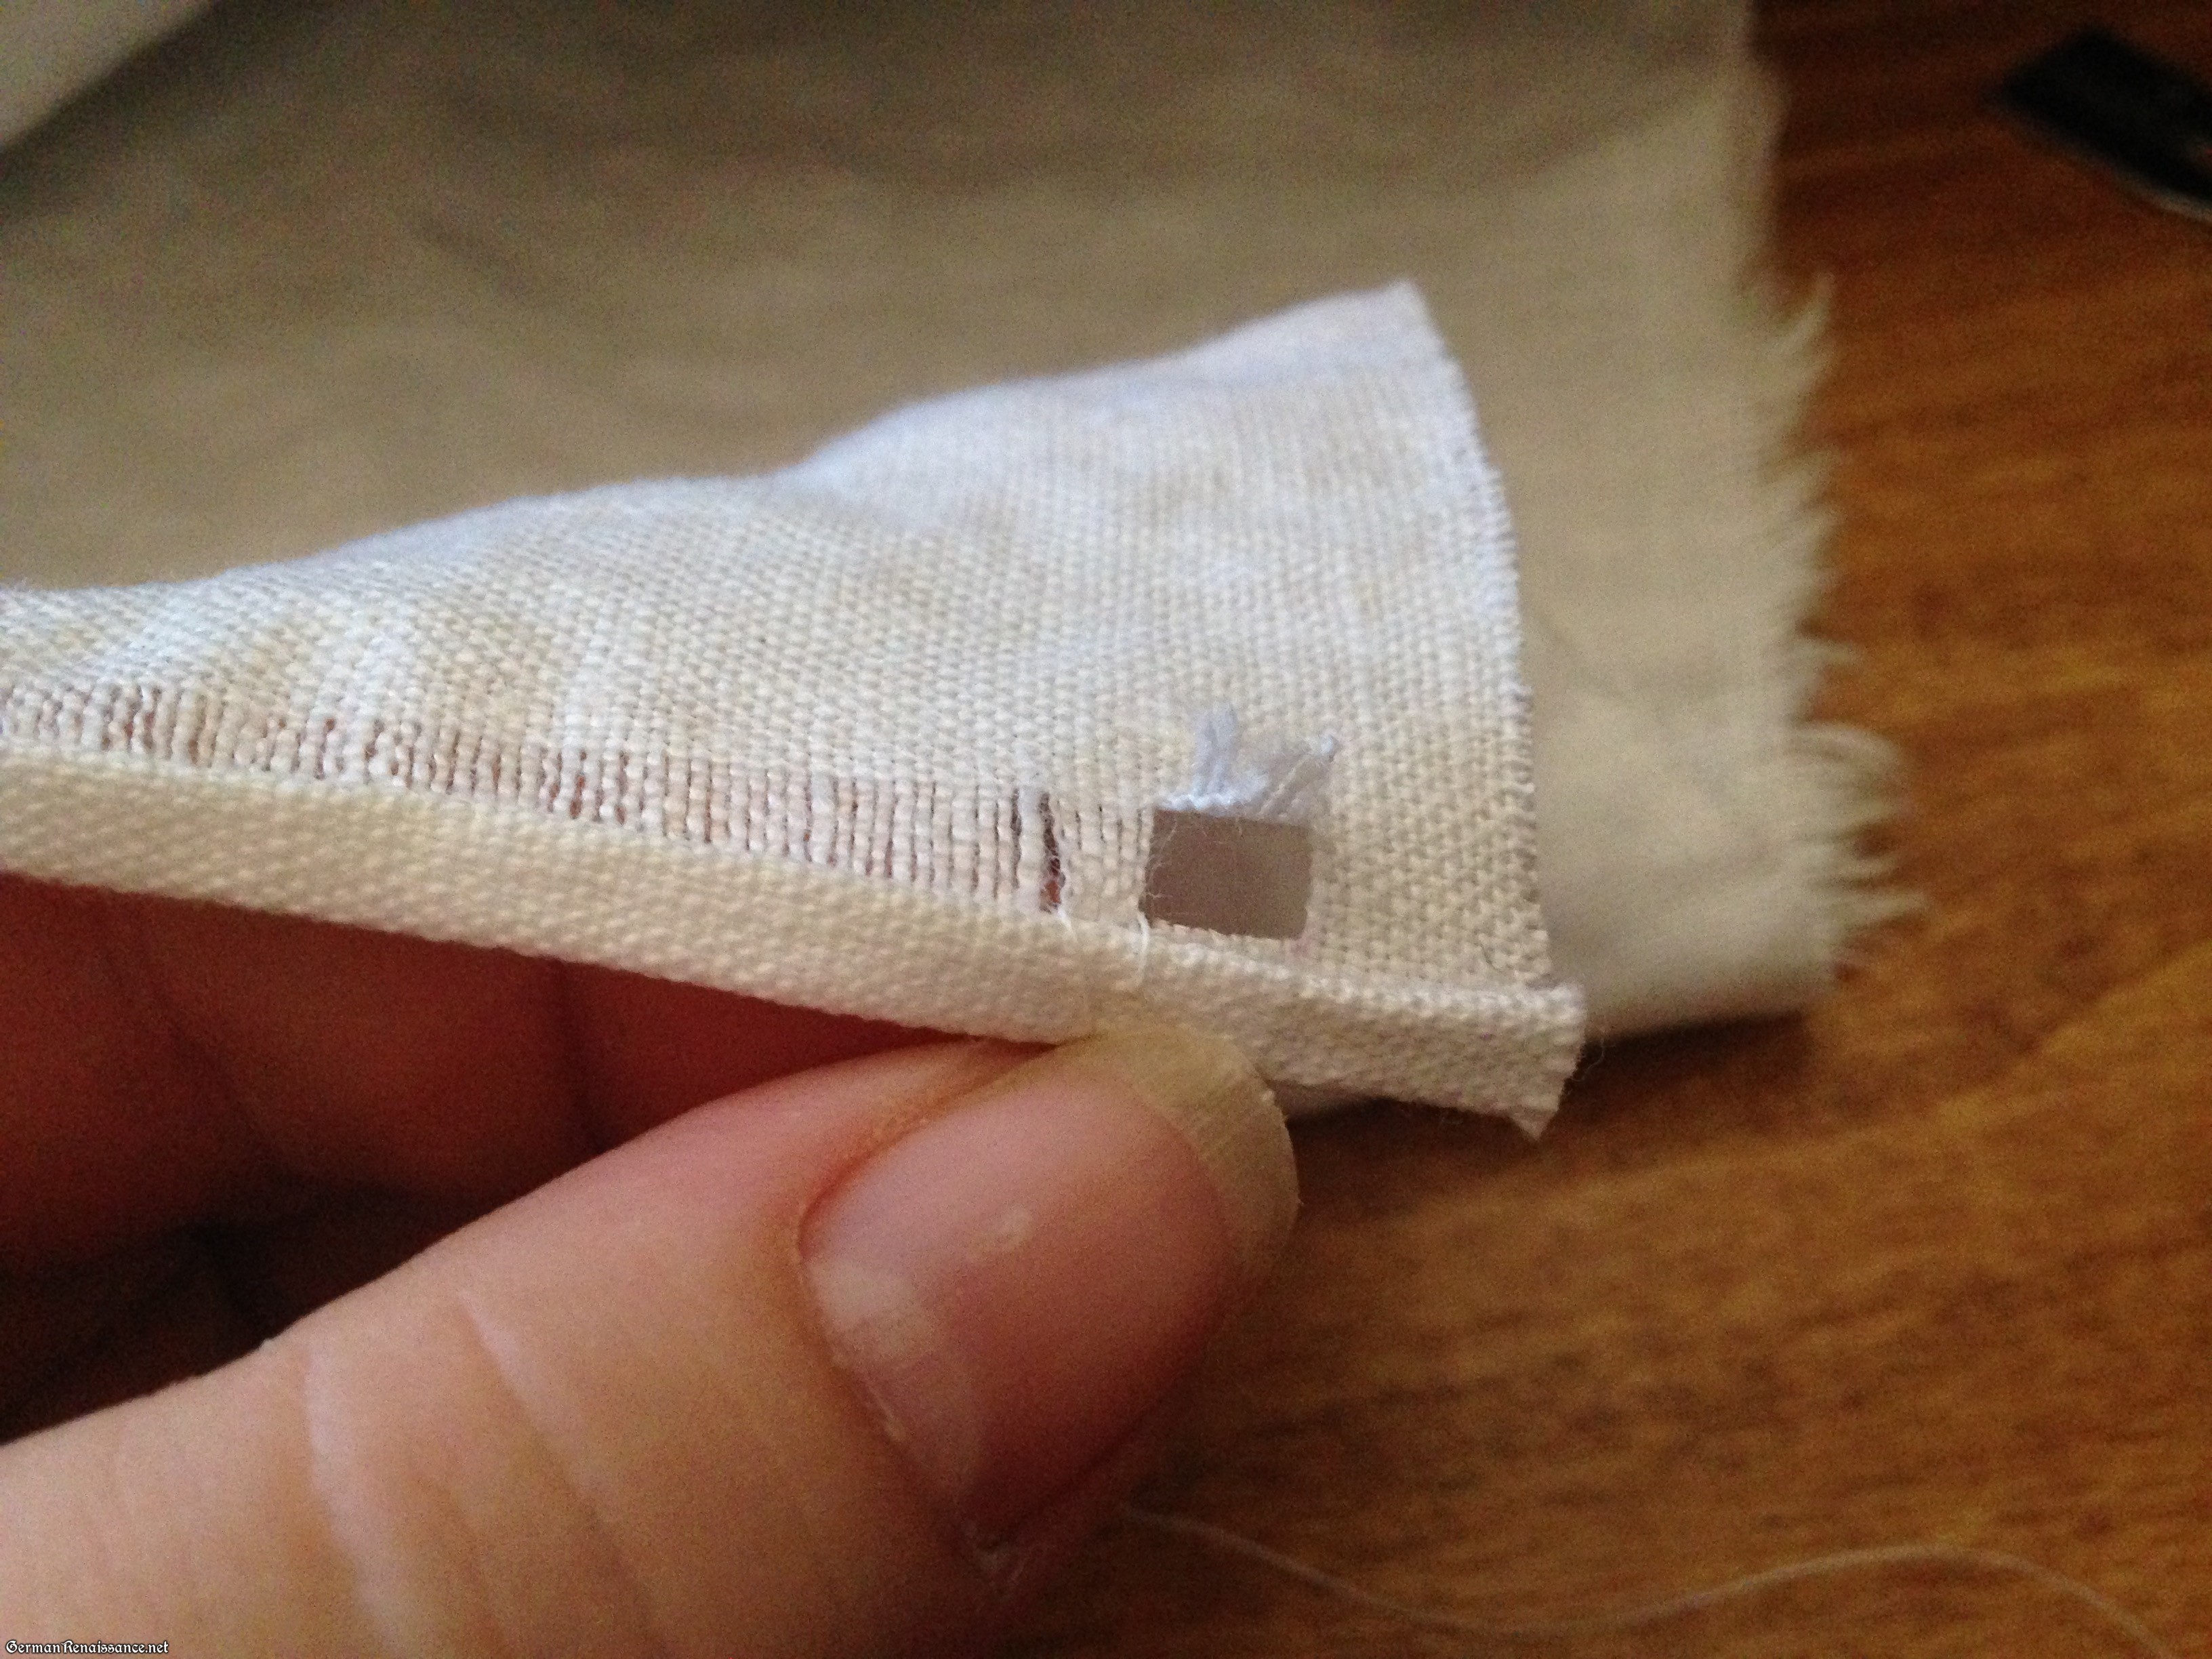
While we cannot know for certain whether or not an uneven running stitch was employed in the 15th and 16th centuries, we can glean important information from Find 121 at Castle Lengberg (Nutz, 83). In Find 121, the top of the fabric, near the pleating, is pointed, as shown in the illustration below.
Author’s depiction of the pointed fabric from a pleated shirt at Castle Lengberg, based on the line drawing provided in How to Pleat a Shirt in the 15th Century (Nutz, 83). No photo of this pointed fabric in the extant garment has been located at the time of writing. (Illustration copyright Genoveva von Lübeck)
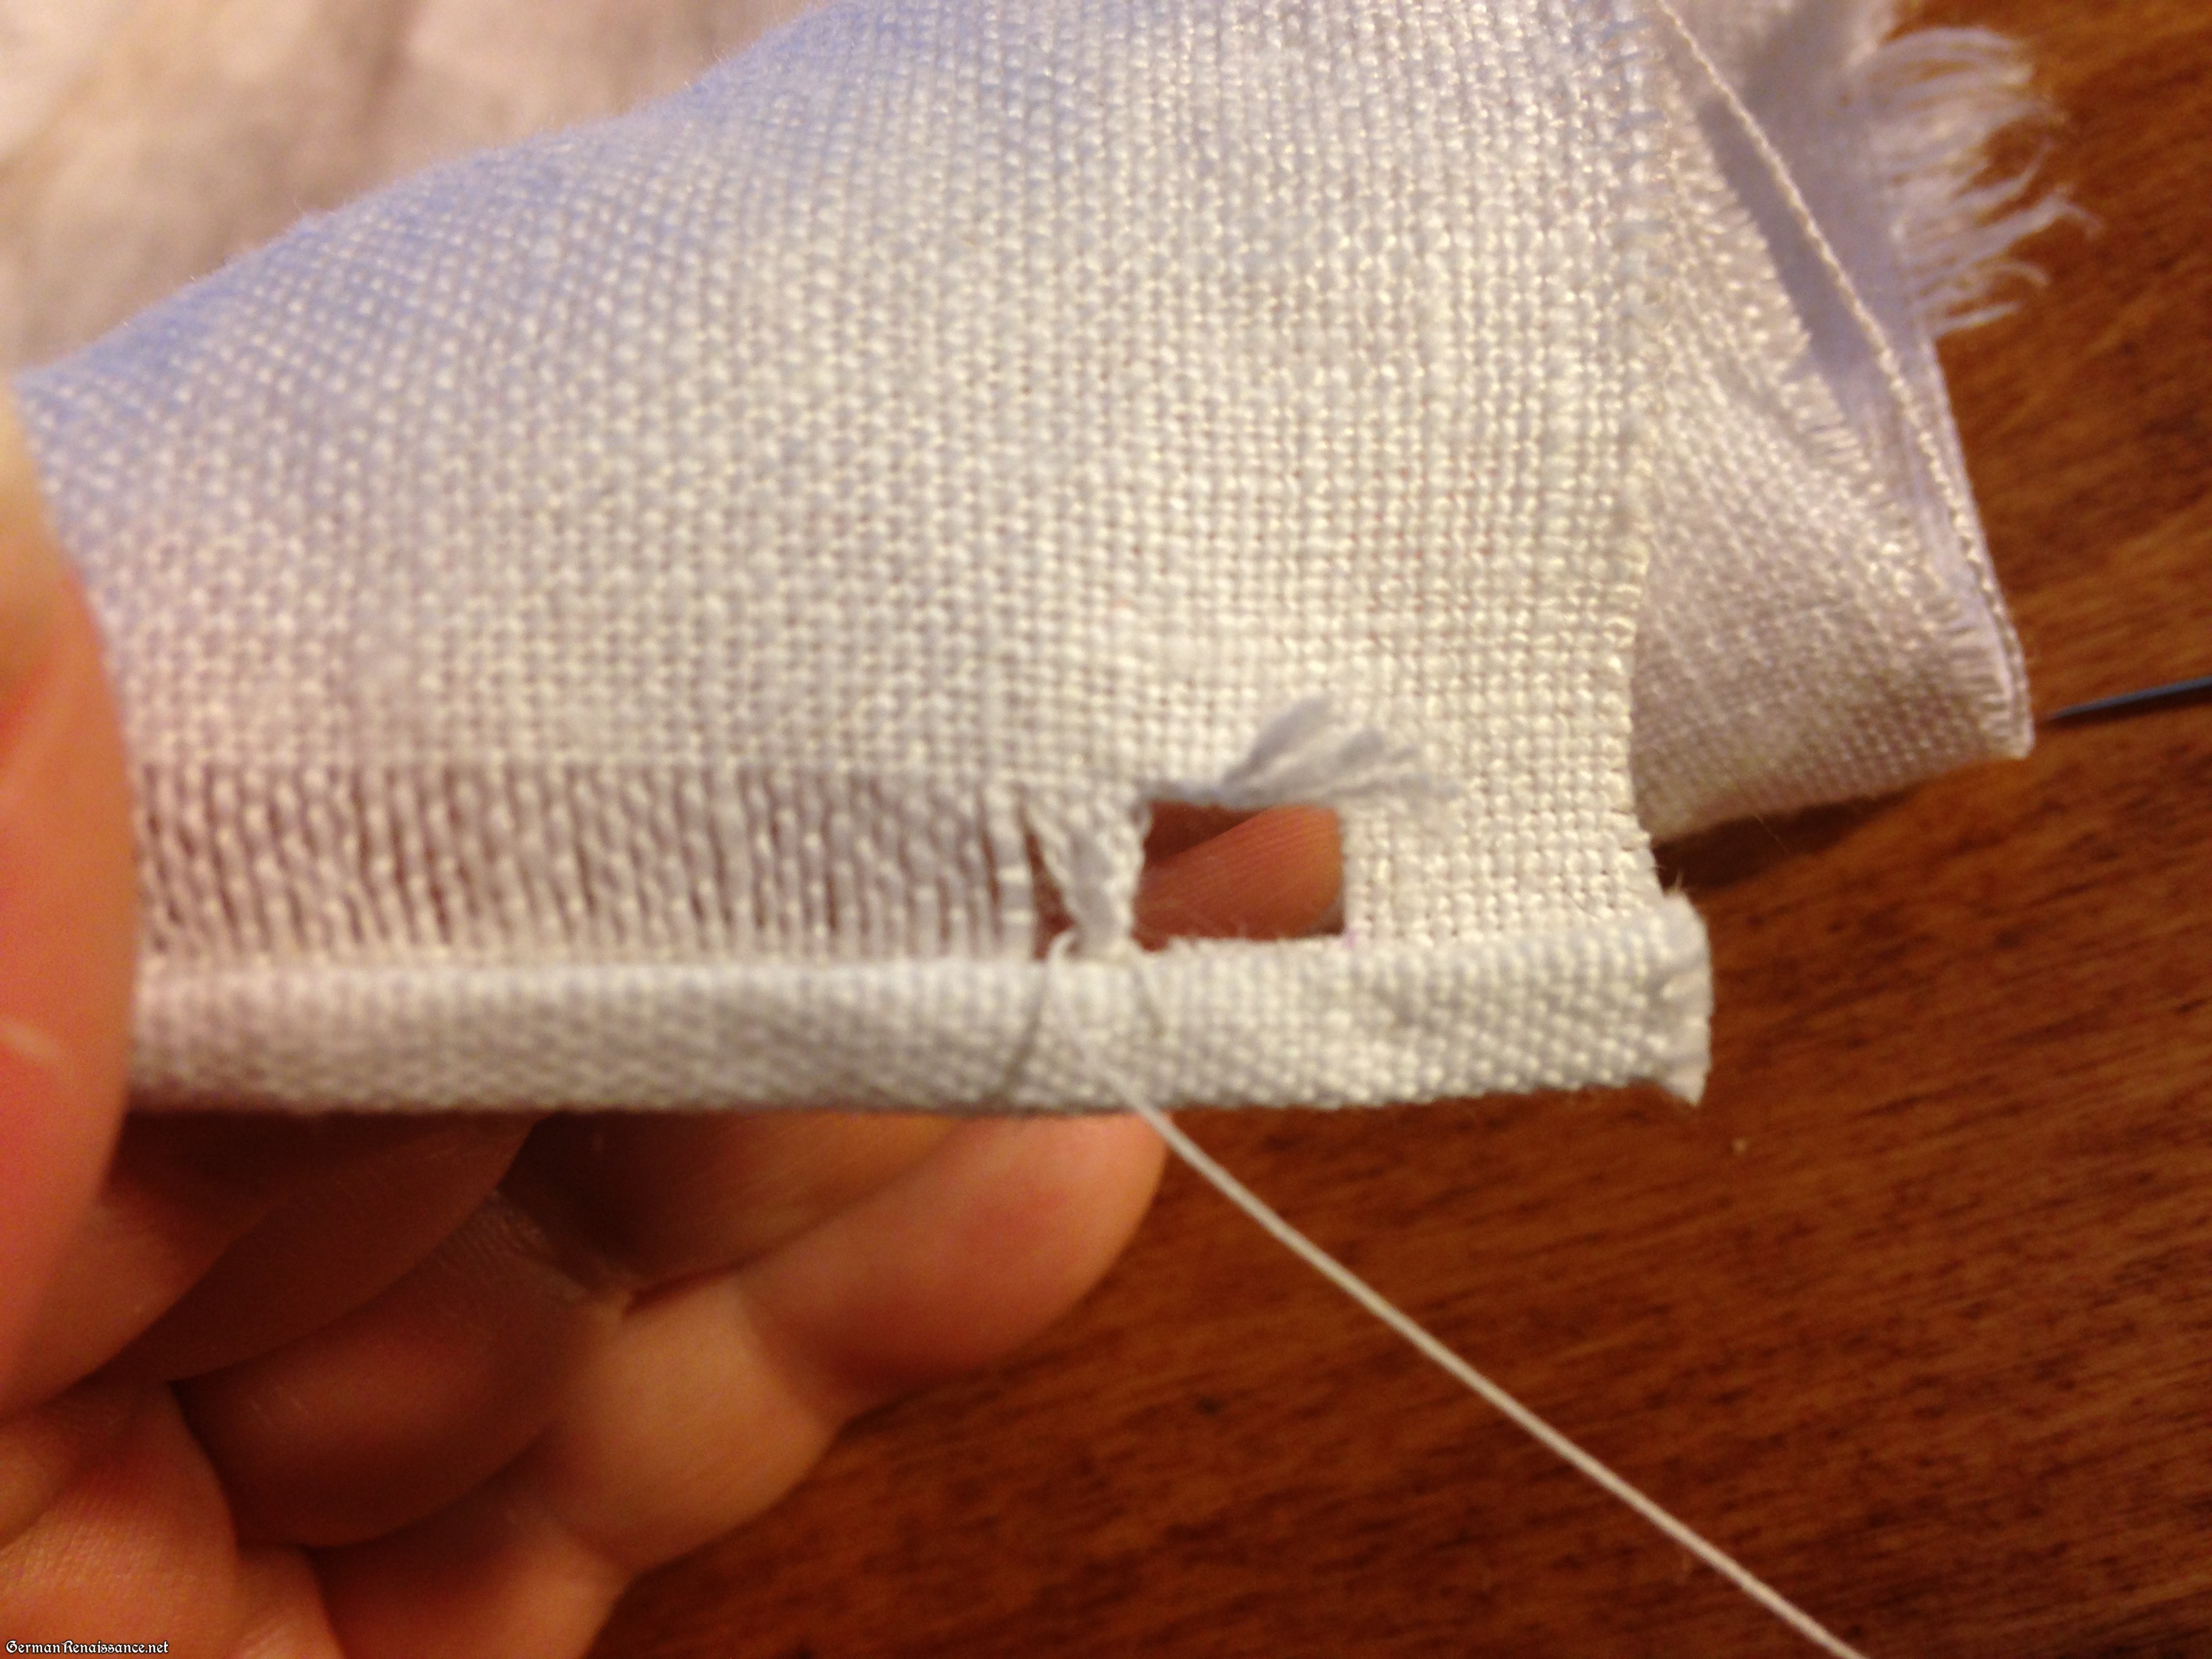
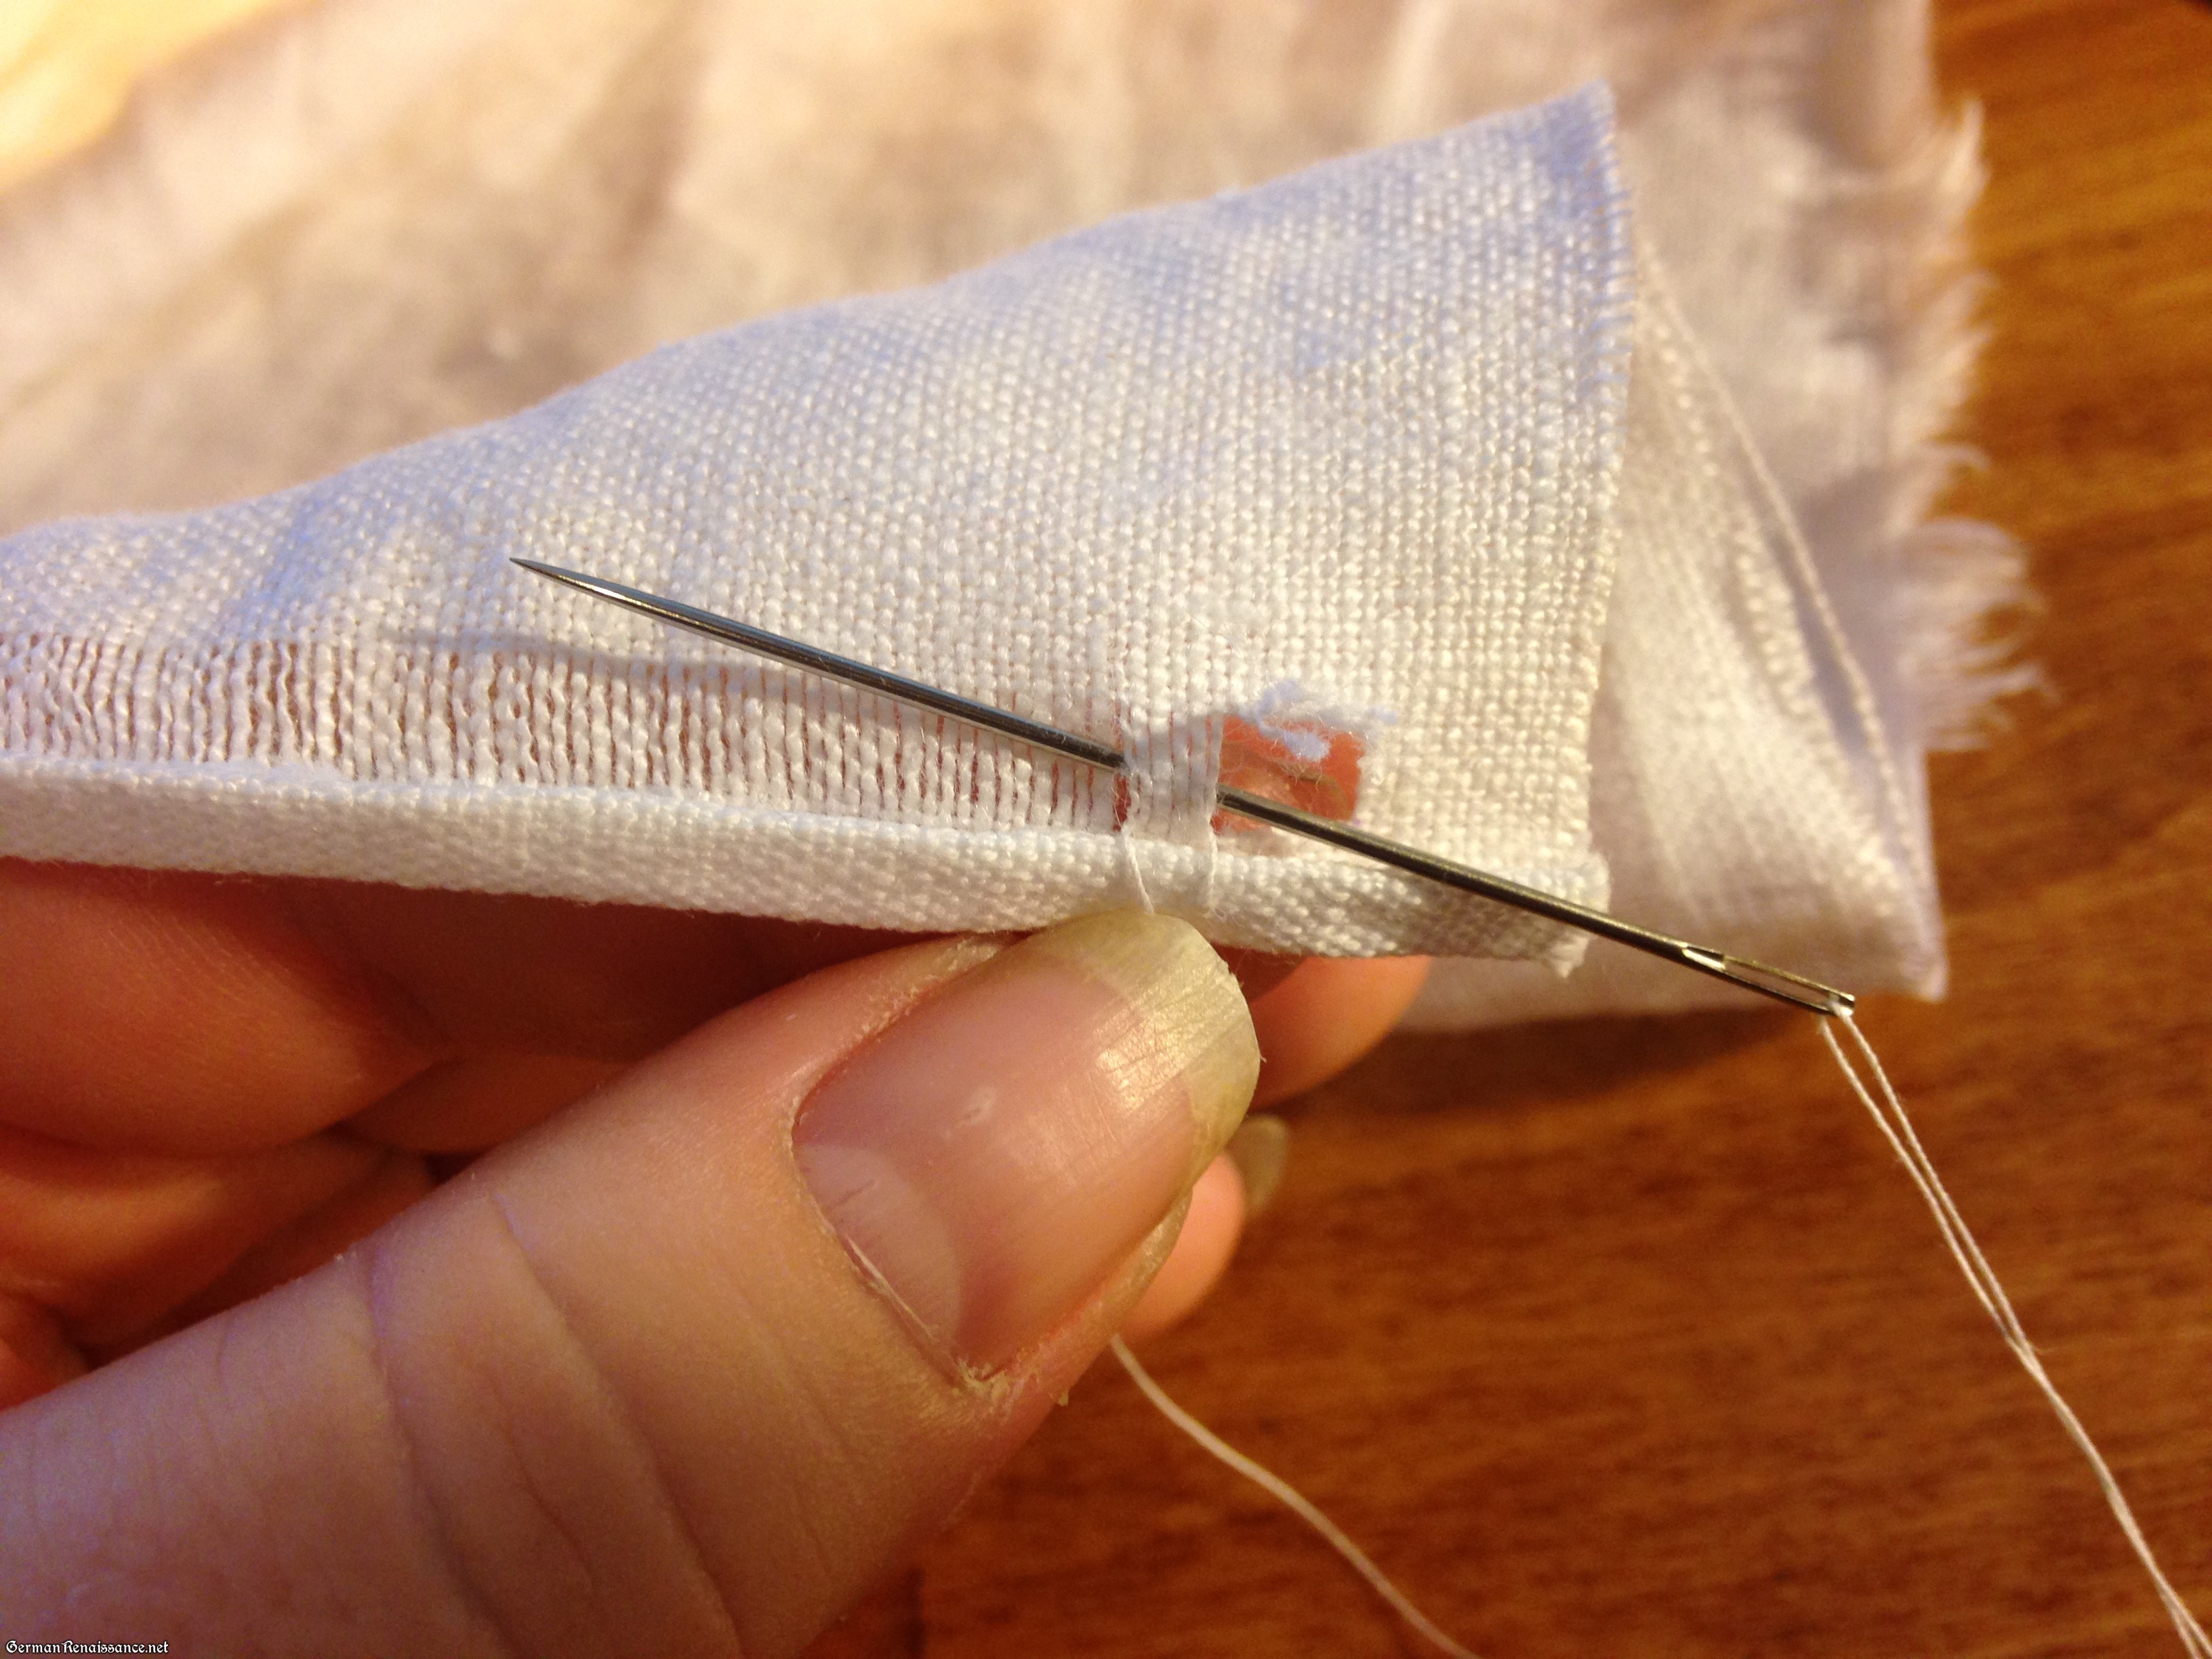
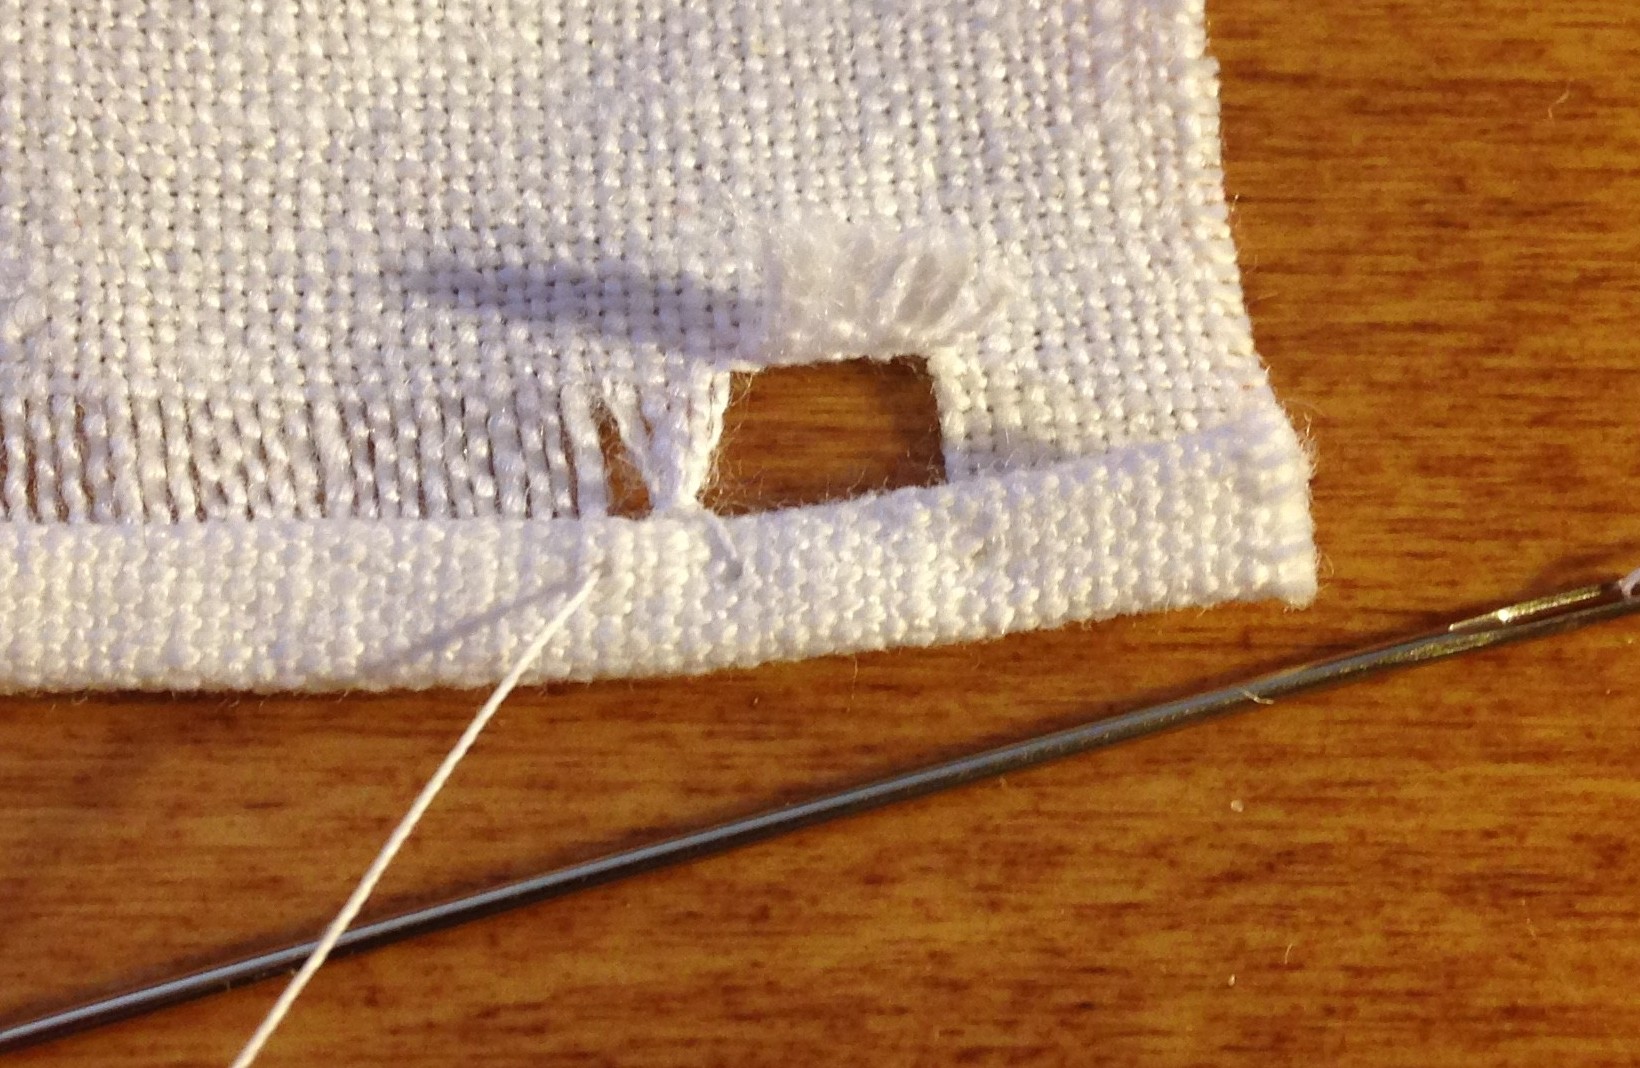
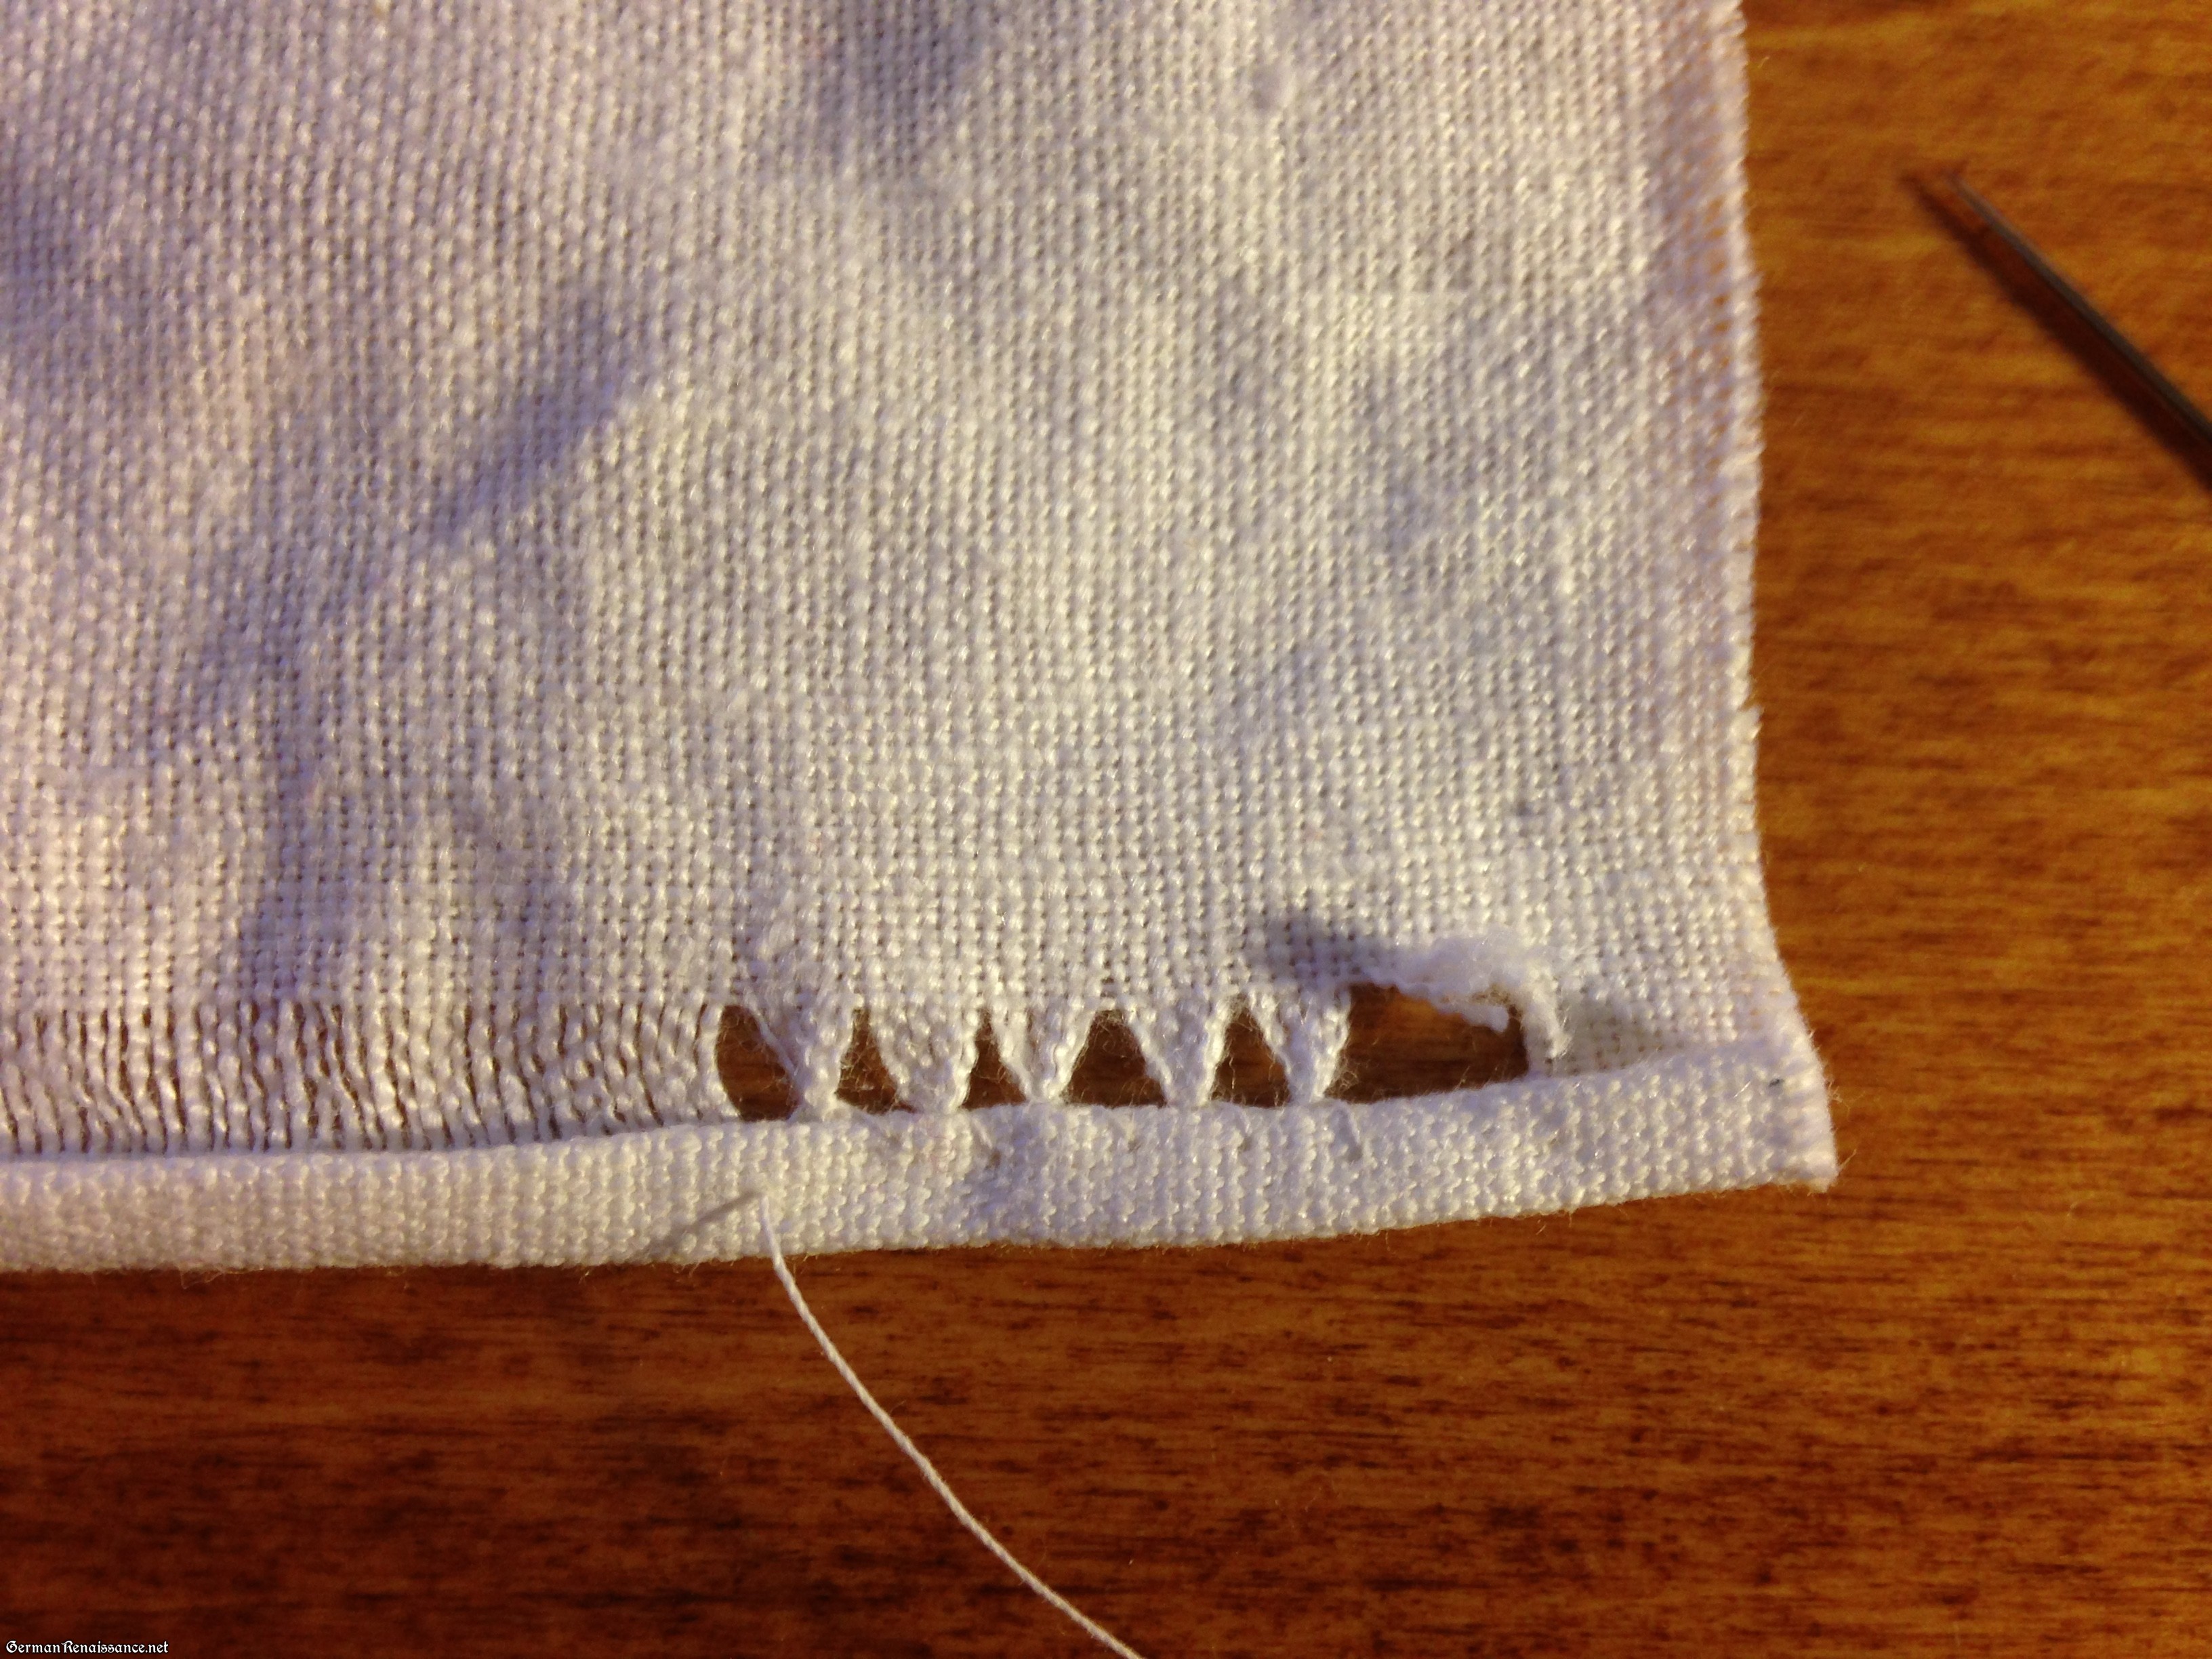
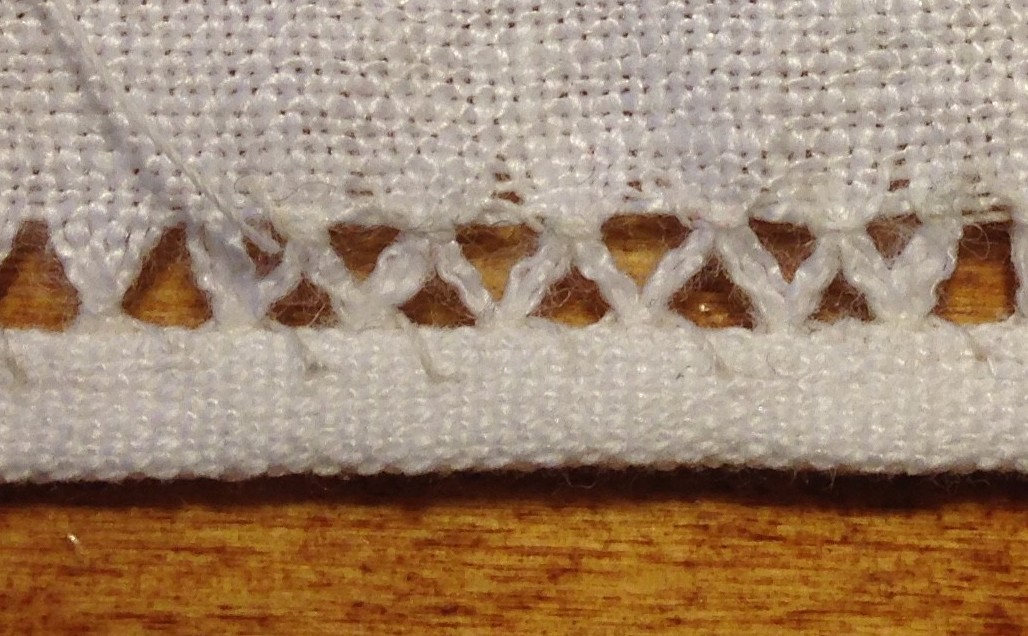
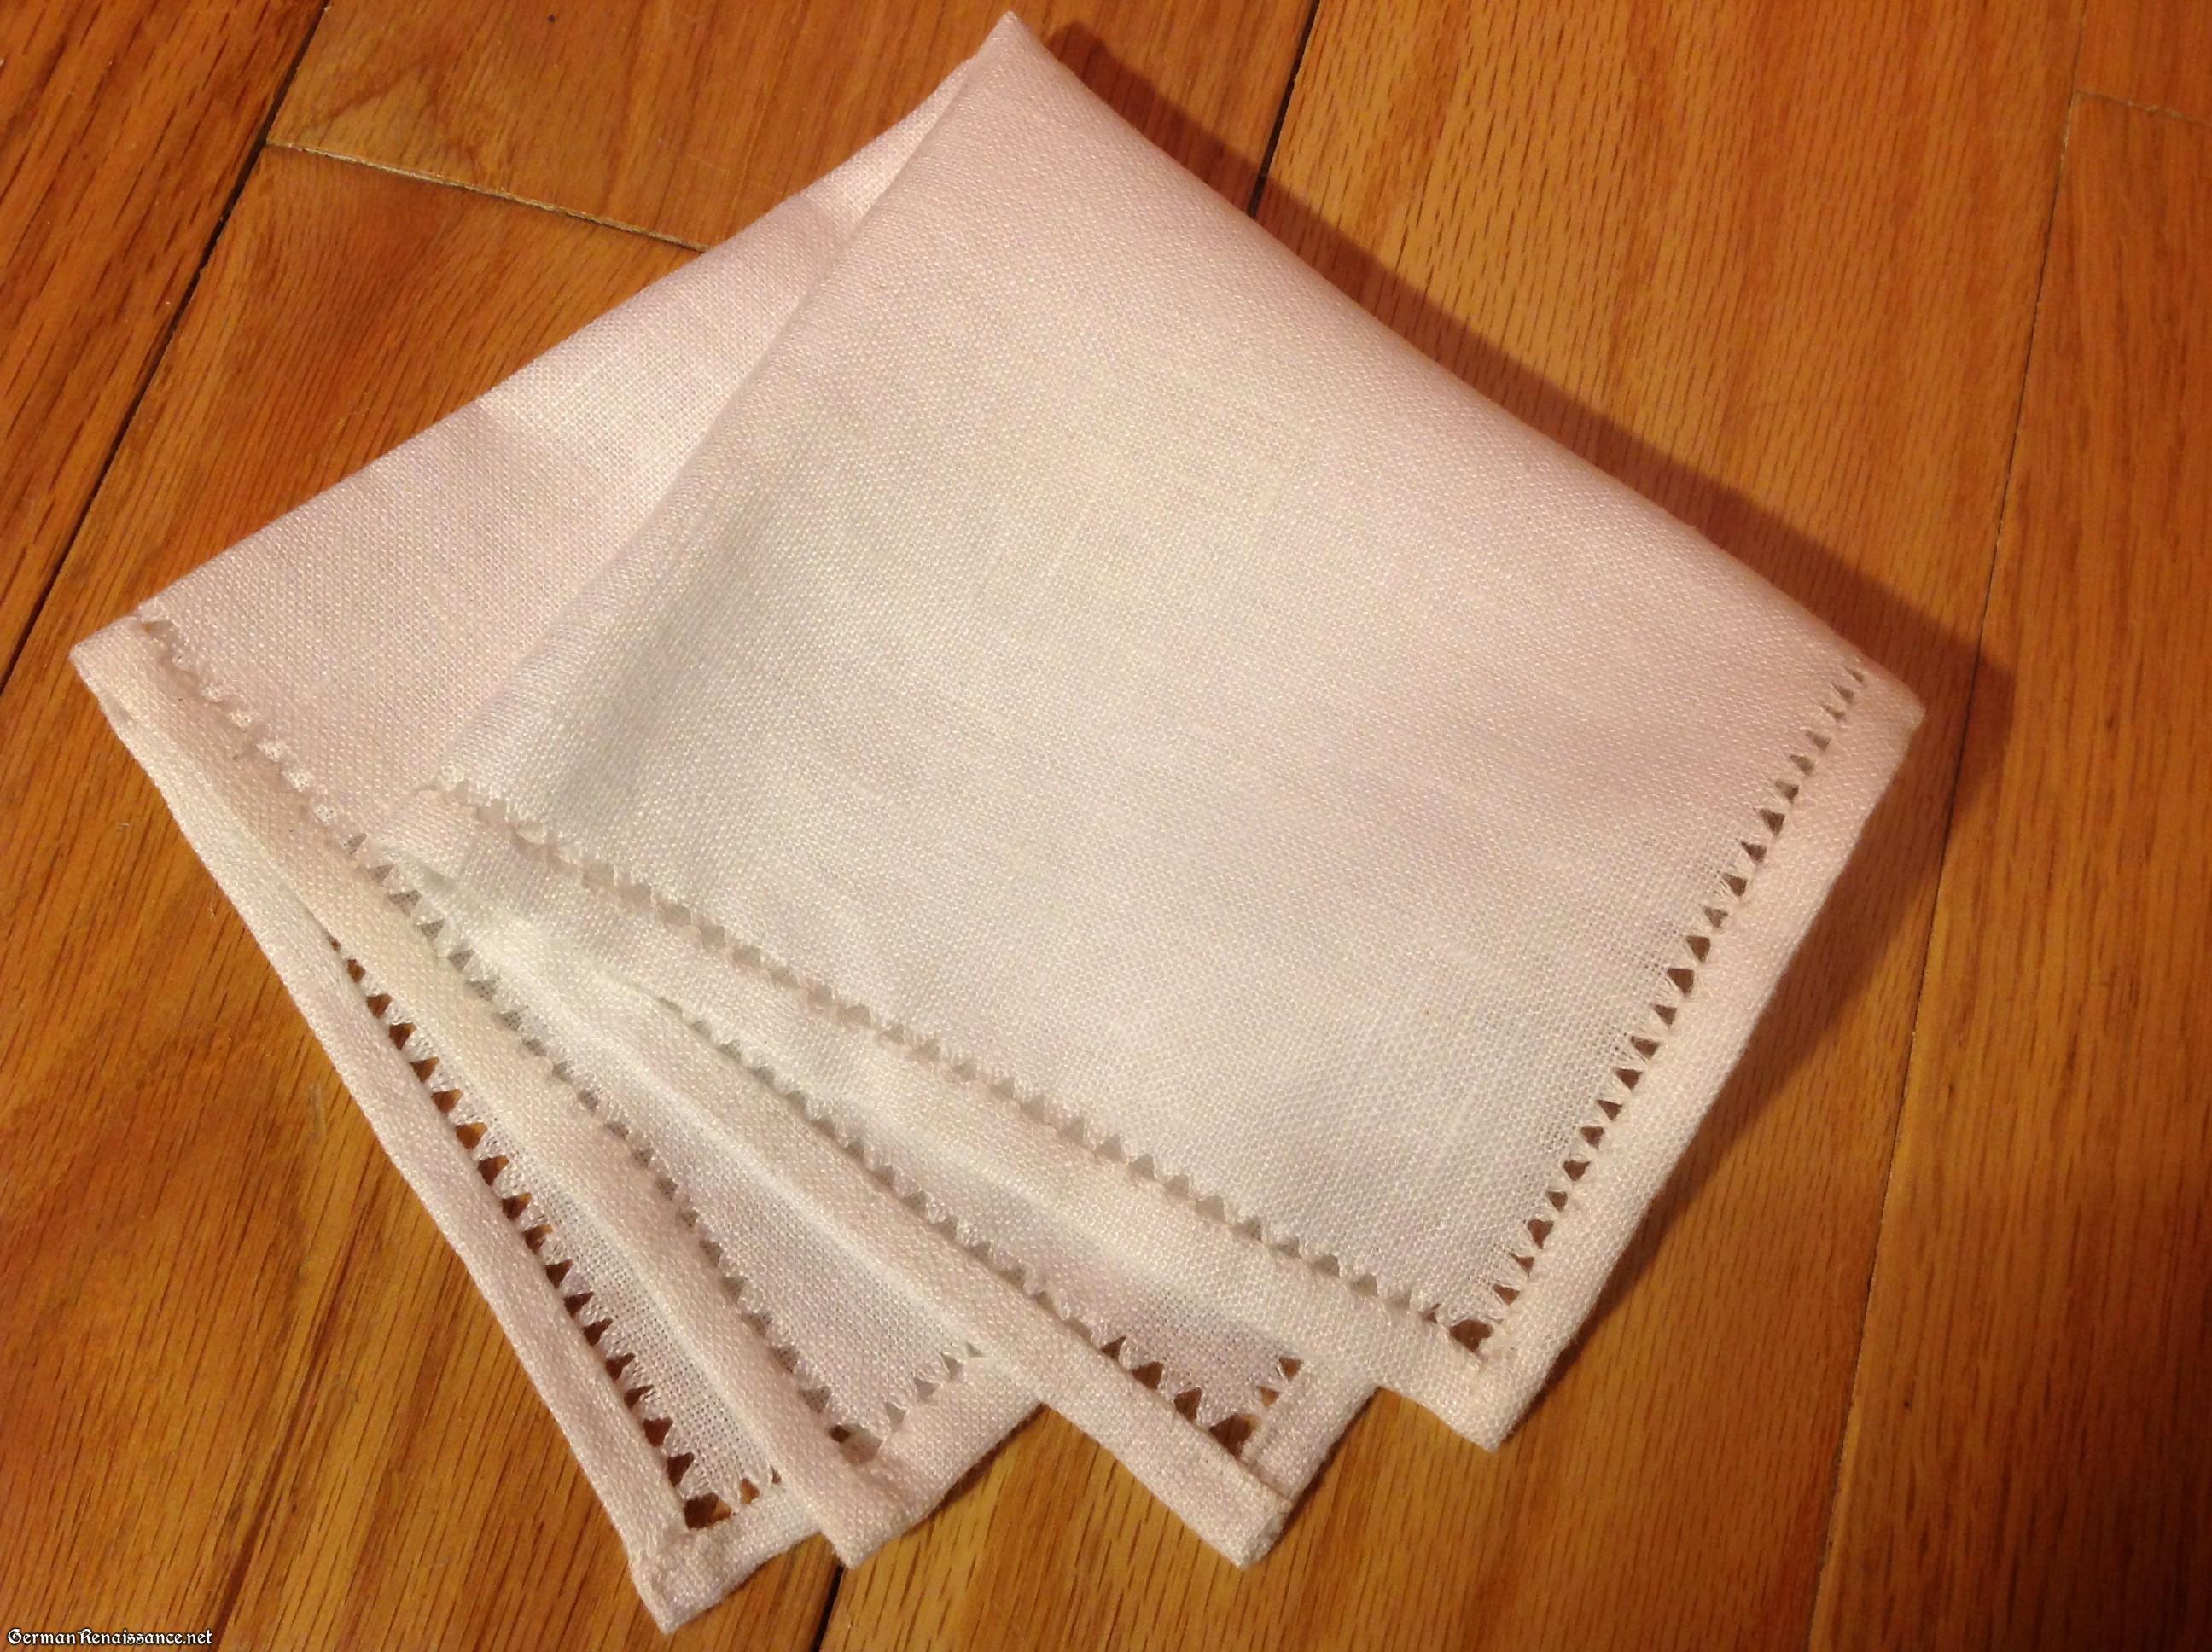
This may seem confusing until one considers the usage of this fabric and its context with the whole shirt. The pointed edge of the pleated fabric is encased in a fabric casing. One can theorize that the sempstress trimmed the edge of the pleated fabric before adding the casing, and if one compresses the fabric and cuts it at an angle (which is more likely to happen with the very large amount of fabric gathered in the pleats), the result is a zig-zag. The pointed edge would have also have minimized fraying. This theory was attempted with a piece of linen that has been tightly pleated and the effect was similar to Find 121 (see photo below).
Points formed after cutting the edge of pleated fabric at an angle.
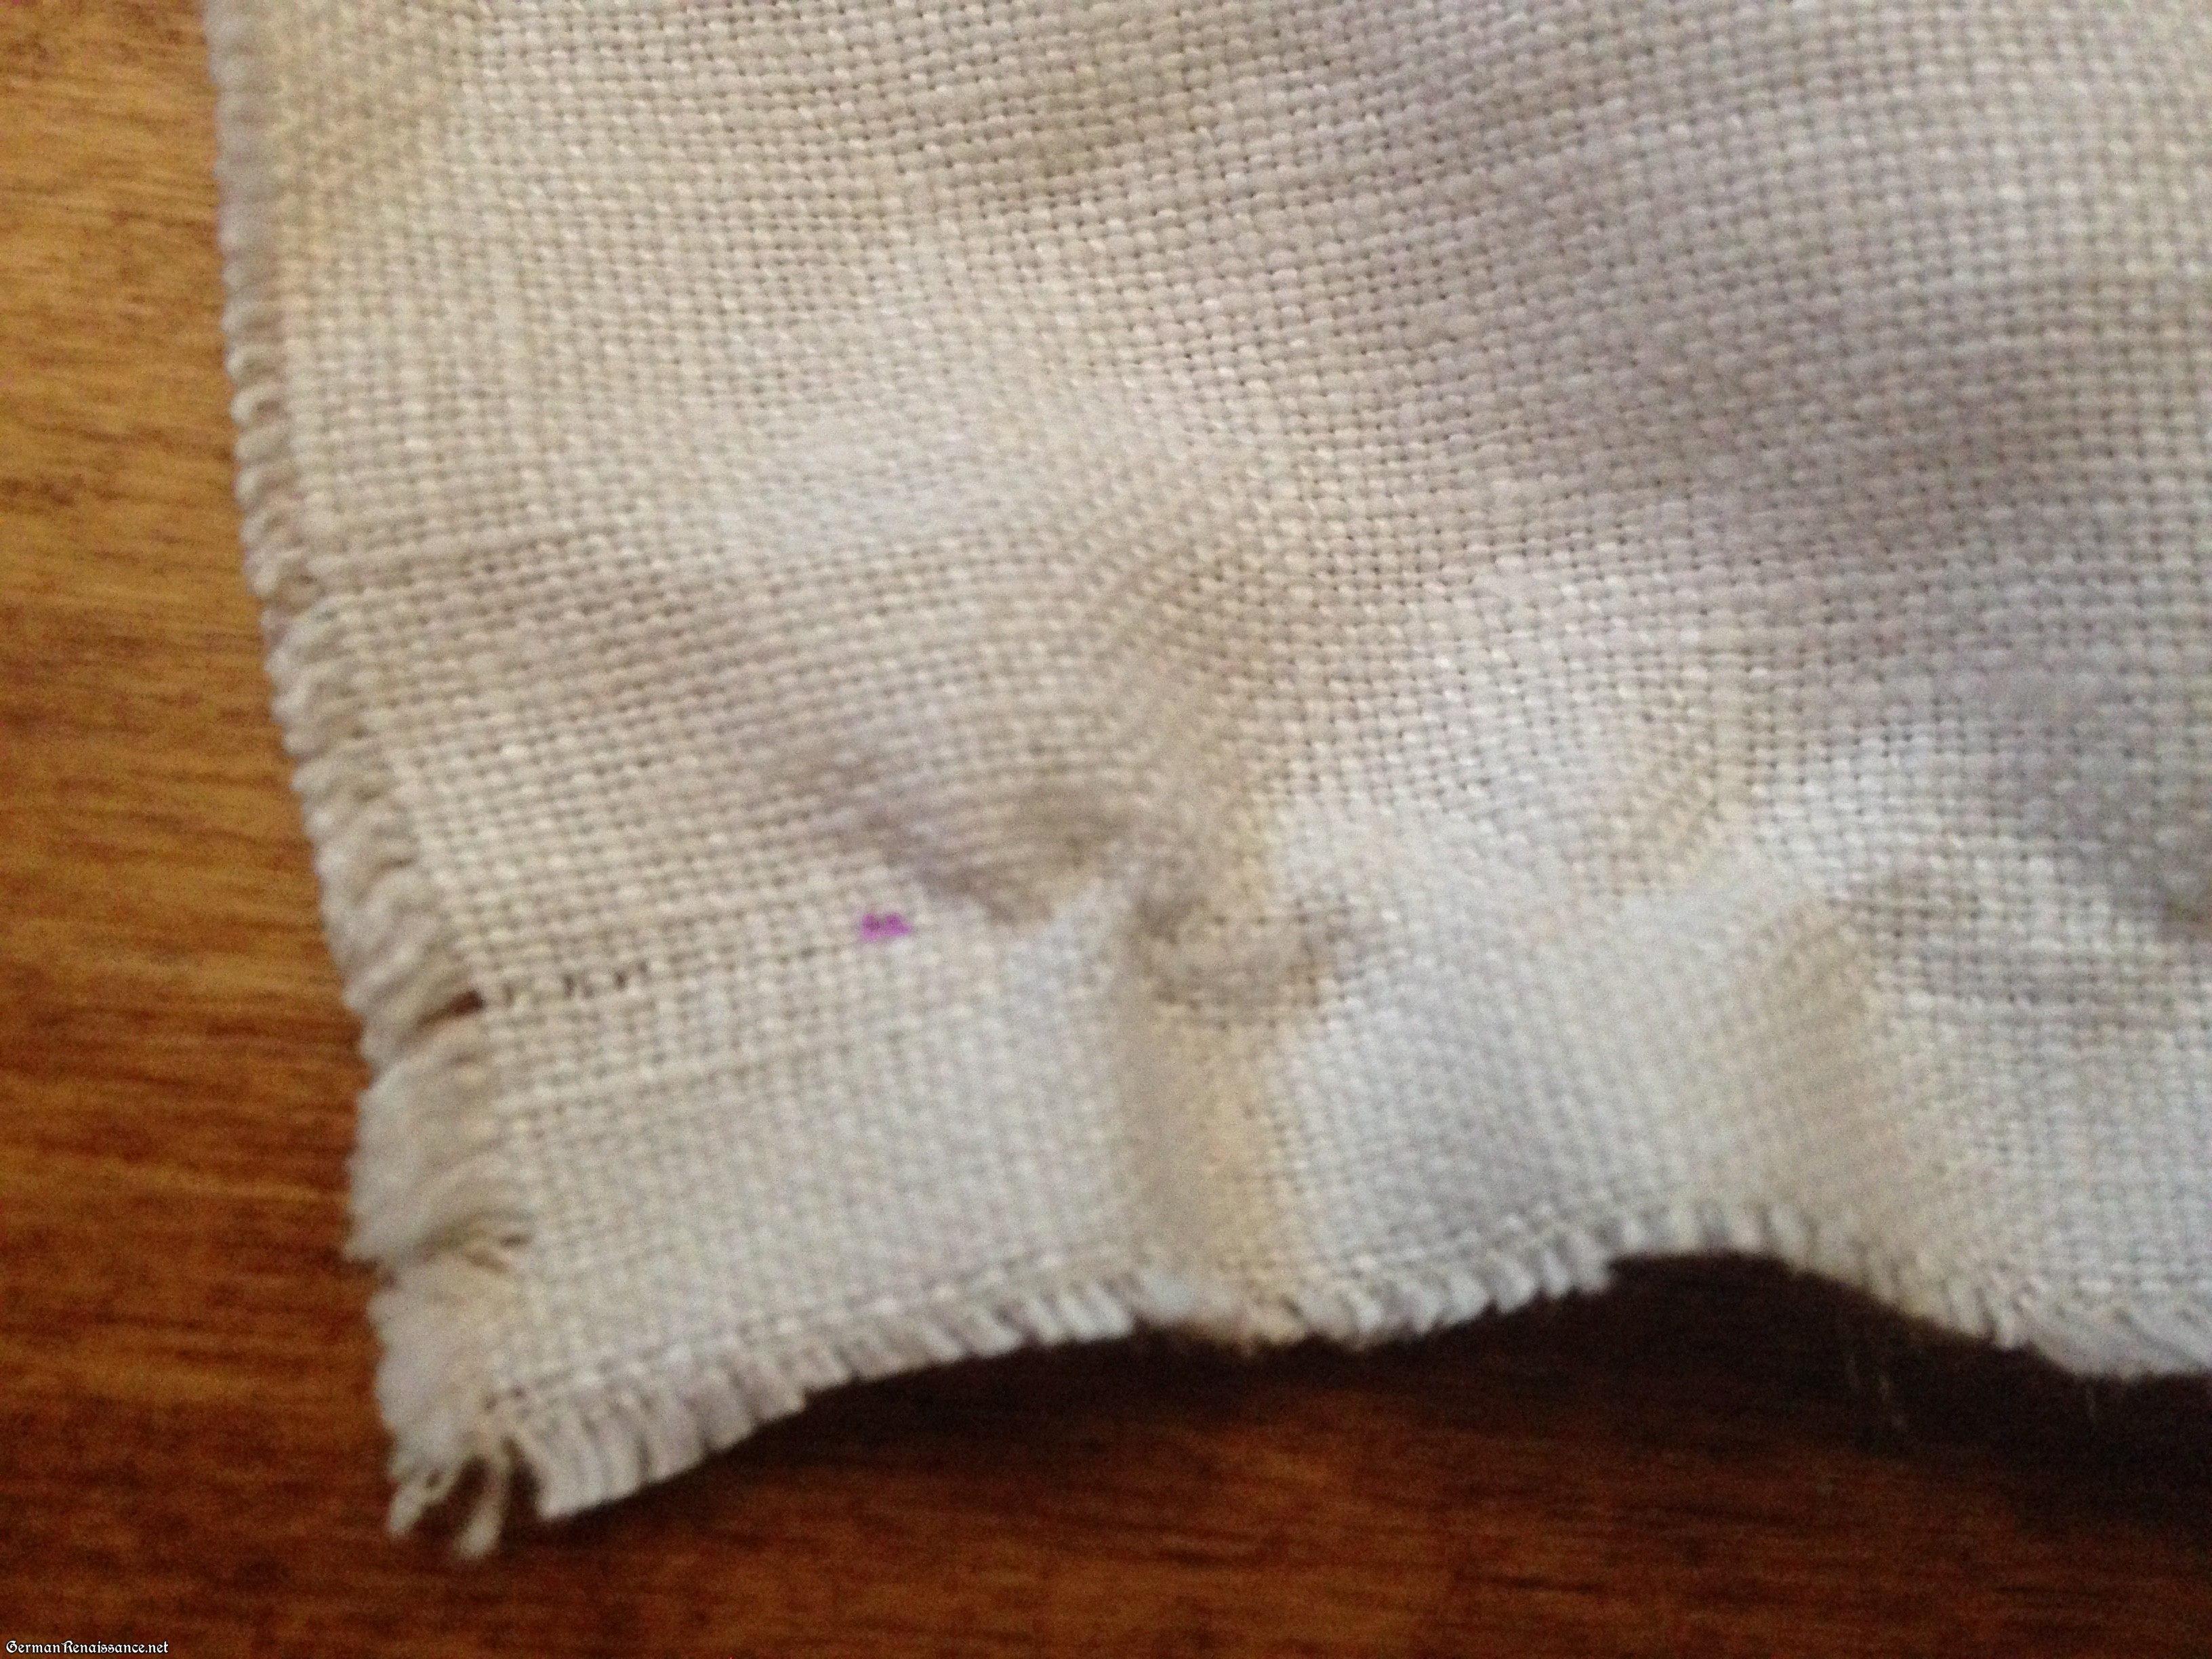
While the pointed, zig-zag effect could come from a pinking tool, it does not seem likely as the points of the fabric correspond to the sharp edge of folds exactly in Find 121. What this pointed fabric could reveal is that the folds were densely and evenly folded when cutting, which would be significantly more likely with evenly-spaced stitches creating the folds than unevenly-spaced stitches. Additionally, the trimming strip attached at the top of the fabric of Find 121 employs evenly-spaced running stitches as well.
From the evidence available for Find 121 from Castle Lengberg, it is probable that a combination of the Gather Method and the Press Method of folding the fabric was historically used. The Gather Method may have been used to create the very tight and even folds, and then the Press Method may have been used to compress the folded fabric (perhaps while wet) with a slickenstone or a press to form the sharply-ridged pleats.
How to Mark the Fabric for the Gather Method
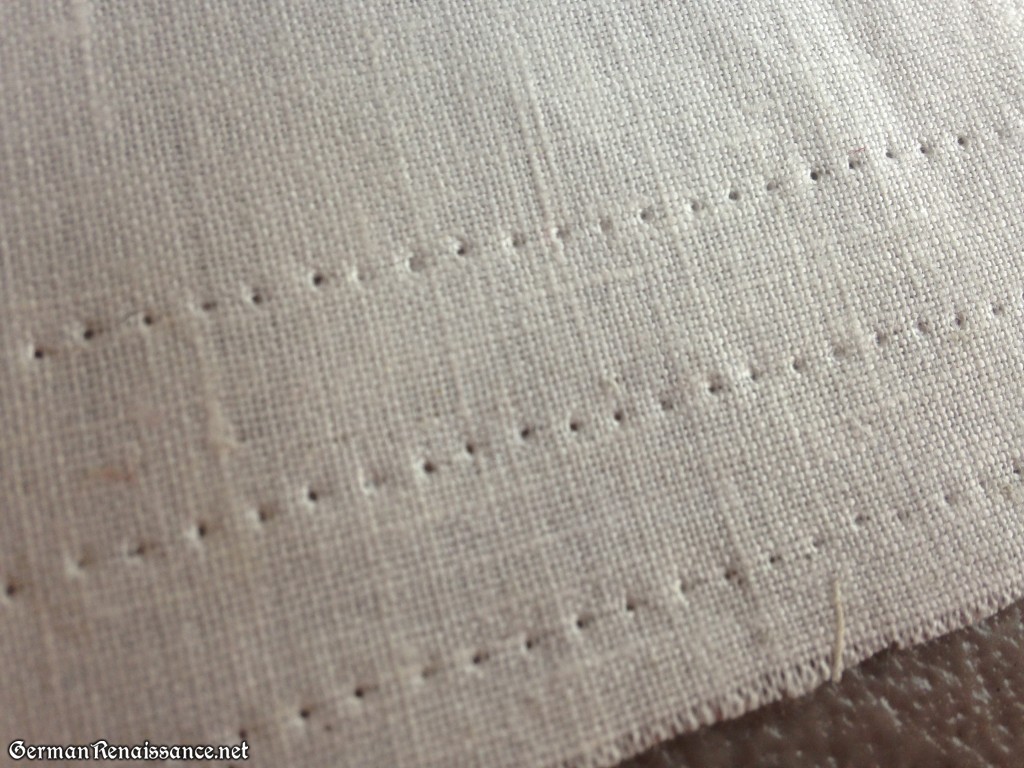
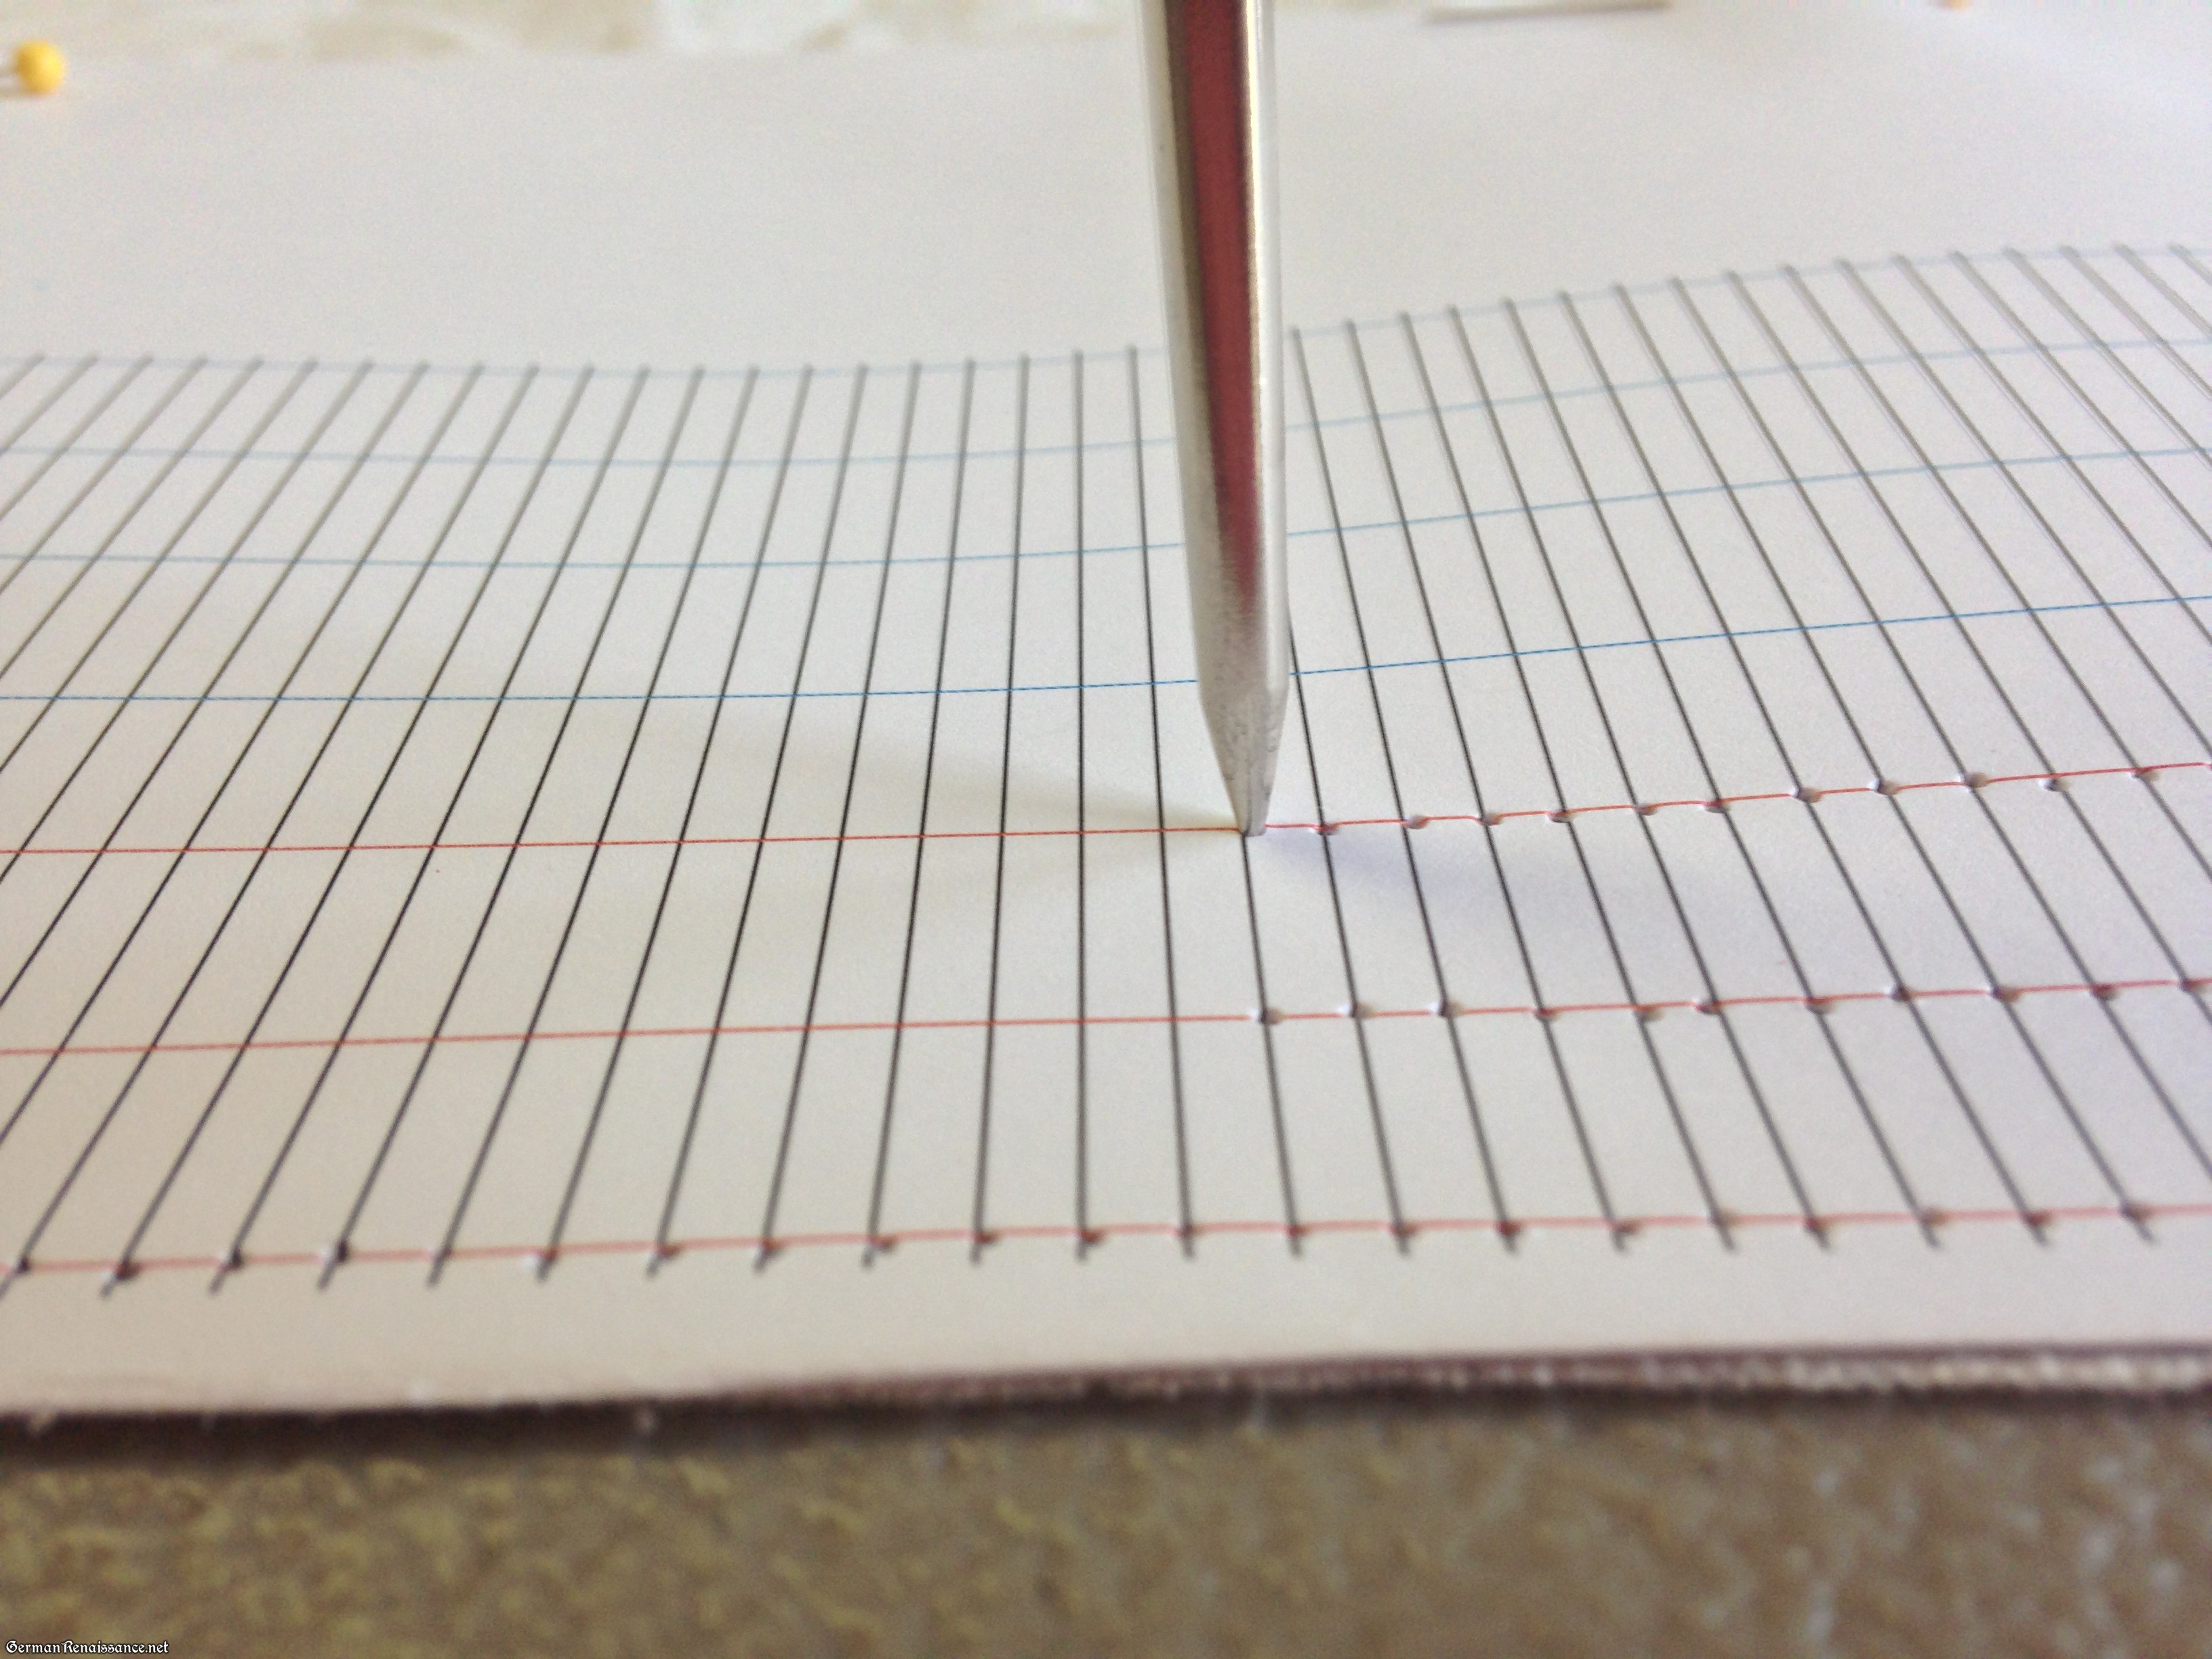
The most exact way to sew even running stitches that gather neatly is to mark your fabric first. Regardless of which method you use, always be certain your fabric is cut on the straight (warp or weft) by either pulling a thread or tearing the fabric. Here are as many different ways that I know at the time of writing:
1. AWL PRICK: Prick the fabric with something pointy, such as an awl, in an evenly spaced grid pattern. You can make your own grid pattern in the spacing you want, or use one of my pre-spaced grid patterns: 1 inch (very large and ideal for beginners), 3/4 inch, 1/2 inch, and 1/4 inch (the most historically-accurately size).

2. TOOL PRICK: Prick the fabric with a set of pointy things already fixed into with the grid pattern you wish. Mistress Milicent Vibbert created such a pleat marking tool from four toothpicks and a scrap piece of wood when she made her Saxon gown (view photo of her pleating tool). The advantage to this method is that no grid is needed –you can prick the first holes, and then move down the fabric setting the first set of pointy bits into the last set of holes and pricking a new set of holes. This way you can create an infinite number of evenly spaced holes. (Note: Milicent notes that her toothpicks were getting dull by the end of her project, so one may want to experiment with using tougher pointy bits, such as nails.)
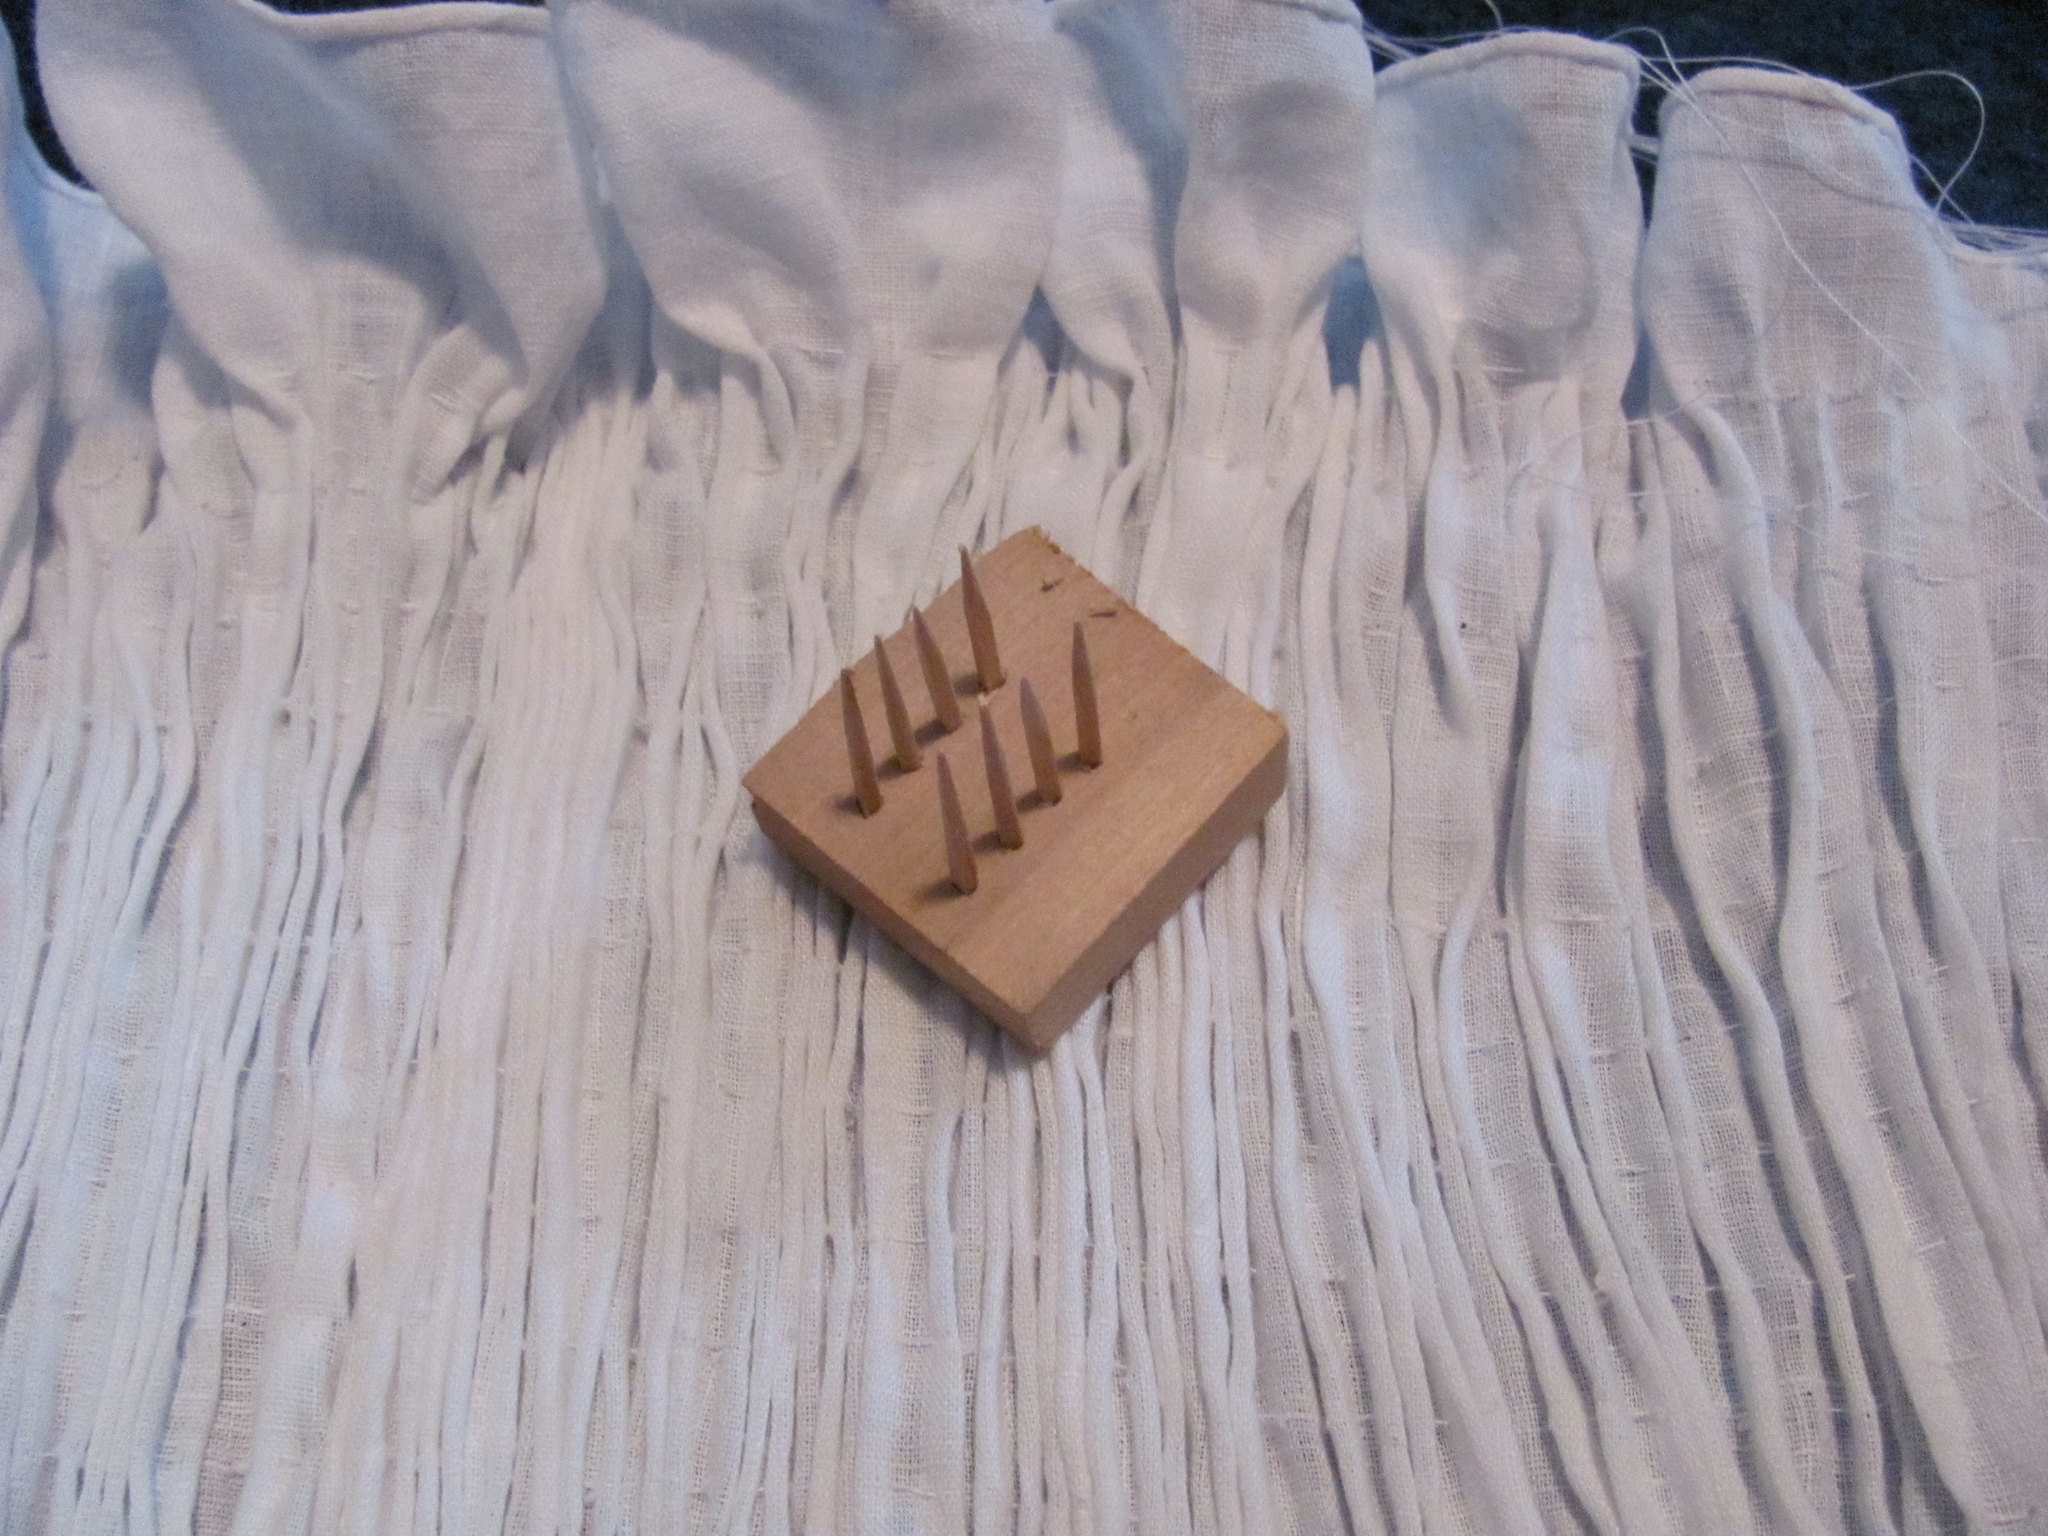
Photo copyright Grace Vibbert
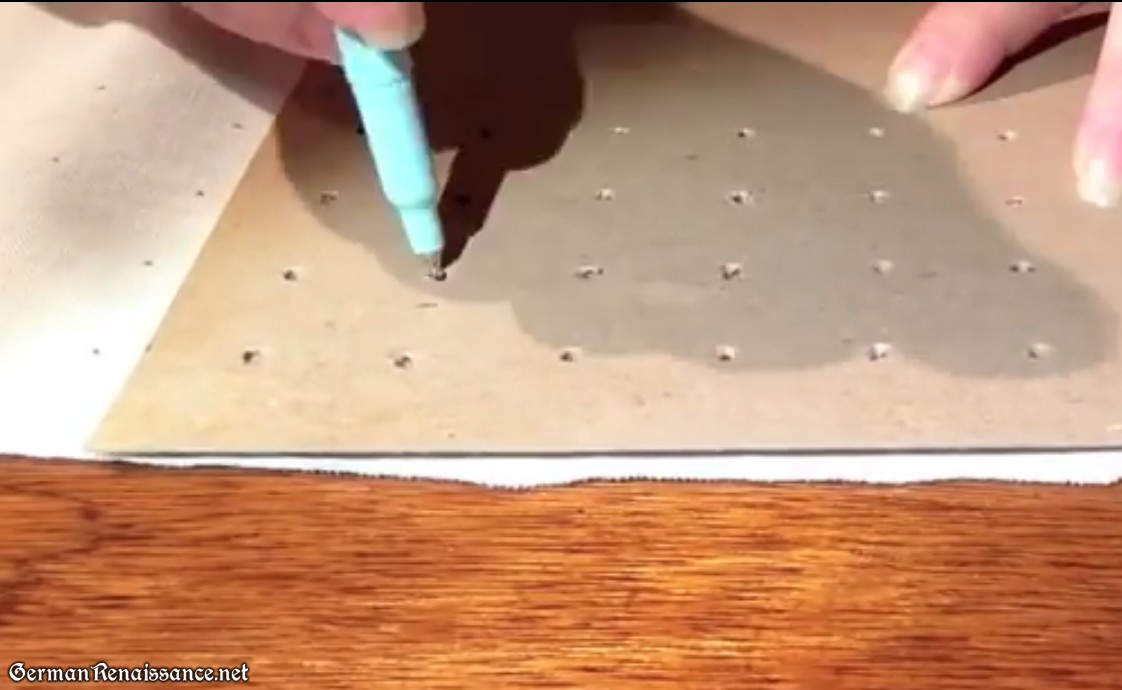
3. PEN: Mark the fabric with a water-soluble fabric marking pen using an evenly spaced grid, like those linked in #1, with each dot pre-punched so the tip of your pen fits through. If your fabric is thin, you can place it over a grid, which should be visible through the thin fabric, and just mark it that way. You can view a video of me marking dots for gathering here. You can also just use a ruler to mark your dots. [Note: As fabric-soluble pens did not exist in the 15th and 16th centuries, this would not be a historically accurate method.]

4. CARBON: Using a carbon copy paper and a grid like those linked in #1, sandwich the carbon paper between your fabric and the grid. Now press on the dots on your grid to transfer the carbon mark to your fabric. [Note: As carbon paper did not exist in the 15th and 16th centuries, this would not be a historically accurate method.]
5. IRON ON: Iron on dots set in a grid pattern to the wrong side of the fabric. Such dots are available for purchase from smocking supply outlets. You can also make your own dots on a laser printer (not an inkjet printer) using just regular white copy paper then use an iron to transfer them to the wrong side of the fabric (the toner will transfer to your fabric dark enough to see). Note that toner is more or less permanent, though it may fade in time. Iron on dots should be able to be washed out. [Note: As iron-on transfers and toner did not exist in the 15th and 16th centuries, this would not be a historically accurate method.]
6. MACHINE MARK: You can use a Bernina (930 or old 1130), or another machine with the capability, to mark your fabric. To do this, starch your fabric then run it through the machine at a long stitch length, unthreaded, with a thick needle. (Method contributed by my friend Noel Gieleghem.)
How to Sew the Fabric for the Gather Method
There are variety of ways to sew the running stitches so you can gather your material into pleats.
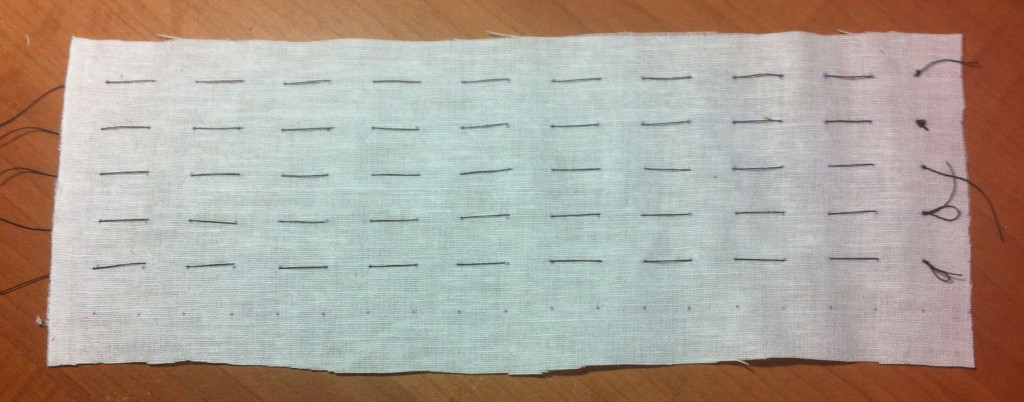
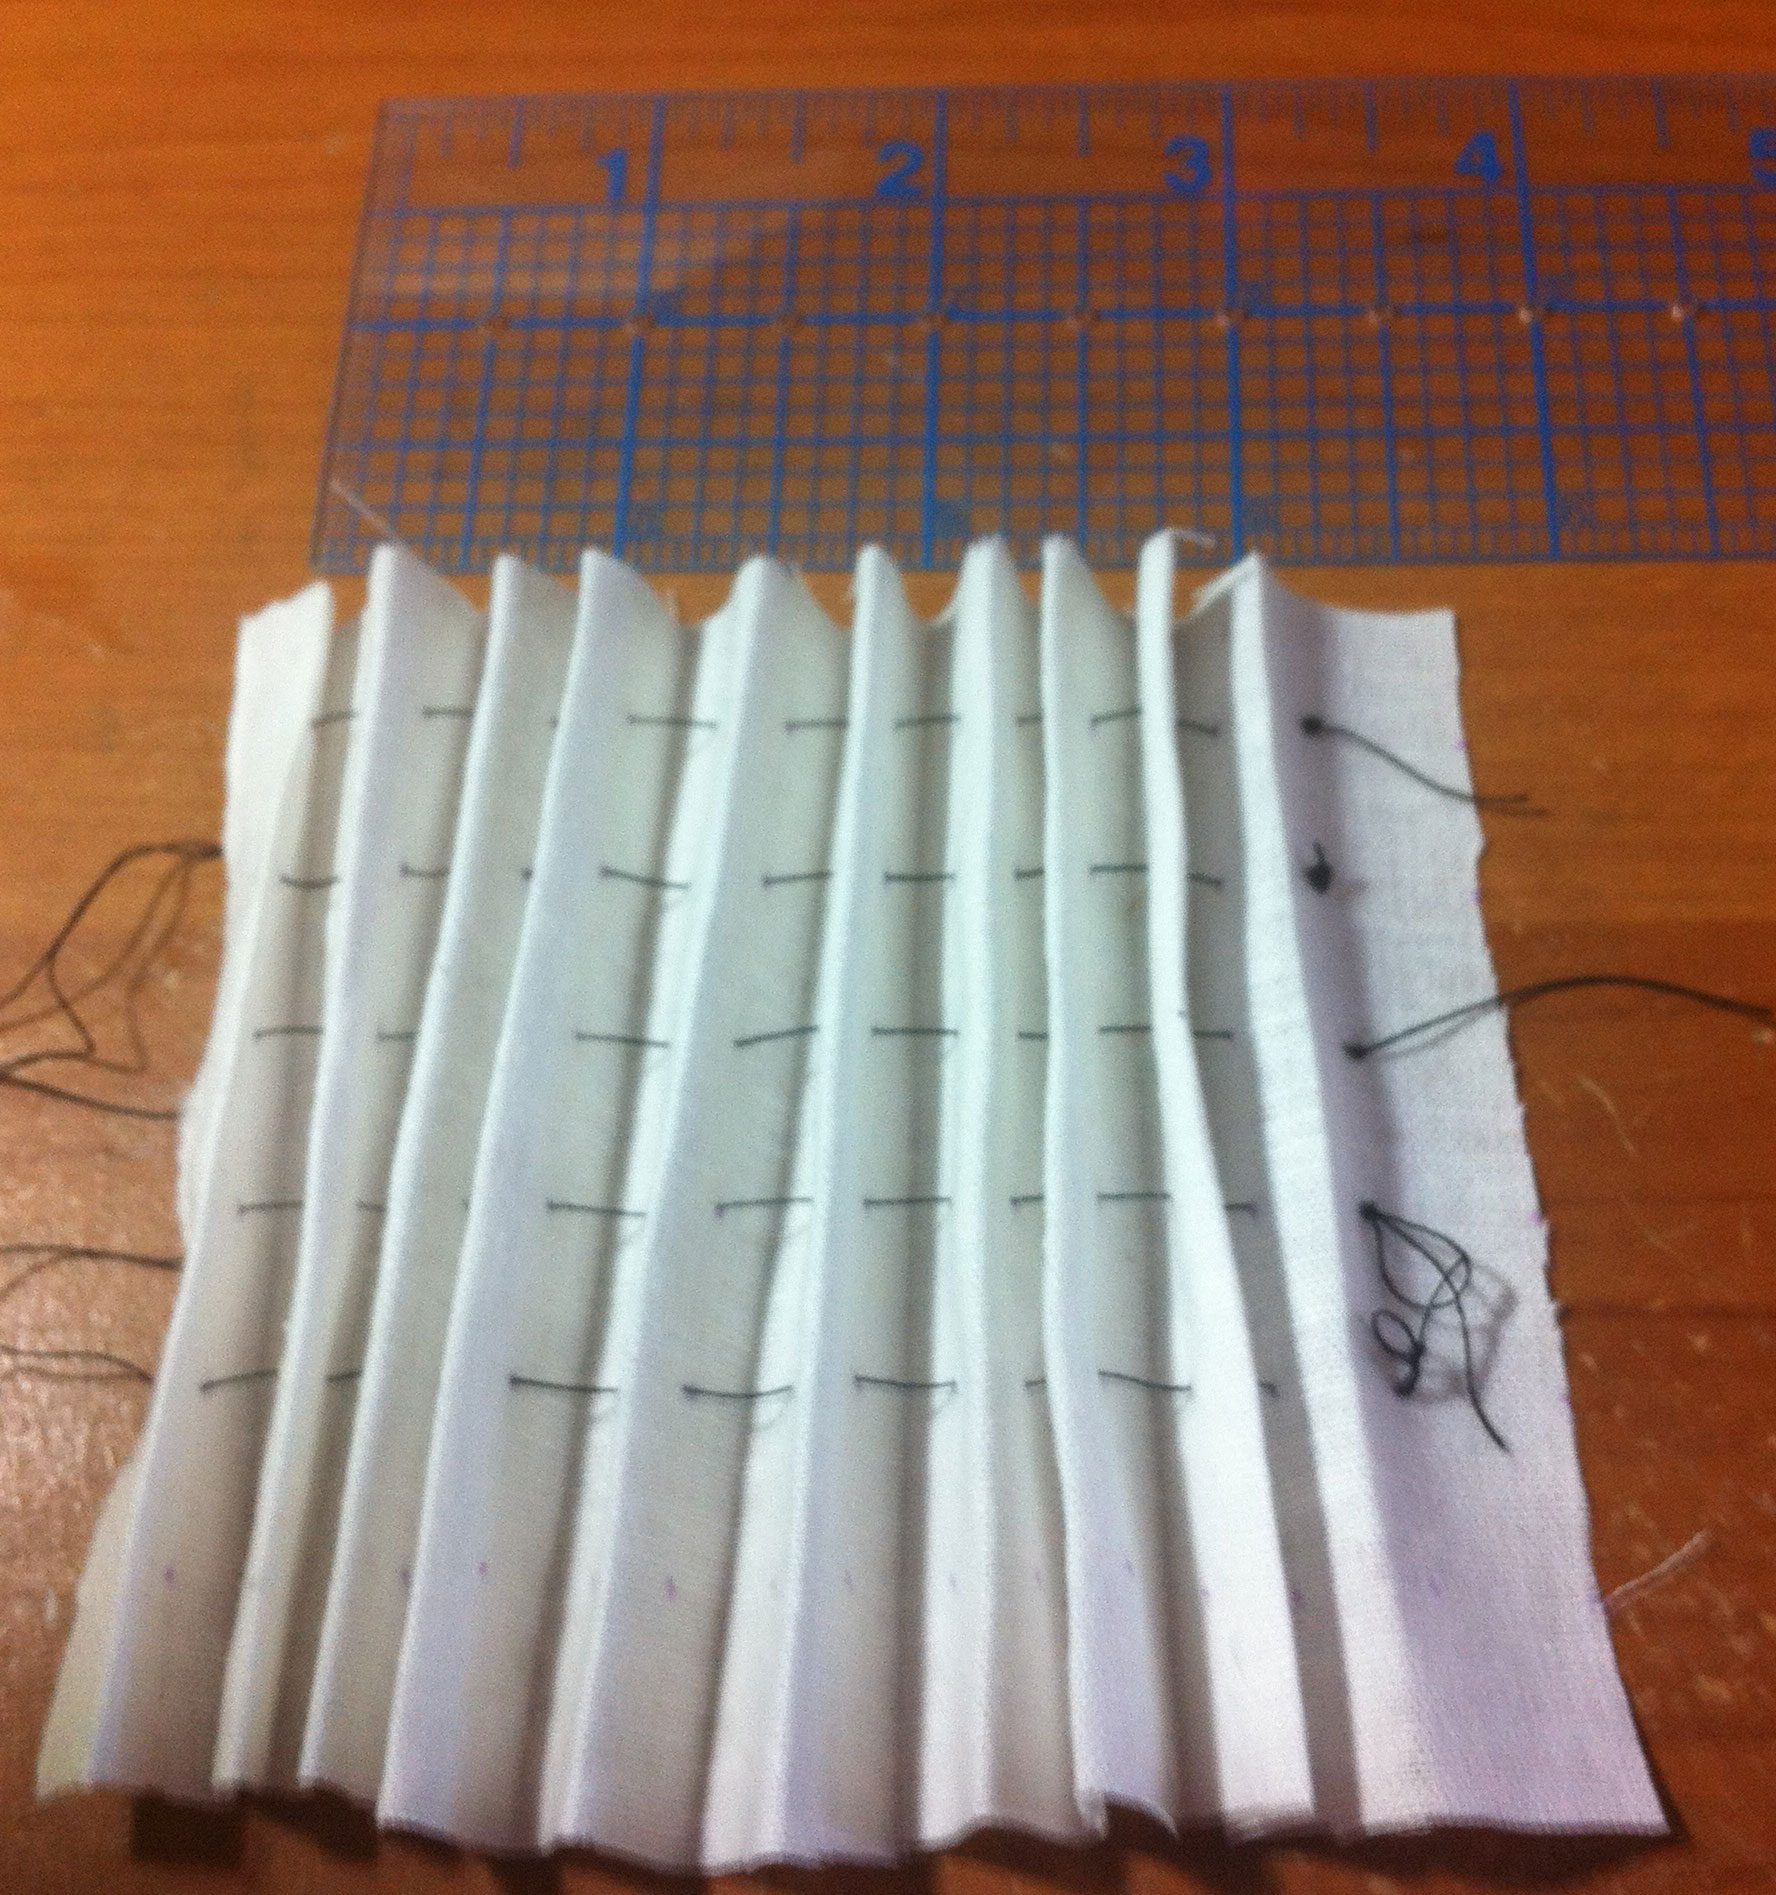
A. MARKED: If you marked your fabric first, sew each row of holes/dots with strong, waxed thread, pushing your needle into the first hole/dot, pushing it out the next hole to the left/dot, pushing it into the next hole on the right/dot, and so on until you reach the end of the row*. Always work from right to left. Each row should be sewn with one length of thread only. Pull on all threads at once to gather the folds. [Note: I employed this method of the Dorothea Meyer hemd — see tutorial here.]
* There is an alternate method called “picking up the dots” where you push the needle on one side of a marked hole/dot and out the other side (see the fourth, fifth, and sixth illustrations at the start of this section above). This method results in an uneven running stitch, which may or may not work well for you as it produces a lopsided gather that is less stable. I do not use this method in my work as I prefer more precision. I do not currently have evidence that this method was used historically, but I haven’t ruled it out, either.
B. COUNTED: If you didn’t mark your fabric first, you can count the threads in your linen and sew your running stitches exactly straight on the grain and an exact number of threads from one another. Be sure each row of running stitches is one length of thread and one length only. When done, pull on all threads to gather the folds.
C. NEEDLE LENGTH: If you didn’t mark your fabric first, you can use your needle as a measuring tool to judge the distance between running stitches — you may wish to mark you needle with a pen or a piece of tape for a consistent distance each time. Be sure each row of running stitches is one length of thread and one length only. When done, pull on all threads to gather the folds.
D. EYEBALL: If you didn’t mark your fabric and aren’t concerned with your stitches being the same distance from one another, you can just eyeball the running stitches. It’s a bit messier, but that is sometimes fine for certain things. What’s most important with each subsequent and parallel row of running stitches line up with the previous rows so that when you pull the threads to gather the pleats they fold neatly.
E. MACHINE SEWN: You can use a pleater to sew the running stitches for you. A pleater is a non-electrical machine with a series of needles around a drum. You feed your material into the pleater, which inserts the running stitches for you. The pleater was invented in the late 1940s. [Note: I do not have a pleater and cannot attest to its usefulness in pleatwork, though many of my friends like them but warn that a pleater isn’t always easy to use and it can be difficult to line the running stitches up with the grain. And as pleaters did not exist in the 15th and 16th centuries, this would not be a historically accurate method.]

Read Pleater (photo copyright Nylh)
Am I missing any methods for marking or gathering? Let me know in the comments!
Regardless of which method you use, the gather method usually ends up looking something like one of these photos once you have gathered and pulled your threads:
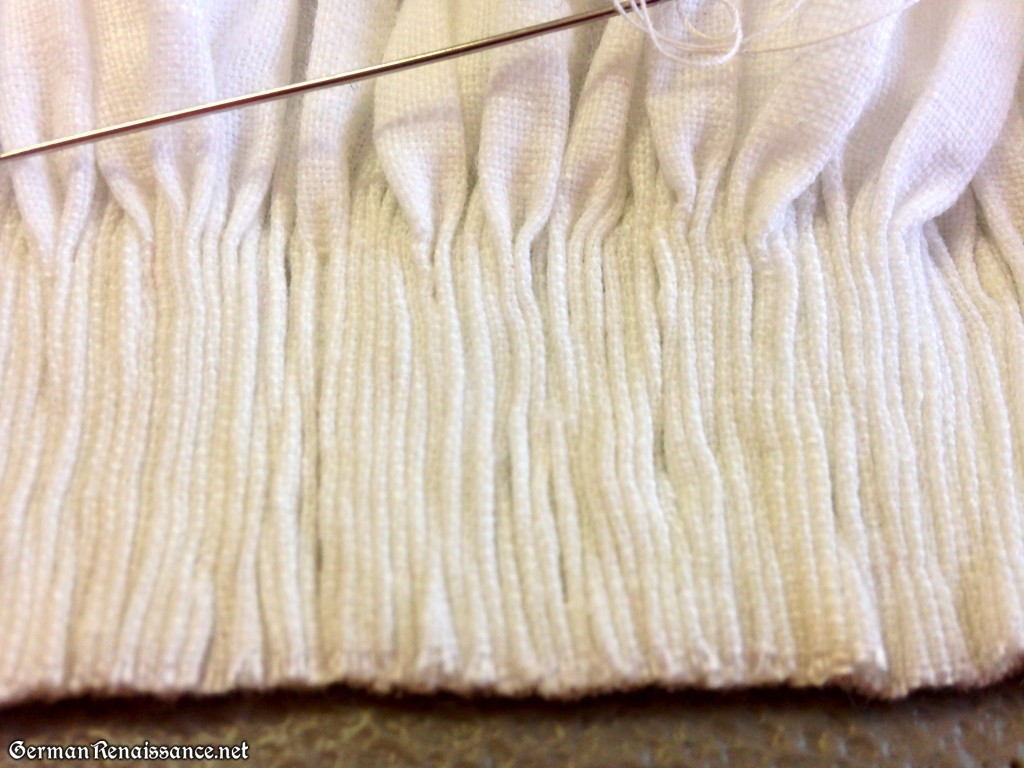
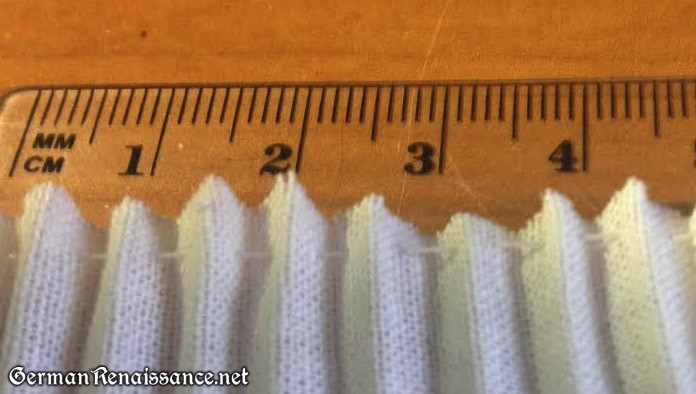
1/4″ running stitch, gathered tightly (great for securing with stem stitches or casements)

1/2″ running stitch, not pulled tightly (great for securing with the honeycomb stitch)
Next up: The Heat Set Method of Creating Pleats (coming soon!)
Previous: The Press Method of Creating Pleats
Go to the Introduction (Main Page) or the Table of Contents

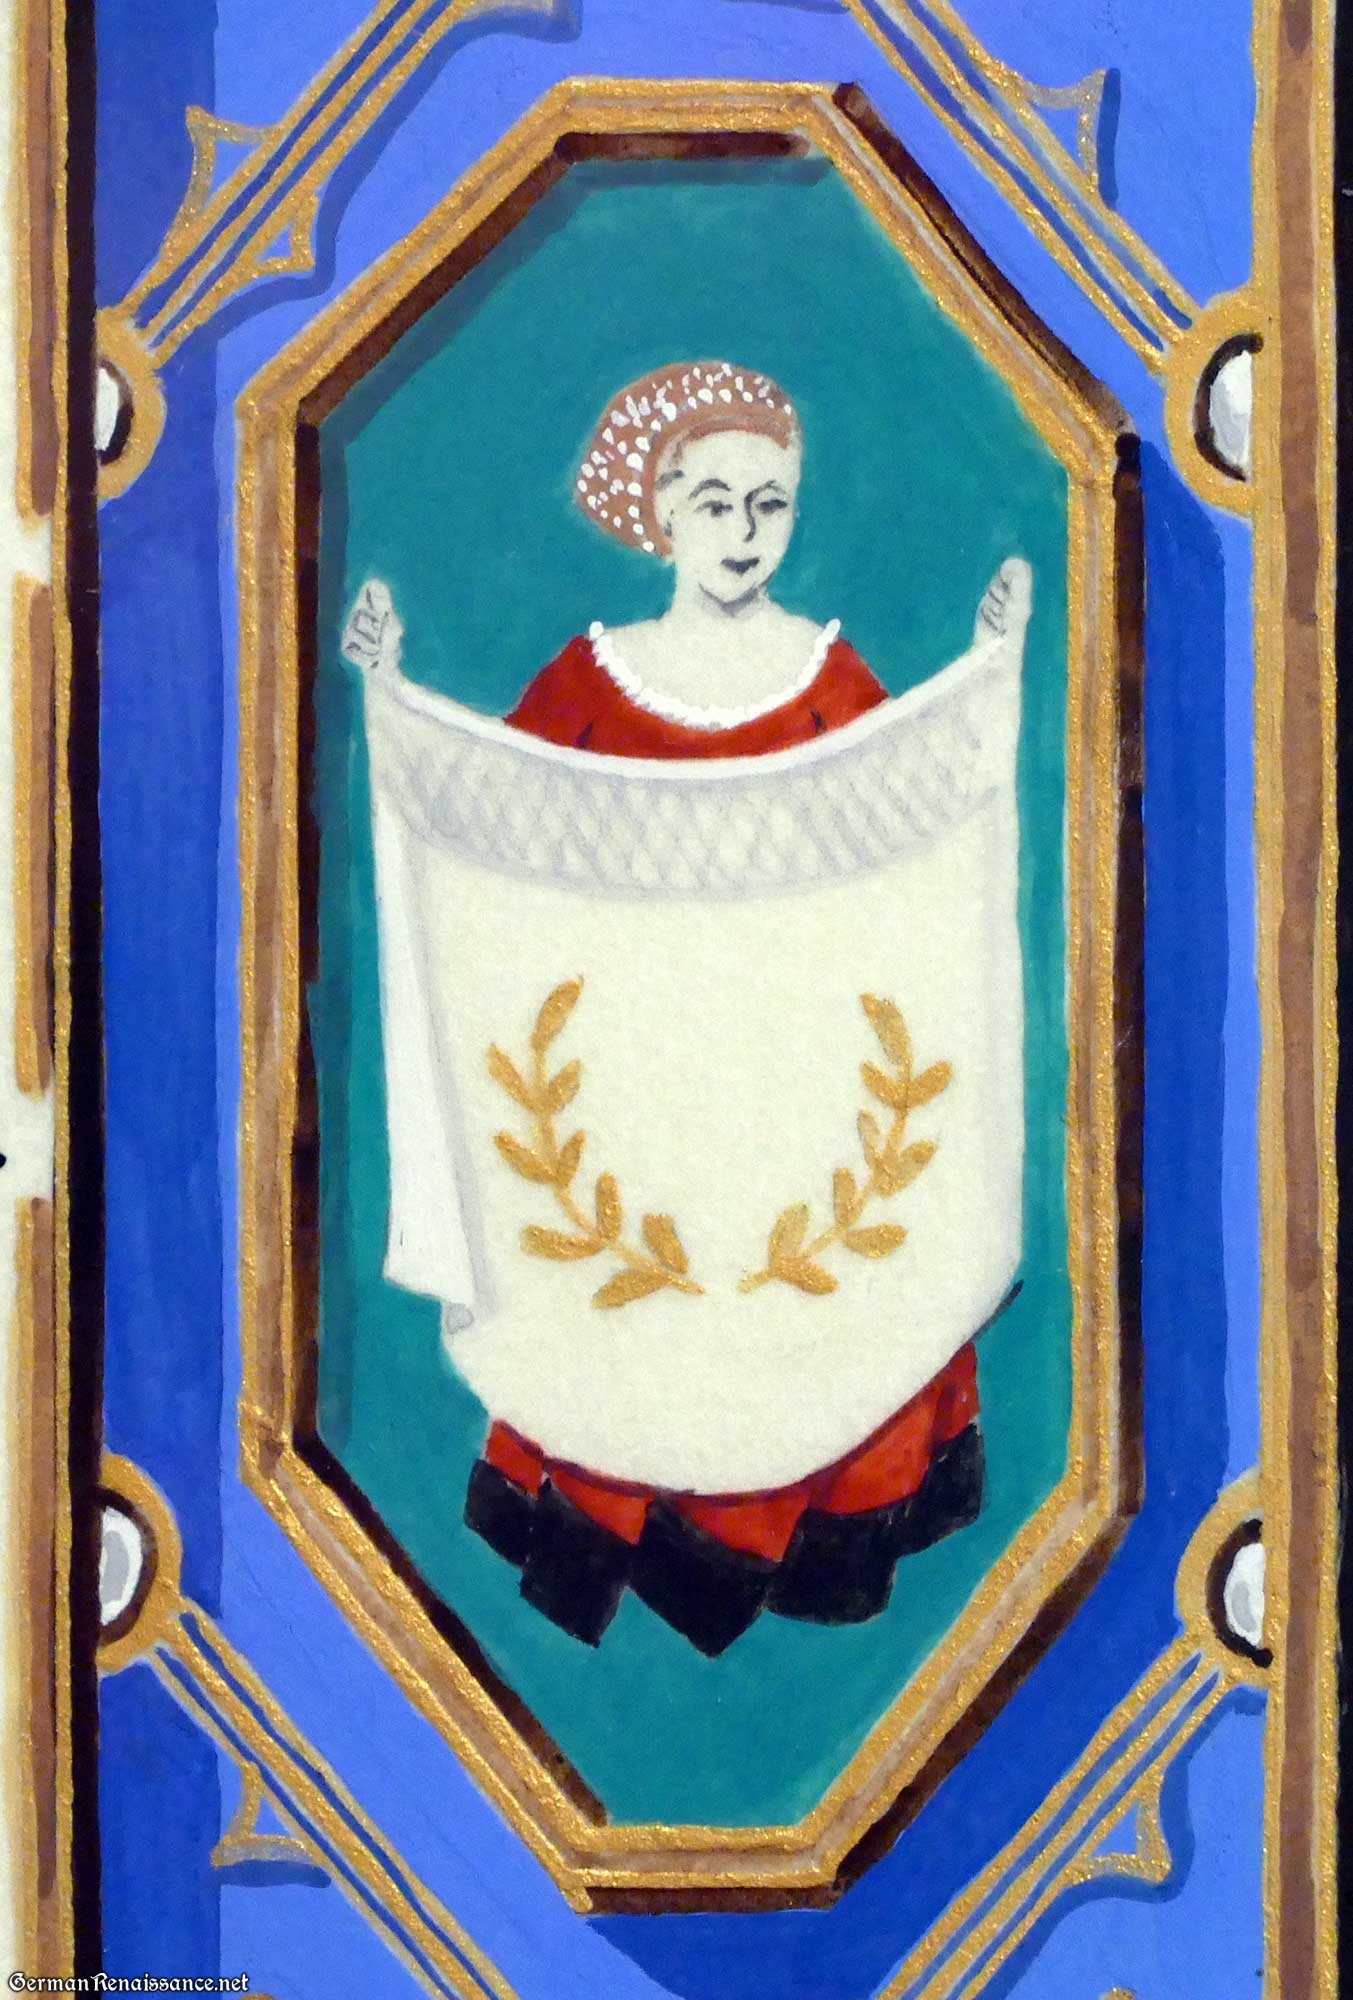 Lady Aeffe illuminated the scroll, and you’ll note the striking similarity to the extant scroll with notable and personal differences. Aeffe explained that the “original image of Veronica holding up her veil with its miraculous image of Christ’s face was changed to a miniature of you [Genoveva], in your distinctive dress, holding up a pleated piece of fabric with a Laurel wreath in lieu of Christ’s face.” That was a stroke of brilliance, for pleatwork is my passion. I’ve included a closeup of that part of the scroll so you can admire the artistry. You’ll also note my arms appear at the bottom in place of the Lamb of God. The plethora of pearls and gems are particularly appropriate to my persona. And, though it wasn’t planned, the acorn is a symbol of my Laurel’s (Mistress Crespine’s) sisterly household. The acorn is also the very first award token I ever received in the Barony of Cynnabar.


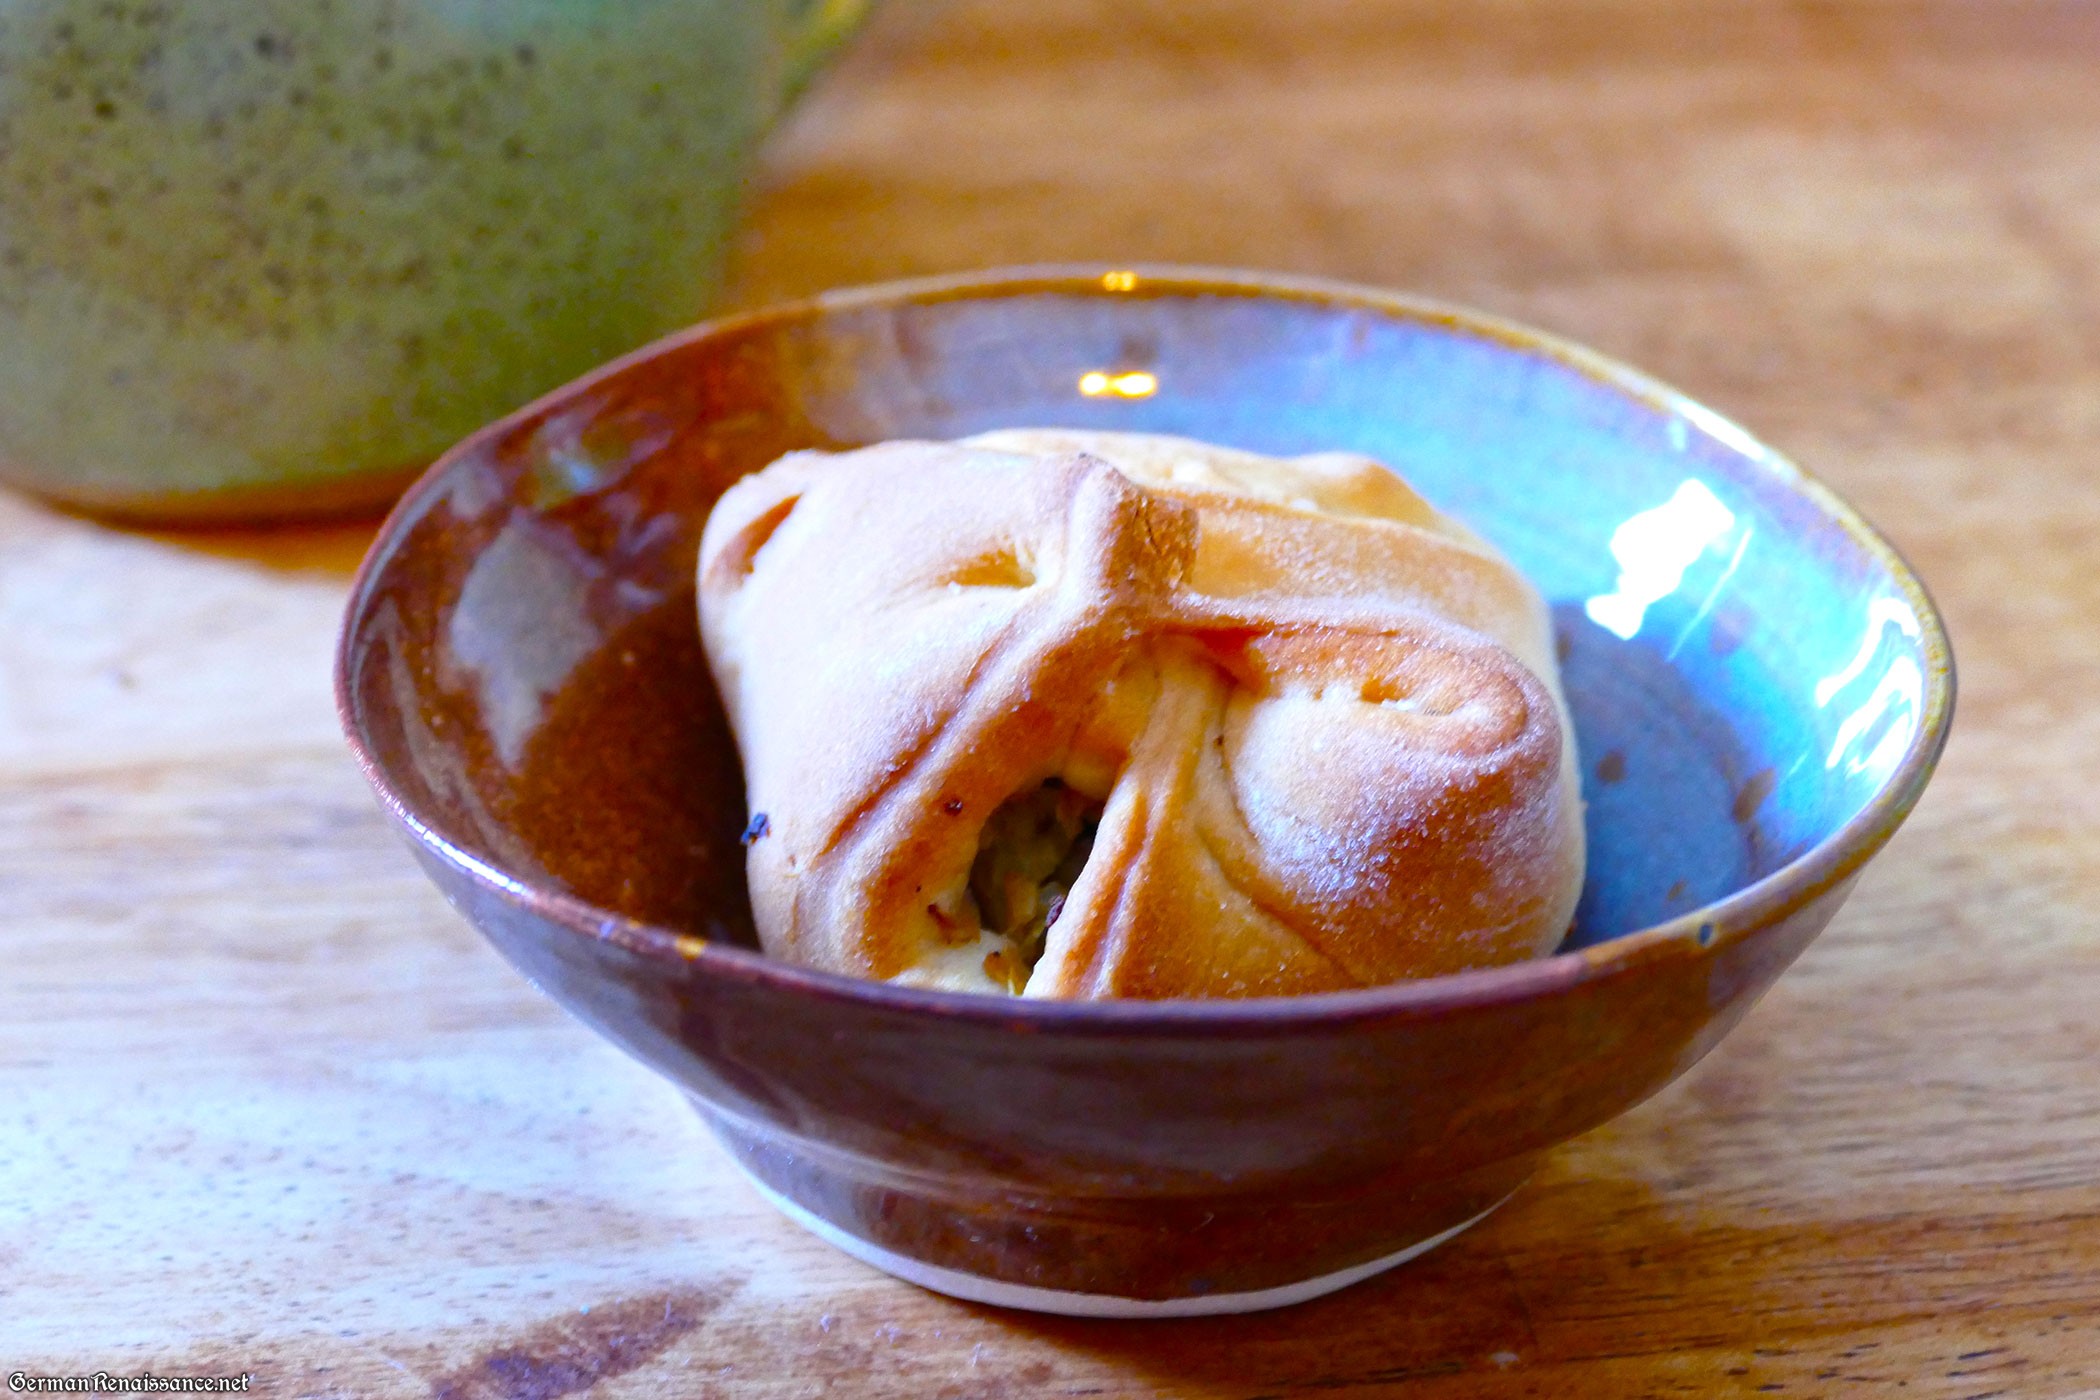
 Brezel
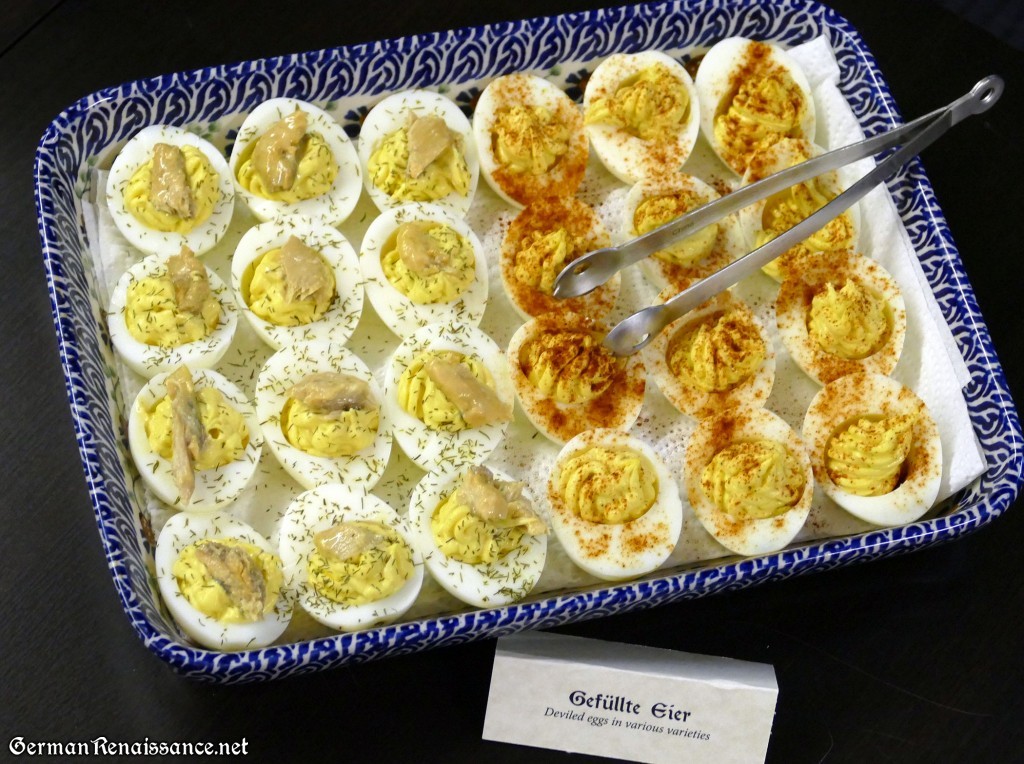 Gefüllte Eier


