Among the many other bits of attire appropriate to a German male of the 16th century you’ll find a good pair of woolen hosen (pants). I’ve actually been trying to make a pair of good hosen since April. My first pair, which were based off a Reconstructing History pattern and “draped” to my guy’s leg, looked “ok” but promptly ripped when worn the first day. Hosen fail!
So for my second attempt, I’m not going to rely on someone else’s pattern. Instead, I’ve researched some source images to get a better idea of who they were constructed. Then I’m making my OWN pattern, based on Gregor’s measurements, with the help of Mistress Melisant who is the goddess of all things costuming. If you find yourself in the same boat as me, come along on my voyage. First stop — the source images!
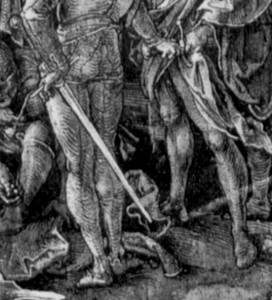
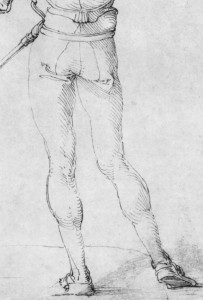
This first photo is one of my favorites, for it shows both the front and back of the hosen. The back view, in particular, shows the SEAMS, which you’ll note go up the back leg and across the rear at an angle. This is what I’ll be shooting for in my pair of hosen, too.
This photo shows that back seam very clearly (click on the image for a better view)! And note that the waist of the hosen go up quite high — do not mistake the belt for the waistline.
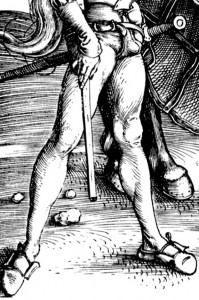
And here’s a good view of the front, including the codpiece:
Other observations: the hosen are quite tight and appear to be full-footed, because they go right down into the shoe.
I did look about for extant hosen, but I could not find any with the diagonal seam.
So my next step was to visit Mistress Melisant during our monthly Garb Workday. She had me take these measurements of Gregor:
Real waist – 45″
Hip – 47″
Thigh – 25″
Knee – 16.5″
Below knee – 15 3/4″
Calf – 18″
Ankle – 10″
Around heel (widest part over top of foot and heel) – 14″
Waist to floor – 46.5″
Crotch seam – 37″
Inseam – 32″
Rise – 12″
The rise, interestingly, was measured by sitting down on a table and measuring from the tabletop to the waist. Cool!
Based on these measurements, Melisant sketched out a not-to-scale diagram with measurements, which I then drew to scale on a piece of Kraft paper to create my pattern. It’s a crazy looking pattern. I’ll take a photo of the pattern later and include it here.
Once I had a pattern, I laid out my pre-washed, pre-shrunk, and ironed wool on the cutting surface and carefully found the BIAS of the wool (the exact diagonal of the fabric’s weave). You cut hosen on the bias so that they’ll stretch and form better to the leg. And it’s important to find the exact bias, because if you’re a little off, they hosen will twist on you (thanks, Mistress Melisant, for telling me that!)
So I cut out a red wool leg and a black wool leg. Gregor’s hosen pattern wouldn’t quite fit on the fabric, so each leg in two pieces — there will be another seam inside the leg, hopefully hidden and not uncomfortable.
Now I just need to baste the legs up the back seam, baste the two legs together, and have Gregor try them on. I left about 2″ seam allowance all around for adjustments. And I’ll tackle the foot and codpiece later!
Photos to follow!


Hi Genoveva, I realize this is a pretty old post, but do you have any pictures? Picture of the pattern would be great. My other half’s measurements are pretty close to those of Gregor so it would give me a good idea if what I came up with is going to work.
Thanks, Inge