Yesterday I discussed how I constructed my favorite high-collared smock which I wore through most of Pennsic. Today I will explain how I finished the collar with honeycomb pleatwork (smocking). (For those looking to make the honeycomb pleatwork apron, check the Patterns page for the instructions!)
Pleatwork is a very common method of gathering, sizing, and embellishing cloth in 16th century Germany. We call it pleatwork (fitz-arbeit), rather than smocking, as a way to differentiating between the creation of the pleats and the embroidery upon them (which isn’t something we’re doing here).
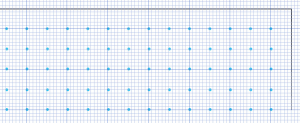
To get started, lay your constructed-but-unpleated smock collar out on a flat surface. Using a strait ruler (or one of my dot templates on the Patterns page) and a water-soluble fabric pen, place a row of small dots on your collar every 1/2″, about 1/2″ to 1″ below your top hem and 1/2″ or 1″ in from the edge of your hemmed opening (go for more space at the top of your collar for a bigger “ruffle” and more space at both ends of your collar if you’re concerned about sizing). Measure down a 1/2″ and make another row. Continue until you have five rows, which is about how many will fit on the 3″ collar you have after hemming it down to about 2.5″ or so. It’s fine to do four or six rows if it makes more sense. The dots will form a nice grid on your fabric, like this:
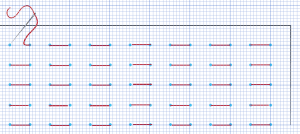
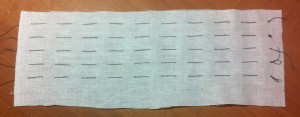
Now take thread and needle (single thread, knotted on one end) and do a full running stitch along each row of dots, with your needle coming up through the material at each dot and going back in at the next one. This gives you stitches exactly 1/2″ apart. Stitch each row with its own length of thread, leaving a long tail of the thread at the end. It does not matter the type or color of thread used here because you will be removing these stiches later.
When all five rows have been sewn with the running stitch, pull on the five threads together to gather the material into pleats. You should gather the material into the length you wish your collar to be — my pattern should gather your 44″ of material into about 16″ of loose pleats (the average woman’s neck is about 15″, the average man’s neck is about 16″). Please keep in mind that the length may vary somewhat. If it the pleated collar is too short, loosen your gathering threads to the desired length. As mentioned earlier, you can start your pleats in 1″ on either side of your collar, which will give you more room to play with (and you can always go back and pleat those if it turns out your collar is too big).
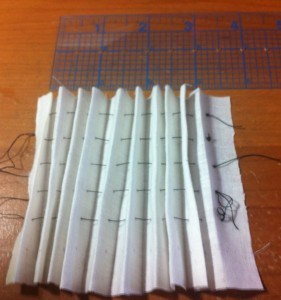
Tip: Pinch and hold the pleats together with your fingers once gathered, creasing them. Ironing is also fine if you wish, but only if the marking pen you use allows it (some specifically say not to use an iron). Historically, they would have wetted the material and used a press or simple gravity to crease the pleats. Creasing them like this makes the next steps easier and makes the pattern we’re about to make stand out nicely.
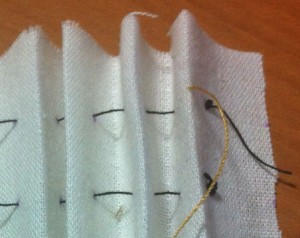
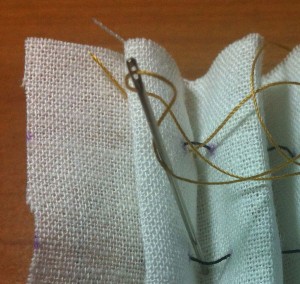
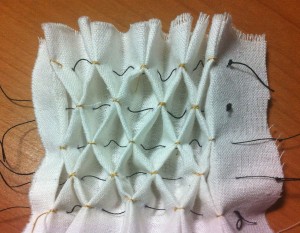
Now take some good white thread (I recommend silk), thread your needle, and knot it well at the end. (Note: The photos below show gold thread rather than white just so that you can see where the stitches appear.) Wax your thread with beeswax to strengthen and lubricate your thread. Bring your first stitch up from the back of your fabric to the front, right into the top-right pleat, as shown in the photo below.
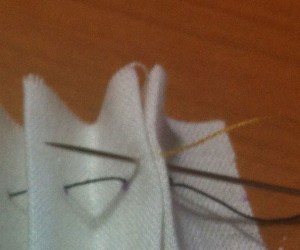
Now put your needle through the top edge of the pleat you started at and the next one to the left, as shown below.
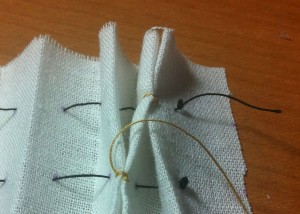
Pull the needle through, then backstitch over these two pleats twice to secure them together.
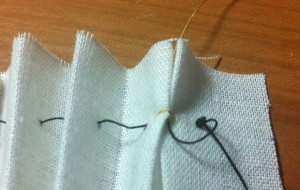
Push your needle back into the second crease, maneuvering it so it stays in the crease on the backside, then push it back through on the row below.
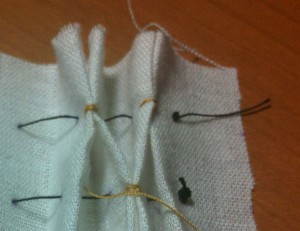
Repeat with the two creases on the row below, making sure you’re offsetting the pleats (this is how you get the honeycomb pattern). Backstitch at least twice to secure the stitch before inserting your needle back in behind the crease.
Push your needle back up through the fabric, behind the crease, at the top of the next pleat and stitch again.
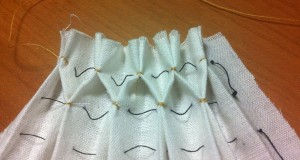
Continue like this across the top two rows.
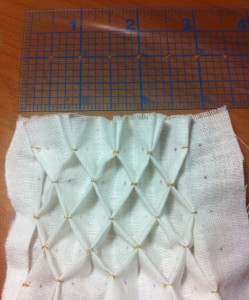
And then finish the other rows. If you have five rows, as I do in my sample, you’ll end up with the fifth row by itself — just move your thread up to the pleats above to anchor it behind the folds before moving onto the next stitch. When finished, triple knot your thread behind the fabric and cut. Here is the sample with all five rows stitched:
Now cut off the knots of the thread you used to gather your pleats and gently pull them out.
This 10″ sample of fabric pleated down into about 3.5″, give or take a bit — remember, this is stretchy, as you can see in the next photo.
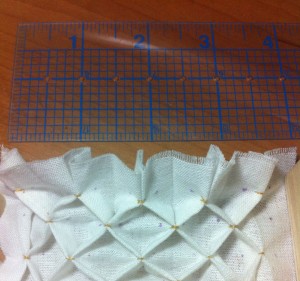
The sample easily stretches to over 4″ with a little pressure. “Medieval elastic!”
My unterhemd pattern has a 44″ collar before the pleatwork. Based on the 1/2″ spacing, it pleats down to about 16″ (or 18″ when stretched). These numbers can vary a bit depending on how tight you pulled your pleats, and how much extra space you left at the end of your rows. But this method worked well for me!
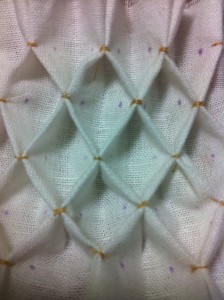
And here is a close-up of the honeycombs, just because I love them:
Don’t forget to rinse out your material to erase the marks!

I use plastic canvas to mark my dots with–you can vary the sizing and its really easy to keep them straight.
I also don’t run the drawstrings first, unless I’m planning on leaving them in. I’ve found that it doesn’t make much of a difference in the end product and definitely does cut the time required. Thanks for sharing your shirt pattern! I still don’t have one I like, so will be trying yours for my next one. 🙂
Thank you so much for this shirt pattern. I just finished making one and I love it! Now I must make something (better than what I already used) to wear over it. It looks awesome.
I tried running drawstrings and doing without on the sleeves. They both have their advantages.
Thanks again for the great pattern!