
Gregor’s leder wams
I’ve researched the 16th century German leder wams, also known as a leather doublet or vest, commonly word by Landsknecht soldiers.
I’ve draped a pattern for a leder wams, using my son as a model for the step by step photos.
I’ve made a full-size, full-leather leder wams for my man Gregor, who has now worn it many times to great success.
Now … I will show you how I did it so you can make one, too. It’s easier than it initially looks, and it wears fabulously!
First, a word about the material. You need real, good-quality leather; not pleather, not vinyl, not wool. Leder wams appear to only ever have been made from leather — cow or bull leather, to be specific. Look for an upholstery leather, about 3 oz. thick. Full or top grain quality. You want it soft enough to mold to the body, but thick enough to be durable. Also, if you get upholstery leather, be wary of super shiny finishes — if you cannot get a full grain finish, you’ll want to deglaze it with acetone. You could also wear the leather with the shiny/smooth side in; there’s is evidence to suggest soldiers did that. If your leather is too boardy and stiff, such as with a tooling leather, stick it in the dryer (air only; not heat) with a clean old shoe and/or some tennis balls to soften it up.
Where did we get our leather? Gregor’s dark brown leather is an upholstery leather which we luckily found at a our local surplus store (Scrap Box) — we think it was an auto upholstery remnant, but it was a large, full hide, aniline dyed with a wonderful grain and natural marks. Alexander’s red leather was obtained at Pennsic from The Real Leather People. Your real challenge comes in finding a piece to fit your pattern that is within your budget.
Step 1: Drape your pattern in muslin following my steps. You may be tempted to go right to draping in leather, but avoid it. Leather is pricey if you make a mistake.
Step 2: Cut out your pattern from the muslin and try it on. Now’s the time to fix any mistakes in the pattern.
Cut out your muslin pattern.
Step 3: Layout your leather as flat as possible and position your muslin pattern over it, being careful to minimize waste while at the same time avoiding any serious flaws or holes in your leather.
Layout your leather and muslin pattern.
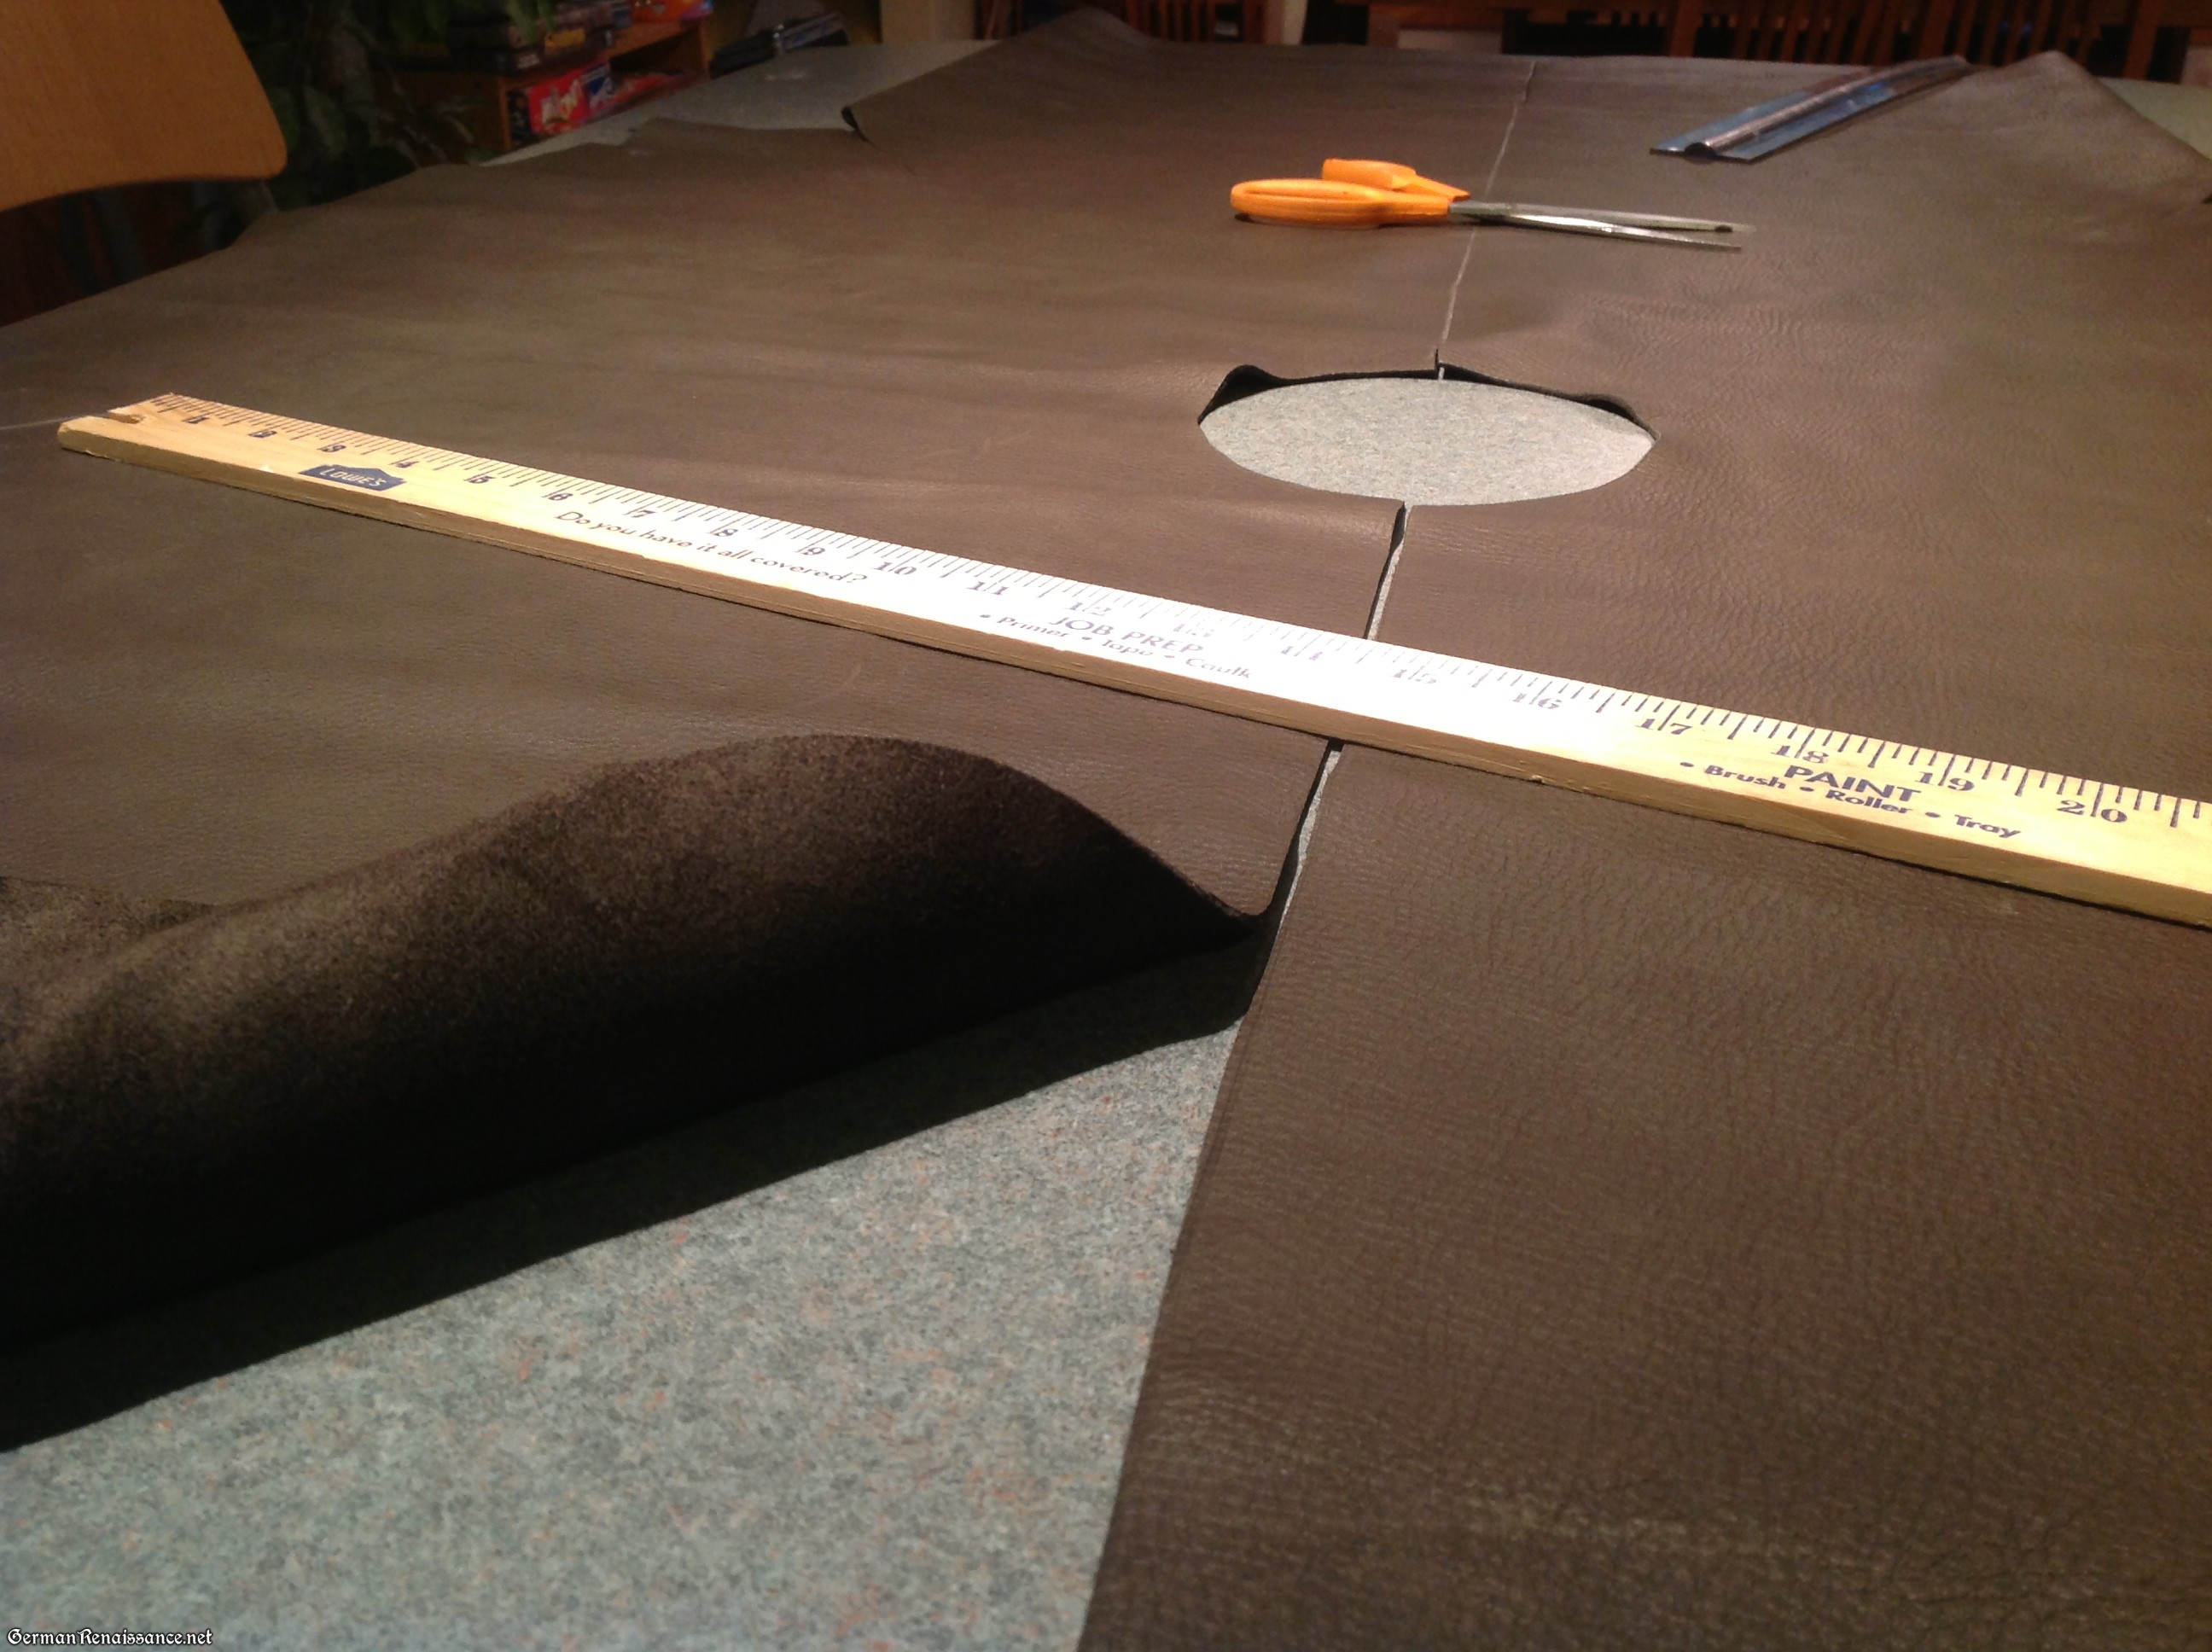
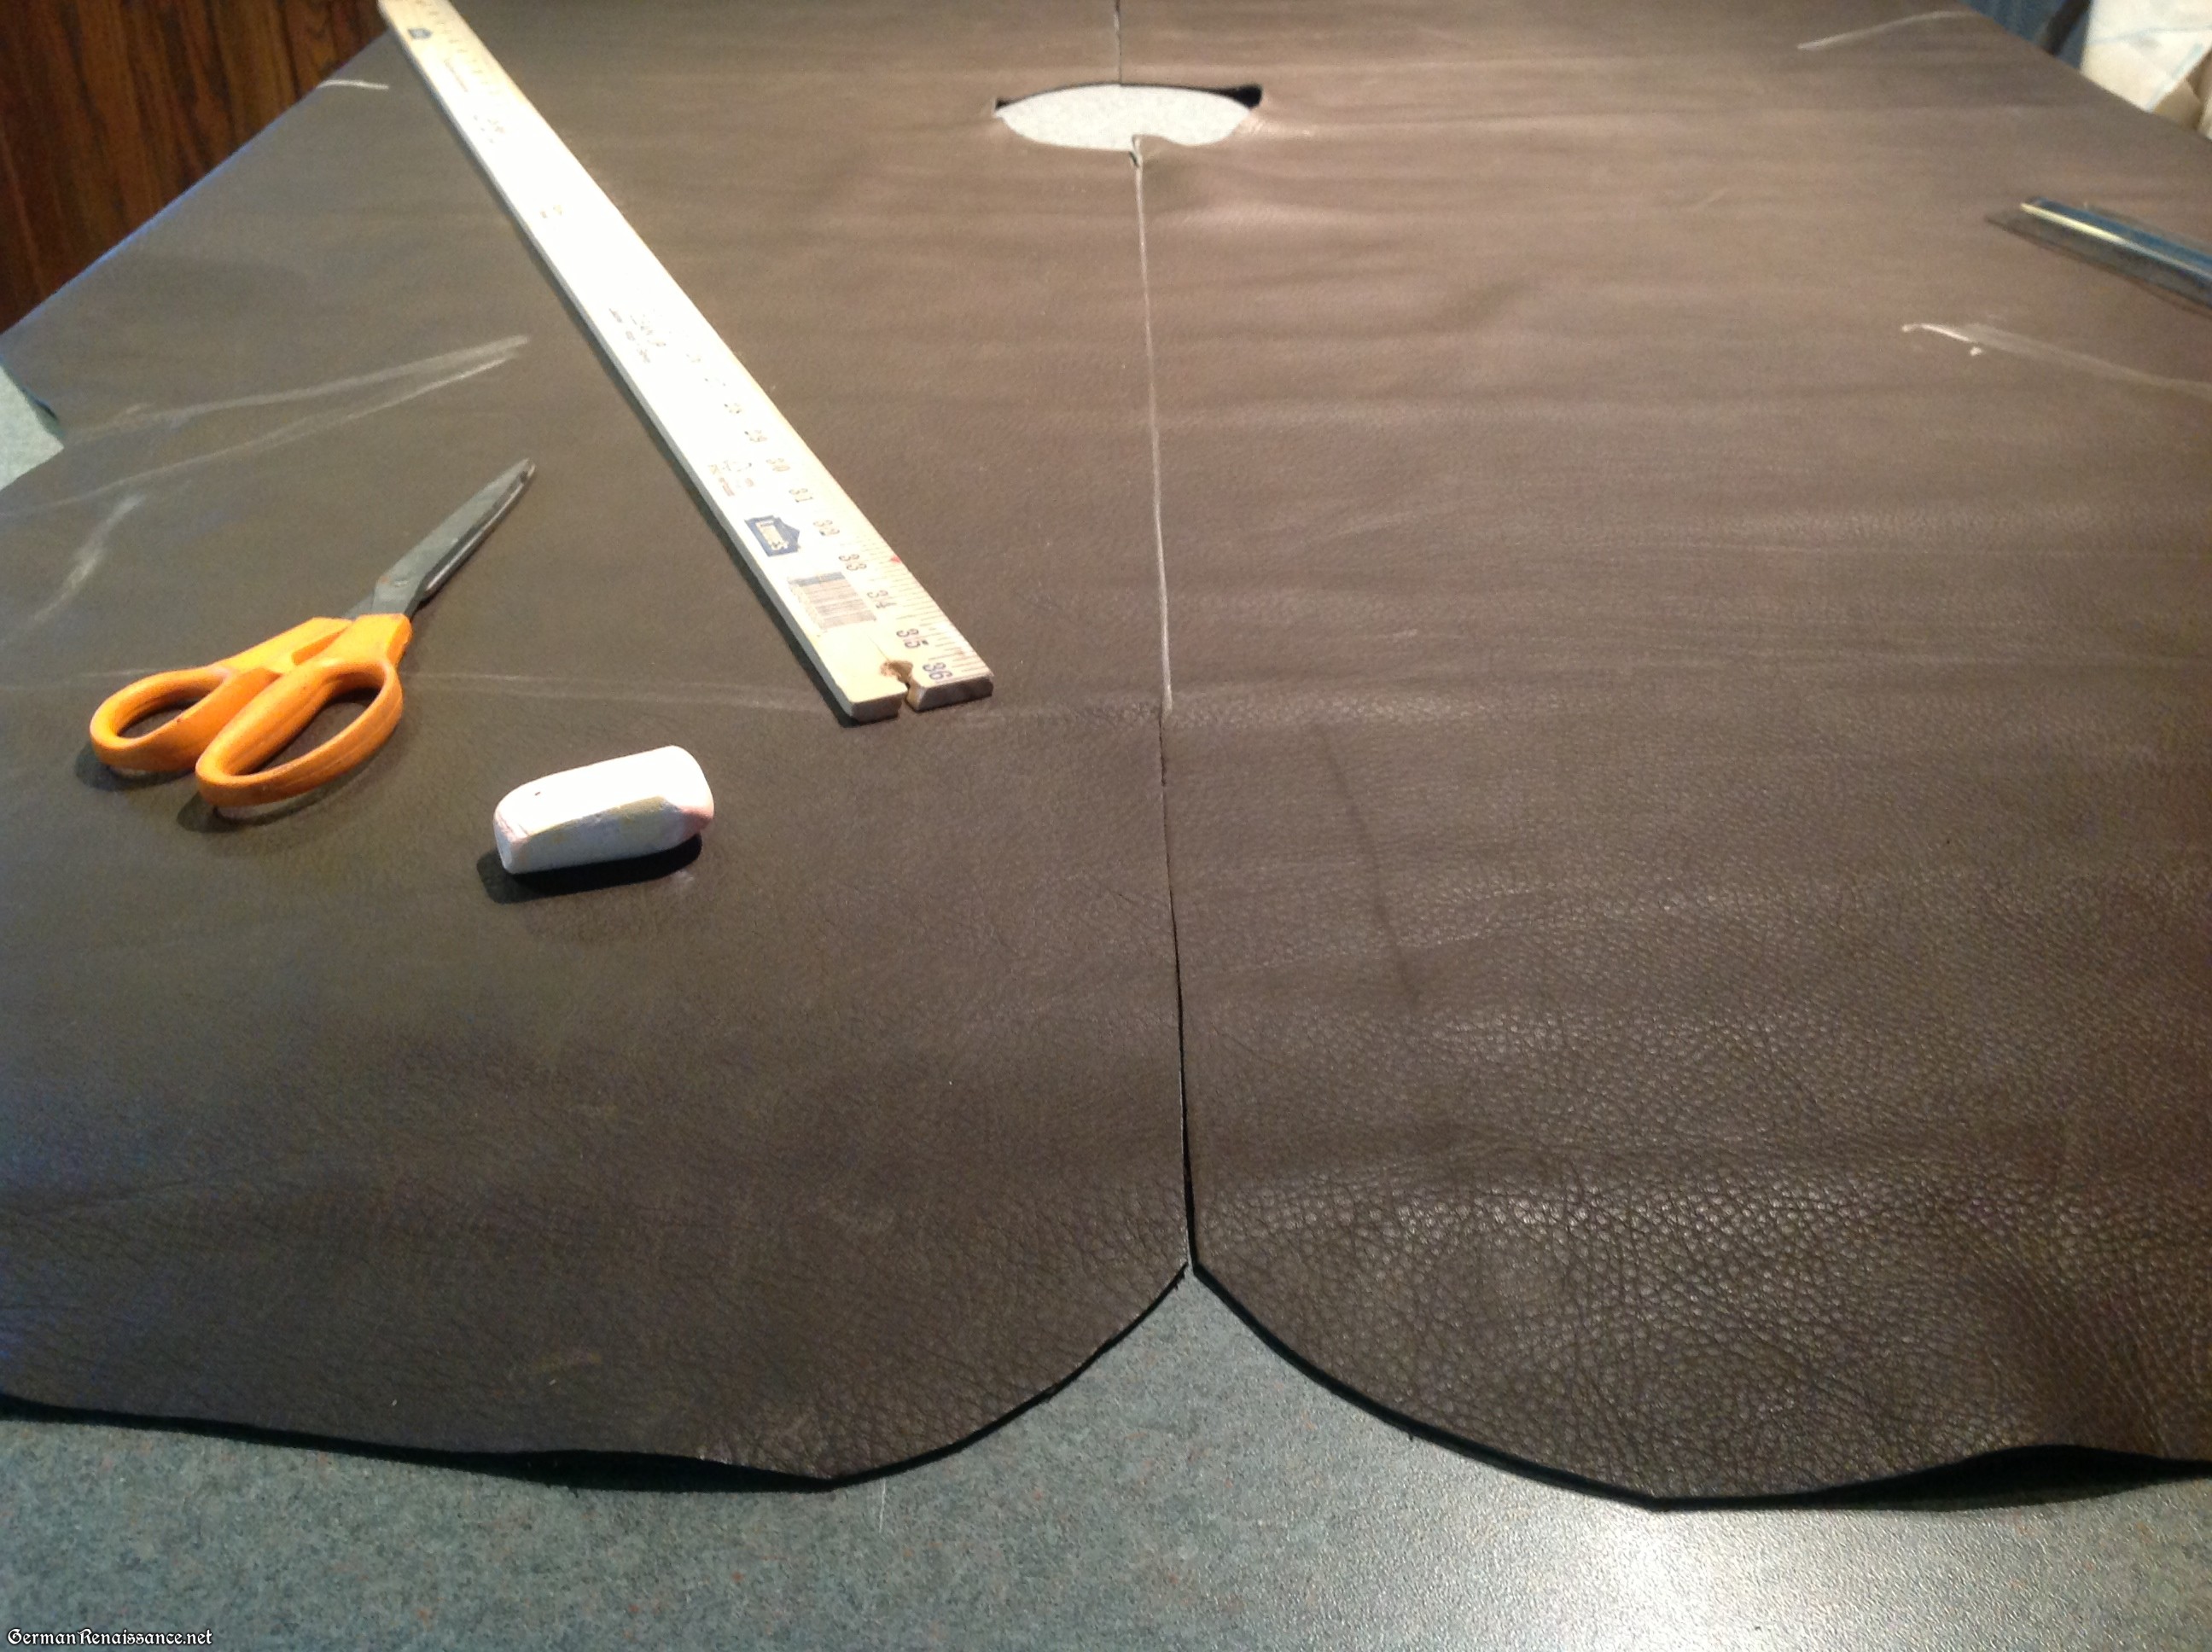
4. Using a rule and a knife (or chalk), make a guideline along the straight front edge, as shown in the photo below. While you’ve got the knife and chalk out, trace the circle for your neck. I used something round (measuring cup) to get a round, smooth line.
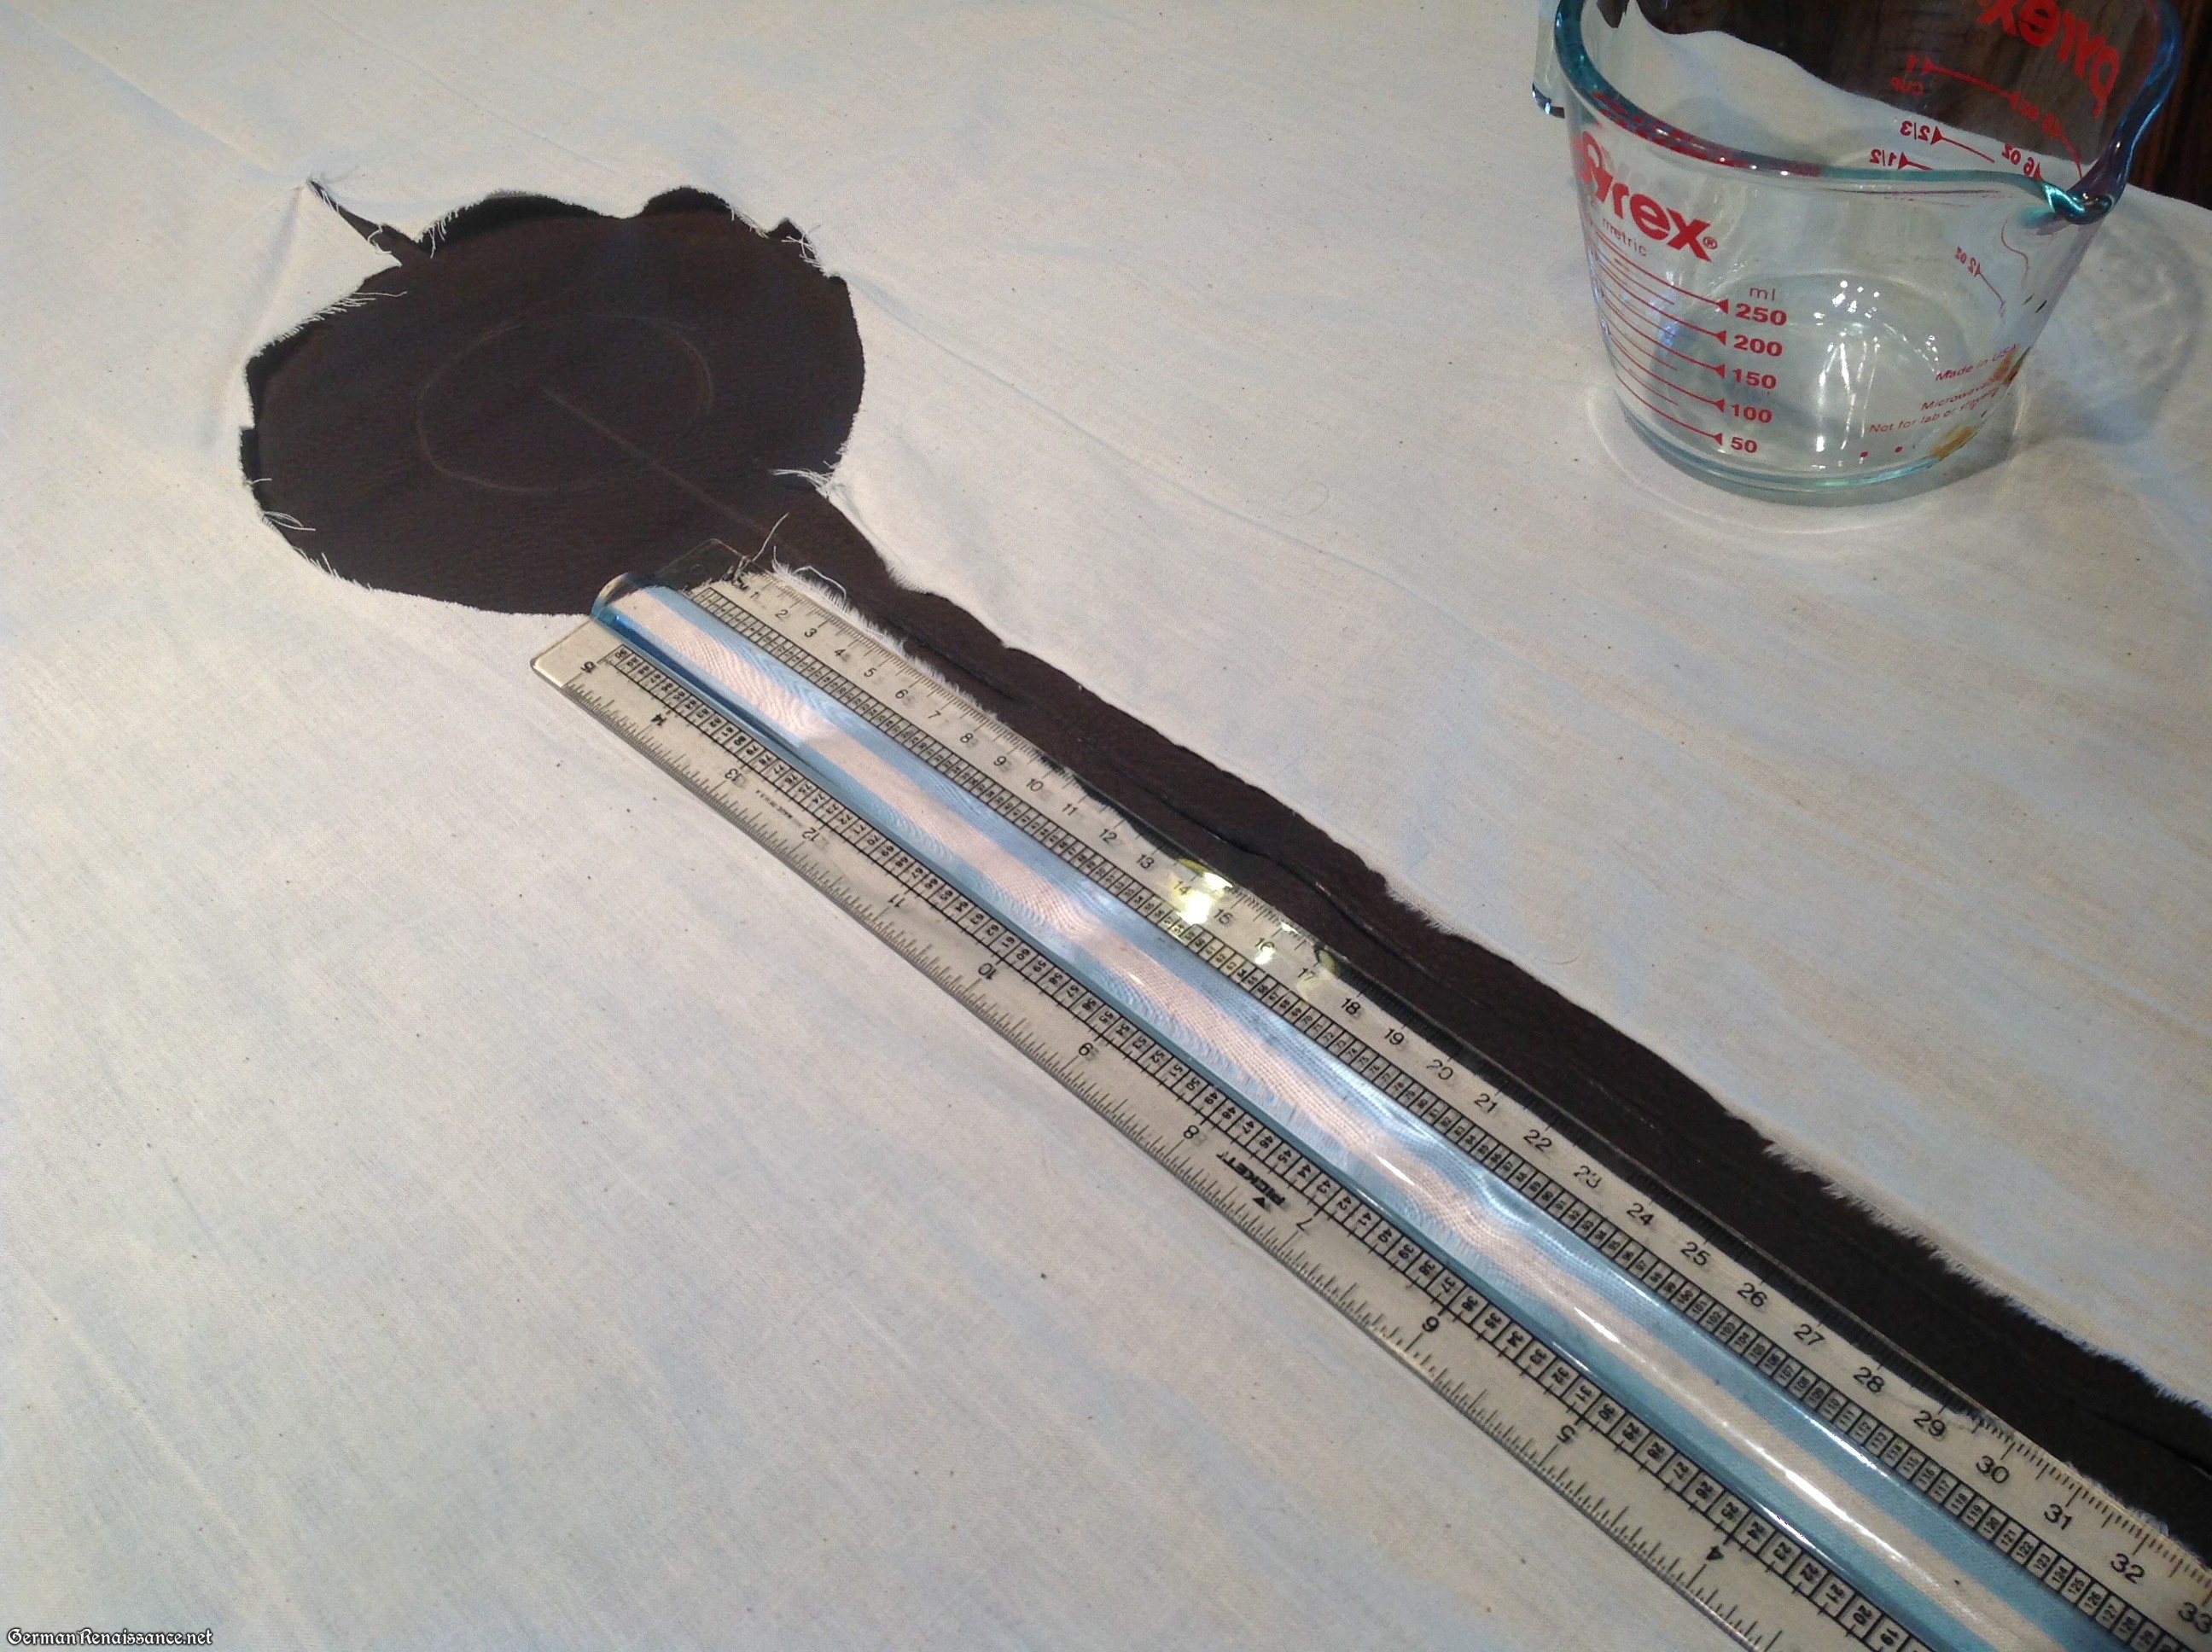
Use a straightedge to make a guideline for your front.
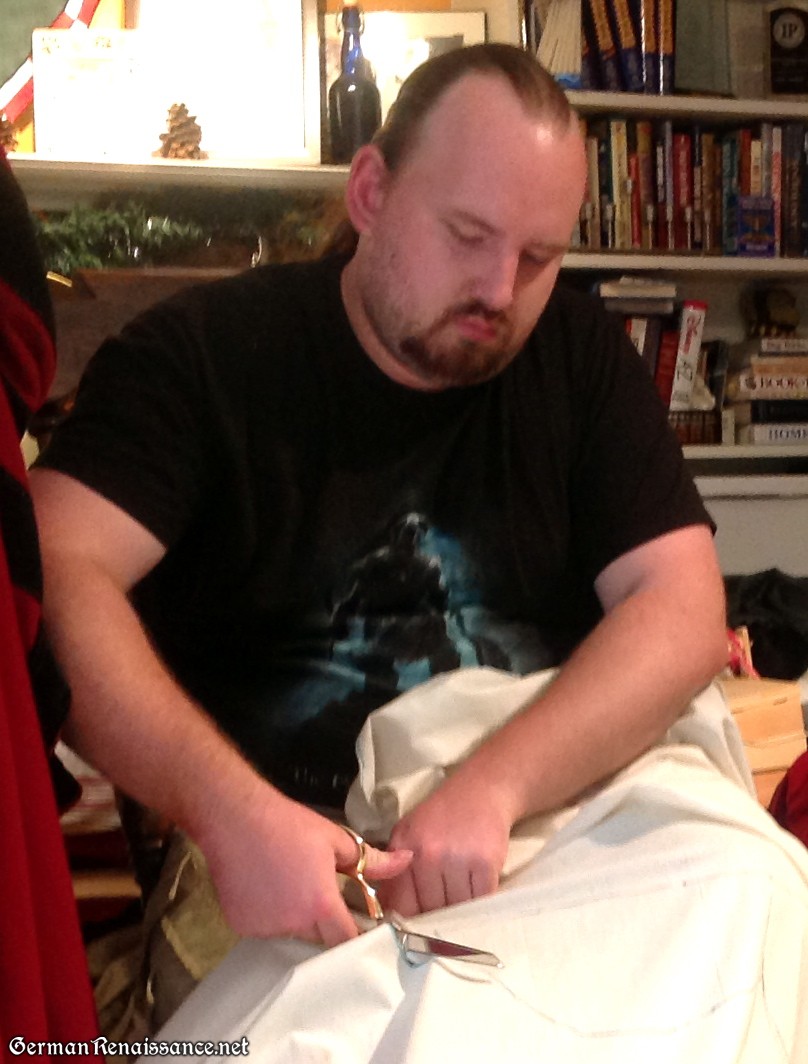
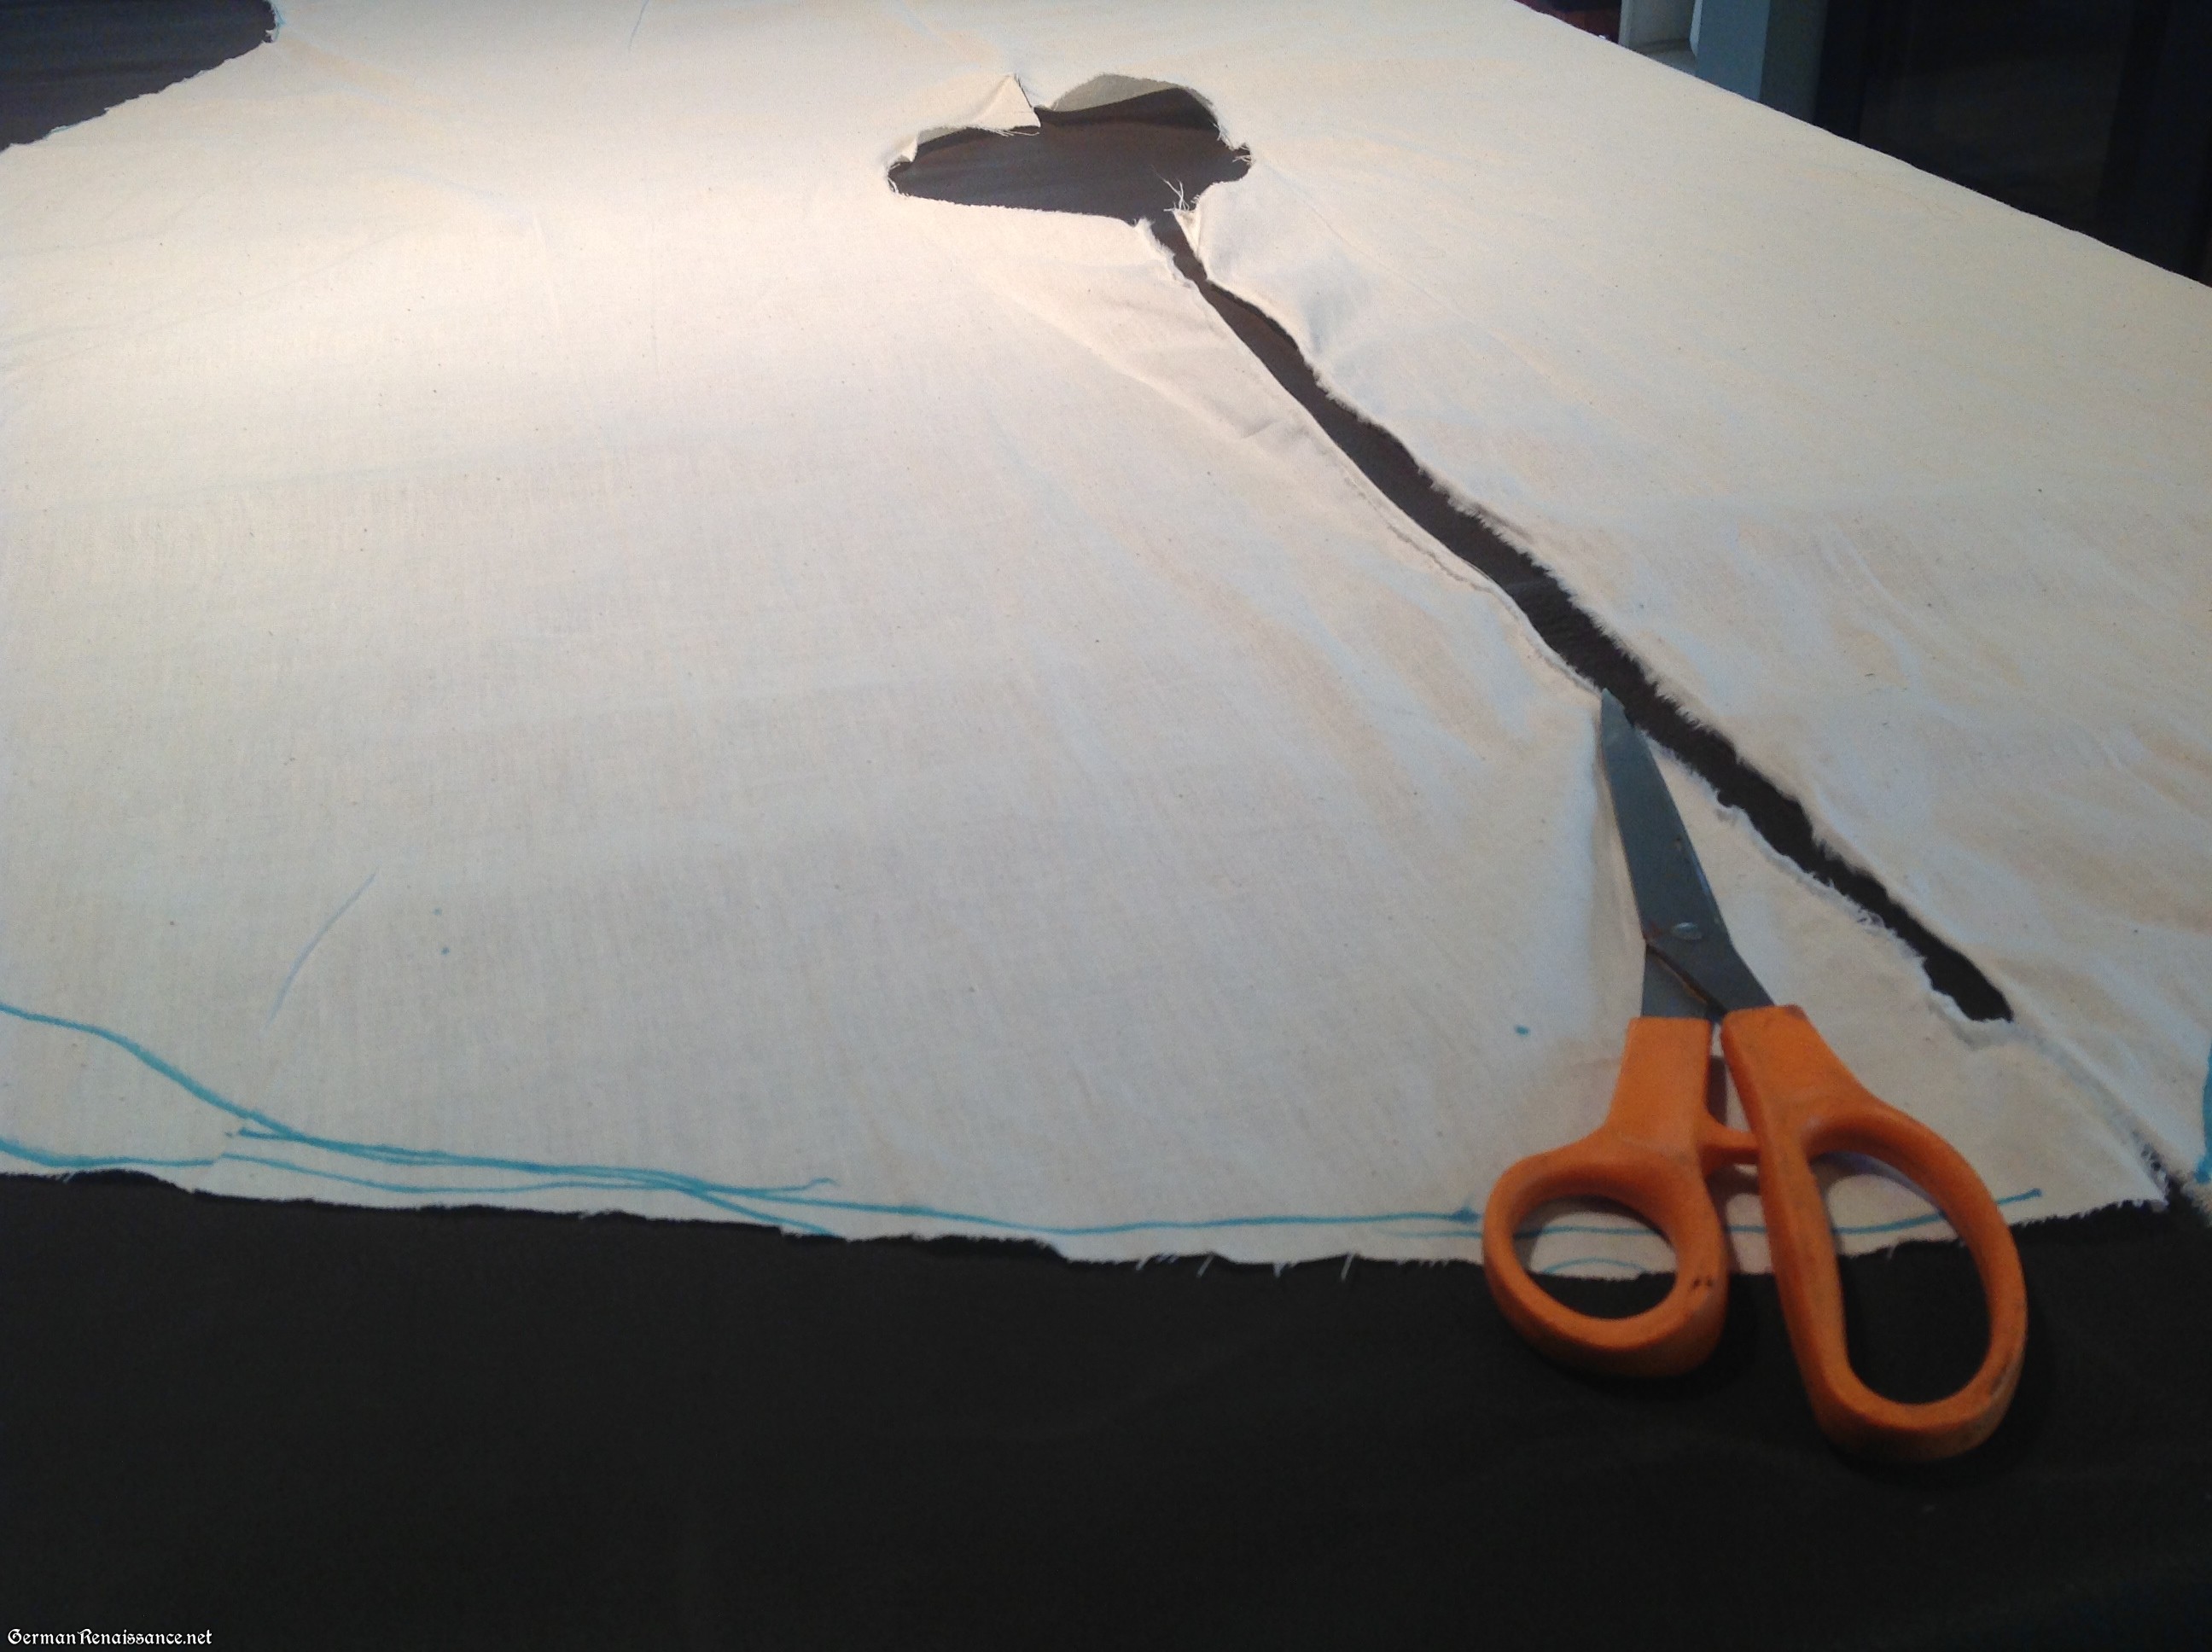
5. Cut your line and circle out using a knife or scissors. If you use scissors, don’t use your best fabric scissors as it’ll just dull them. I used an older pair of craft scissors and it worked fine. Keep in mind your cuts will be seen, so be straight and true.
Cut your neckline and front edge.
6. Line your pattern back up onto your leather and trace around the edges with chalk, and cut. (The only place you need a seam allowance is on the sides (1/2″), if you didn’t already build that into your pattern when you draped it.) If you are at all nervous about making a mistake, there’s nothing wrong with being a bit generous in your cuts and later cutting more. Feel free to take it off your cutting surface and try it on several times during the cutting process. I will admit to doing this, though it turns out I really didn’t need to. The pattern I’d made was good.
Mid-cut, going a little slow as you can see.
7. Drape the leather over yourself and cross over the front sections. Make sure the sides meet (and aren’t too loose). Make sure you can move your arms freely. Correct any issues now. I ended up making deeper cuts in the sleeve for better arm movement. At this point you should also mark where the two sides meet.
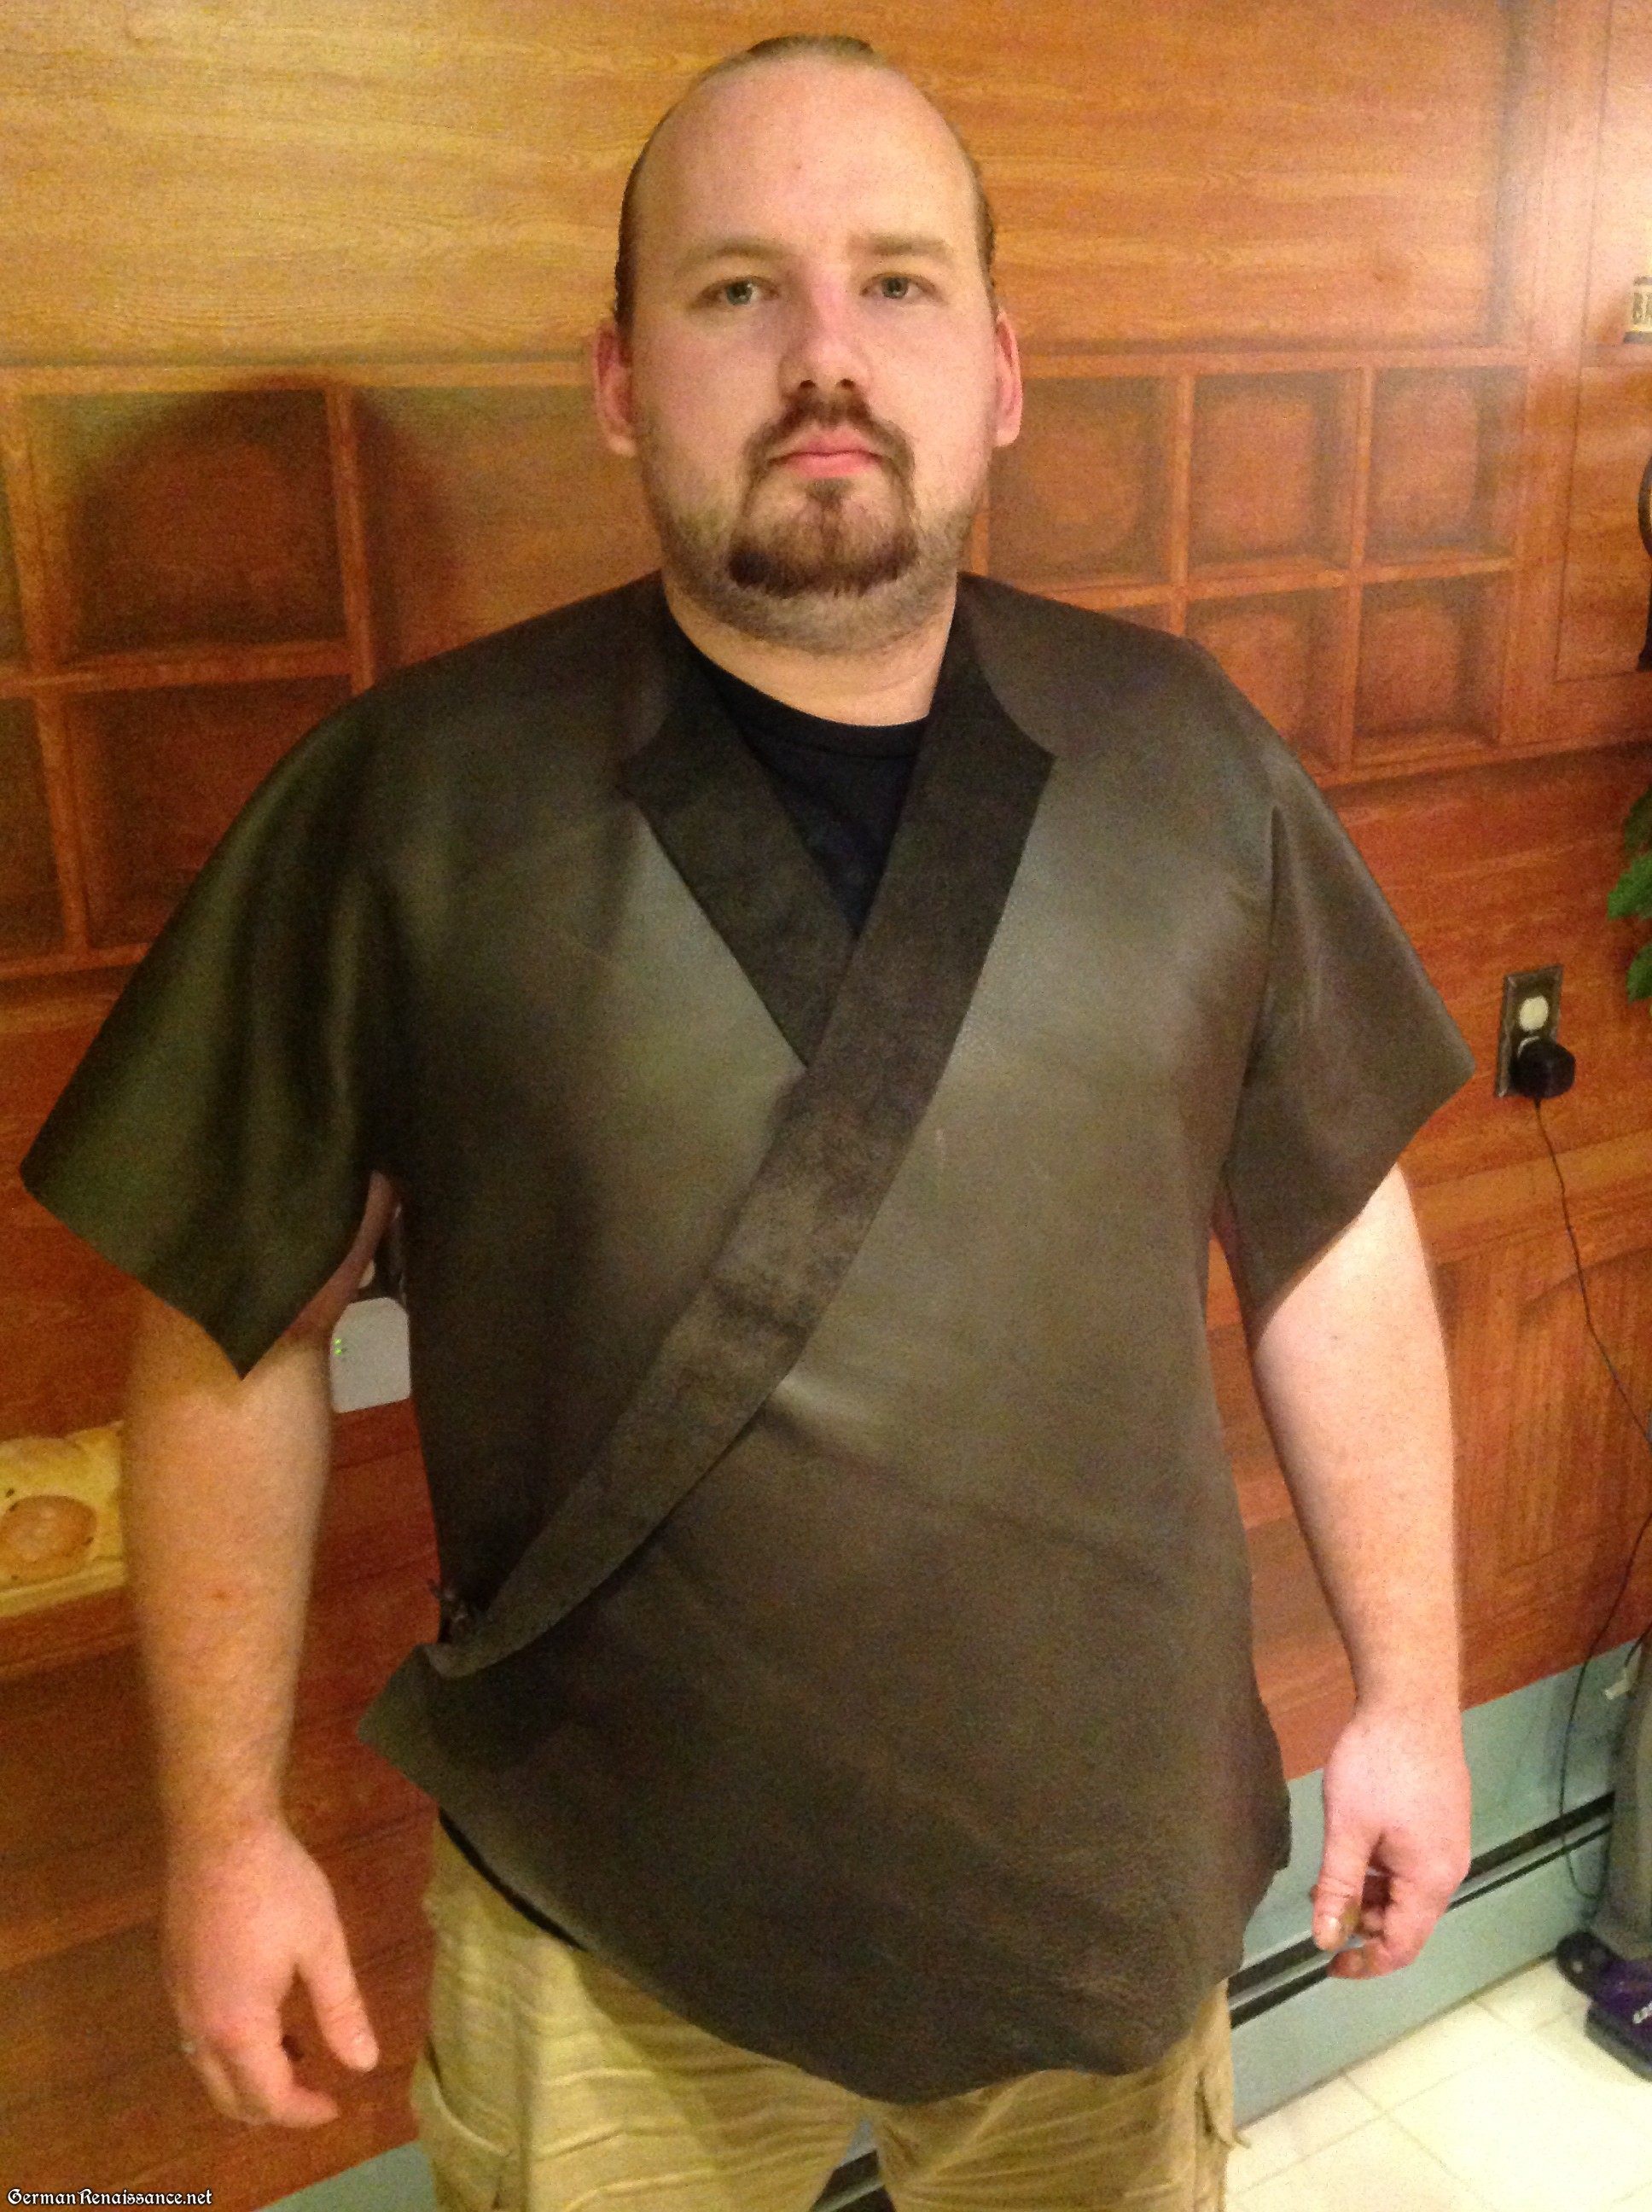
Try on your leather!
9. Now it’s time to sew your leather. The wams needs only two seams, one on either side of the torso, and it’s best to do it by hand. Using a leather punch, a 1/6″ awl, and a ruler, make punches about 1/2″ away from the edge and about 1/4″ apart. You will make four sets of these holes, two along each side on either side of your leather where you marked it in the previous step. (Note: Do not let this step scare you if this is your first time working with leather. This was my first leather project. Punching these holes was simple with patience and care.)
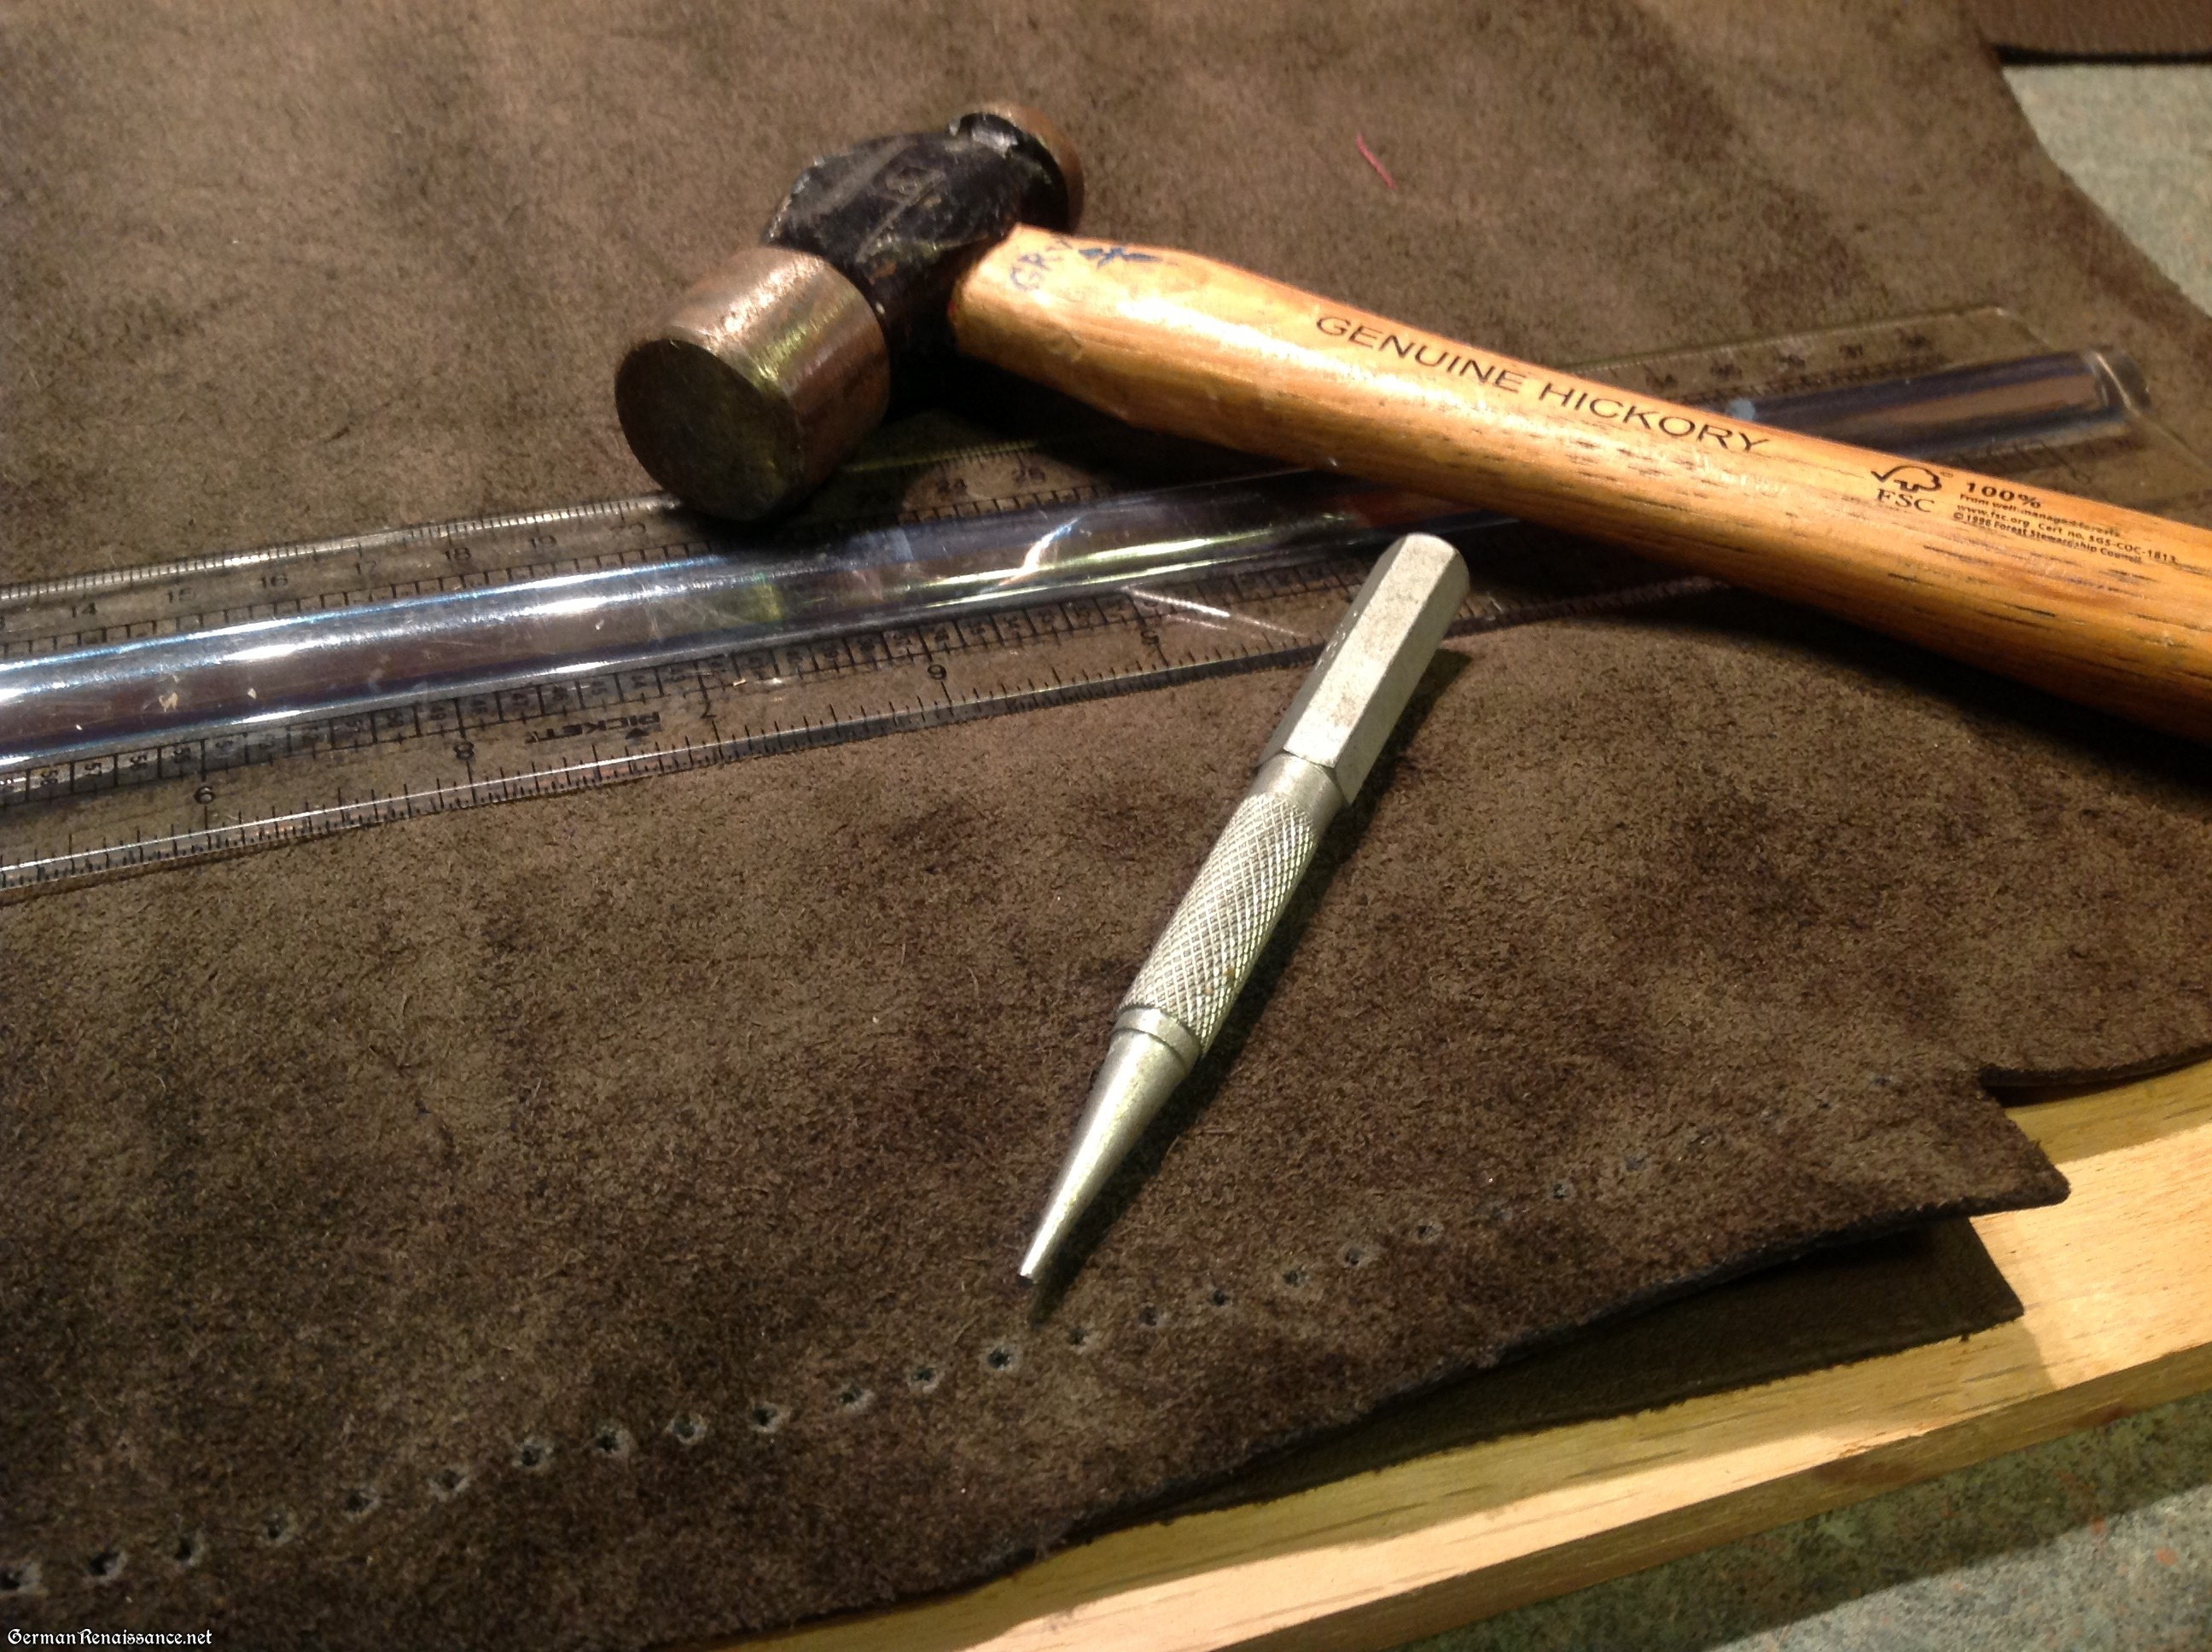
Holes punched for the seam.
10. Using sinew, sew your seams, right sides together. (Note I first used a thick linen thread, but it proved to be too weak, so use sinew instead!) A long, strong needle is best. You’ll want to do a saddle stitch here, which really just means you’ll do a running stitch through the holes from either side, creating a double running stitch with thread passing through the hole twice. For more information on sewing leather, check here: http://www.backroomleather.com/sewingleathertutorial.html . Do not overtighten your stitches, or the seams will pucker.

Sewing the seams with a saddle stitch.

The completed seam.
11. To keep your leder wams closed, you’ll want two ties. One goes on one side of your front (and ties to the opposite side) and the other goes on the other side of your front (and ties on its opposite side). It’s a bit like a bathrobe, except both sides crossover and tie. The ties should be placed at the bottom corners. To make your ties, cut a 1/4″ x 48″ strip of leather from your leather hide, then cut into four equal parts. Or just use leather thongs, if you have them. Using your awl, make a punch in each of your two front corners and a punch in each of your two front sides. Here’s a diagram showing the locations of where you want to put your punches for the ties:
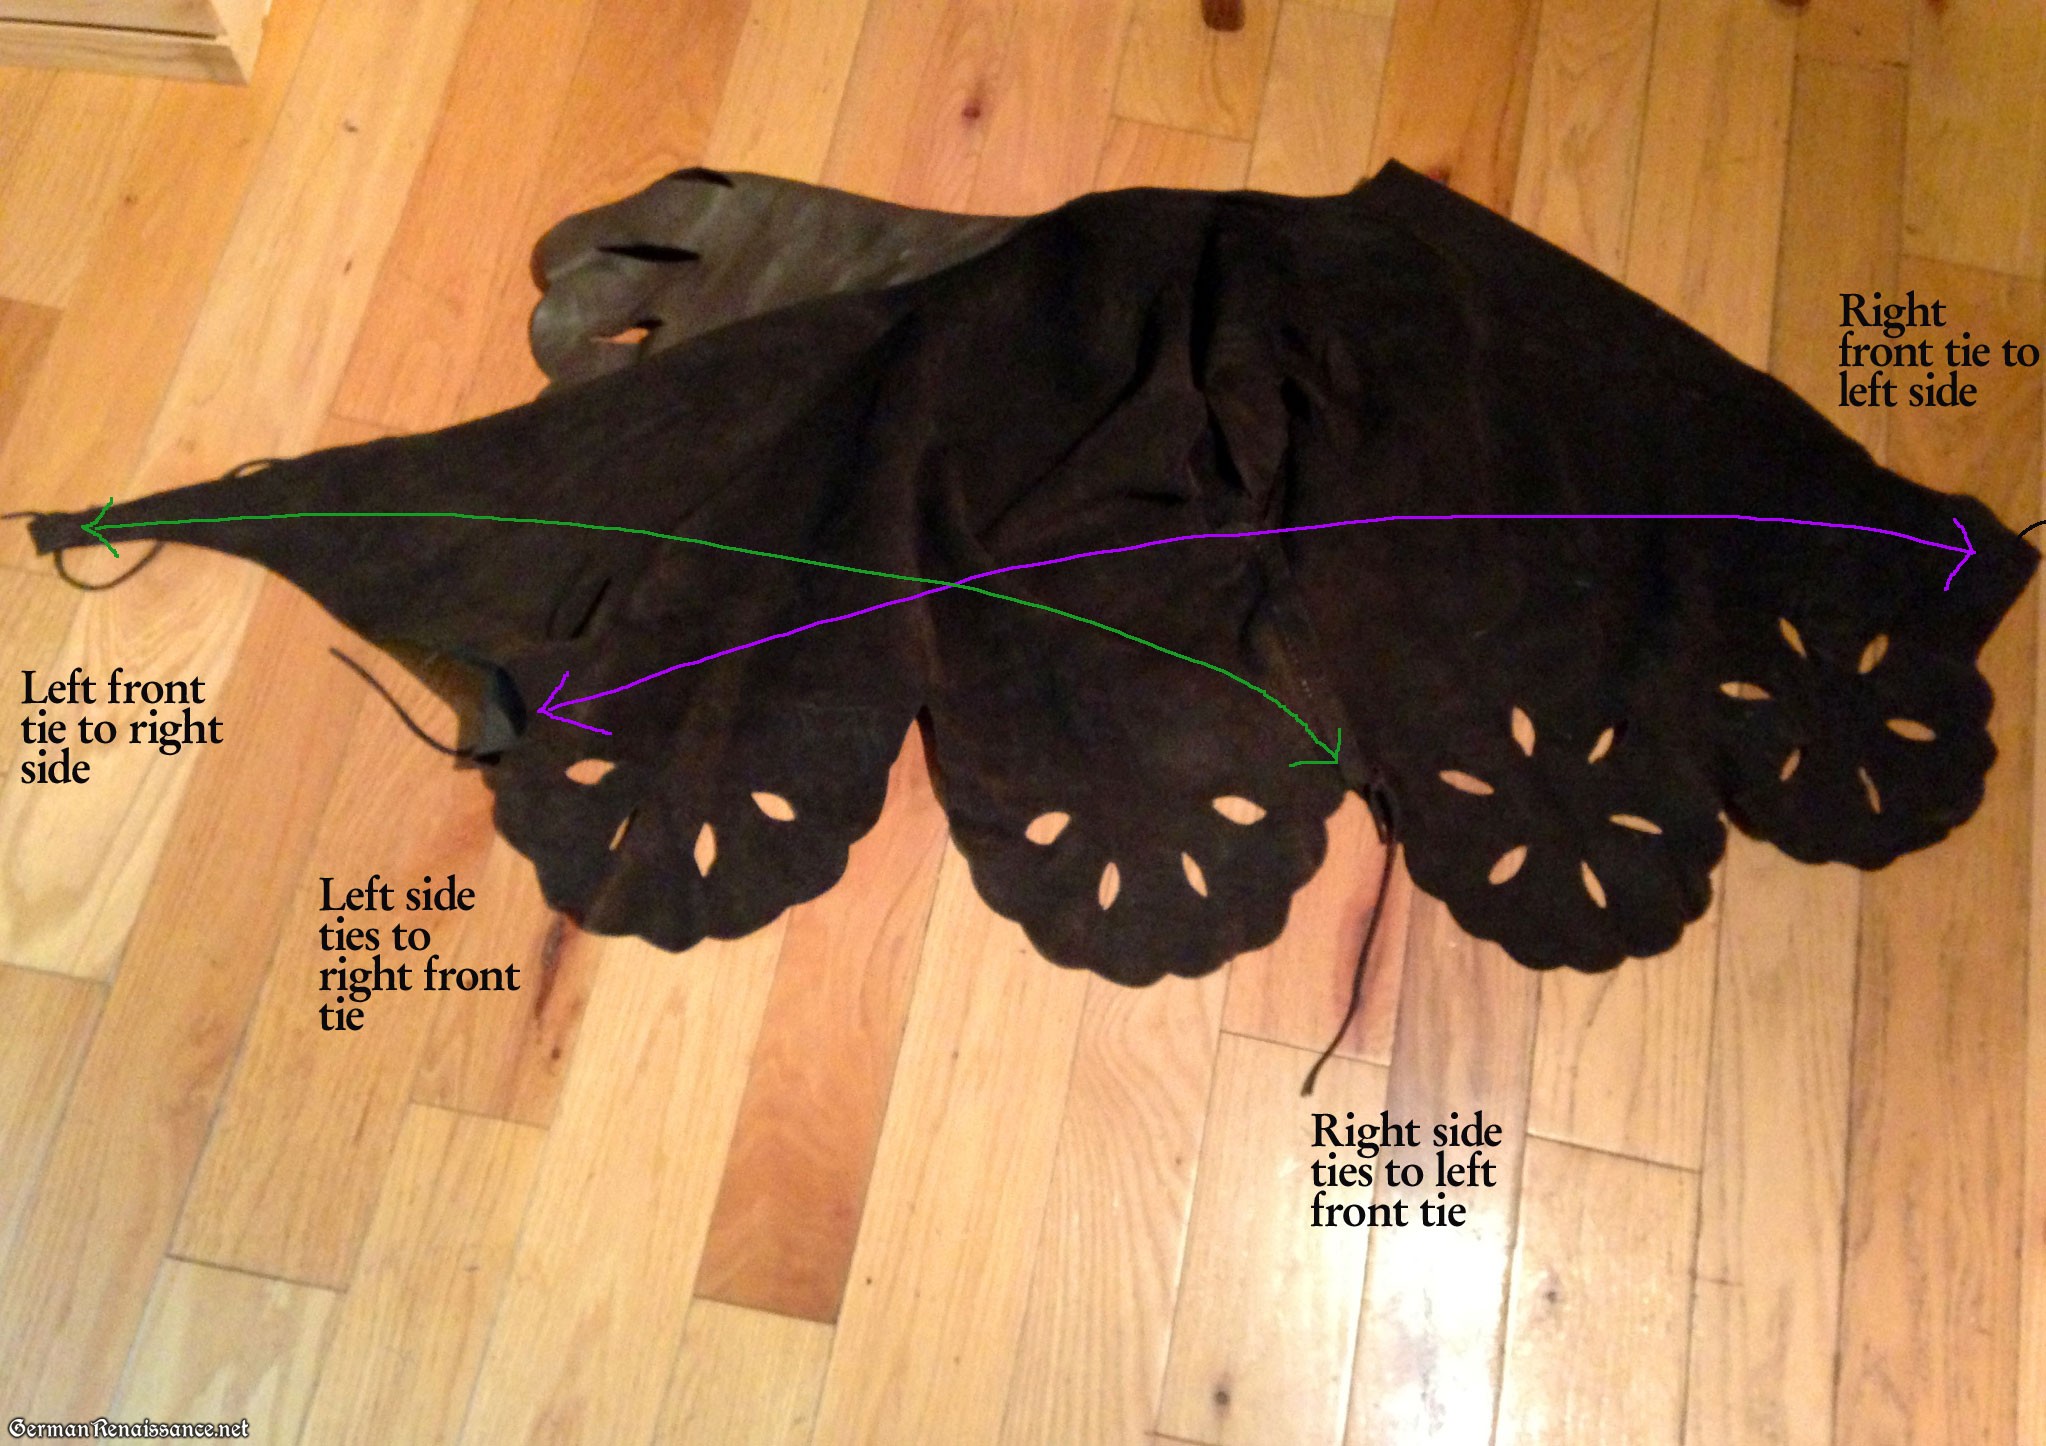
Put a hole in each of these four spots.
12. Now thread a leather tie through each of the four holes, knotting it securely on the inside. Put on your leder wams, tie one side, then tie the other, and make sure the fit is good and snug, but not too tight. You can optionally put in another set of ties if you plan to wear this over any armor.
13. Now comes the fun part: decorative cuts and slashes! I based on my cuts on the most common leder wams I’ve seen in woodcuts, meaning I put two scalloped pinwheel shapes with slashes in the front and back, plus scalloped the sleeves and slashed them. You could do more or less than this. I’ve seen leder wams with slashes all over, if that’s what you want! You will not need to treat the edges of the leather — it will not fray or anything. To do the scalloped shape, I measured the front and back flaps, cut out a piece of paper to size, folded it 4 times, and curved the bottom — when it was opened, it looked like a flower. I then just positioned it on a flap, marked the leather with chalk, and cut.
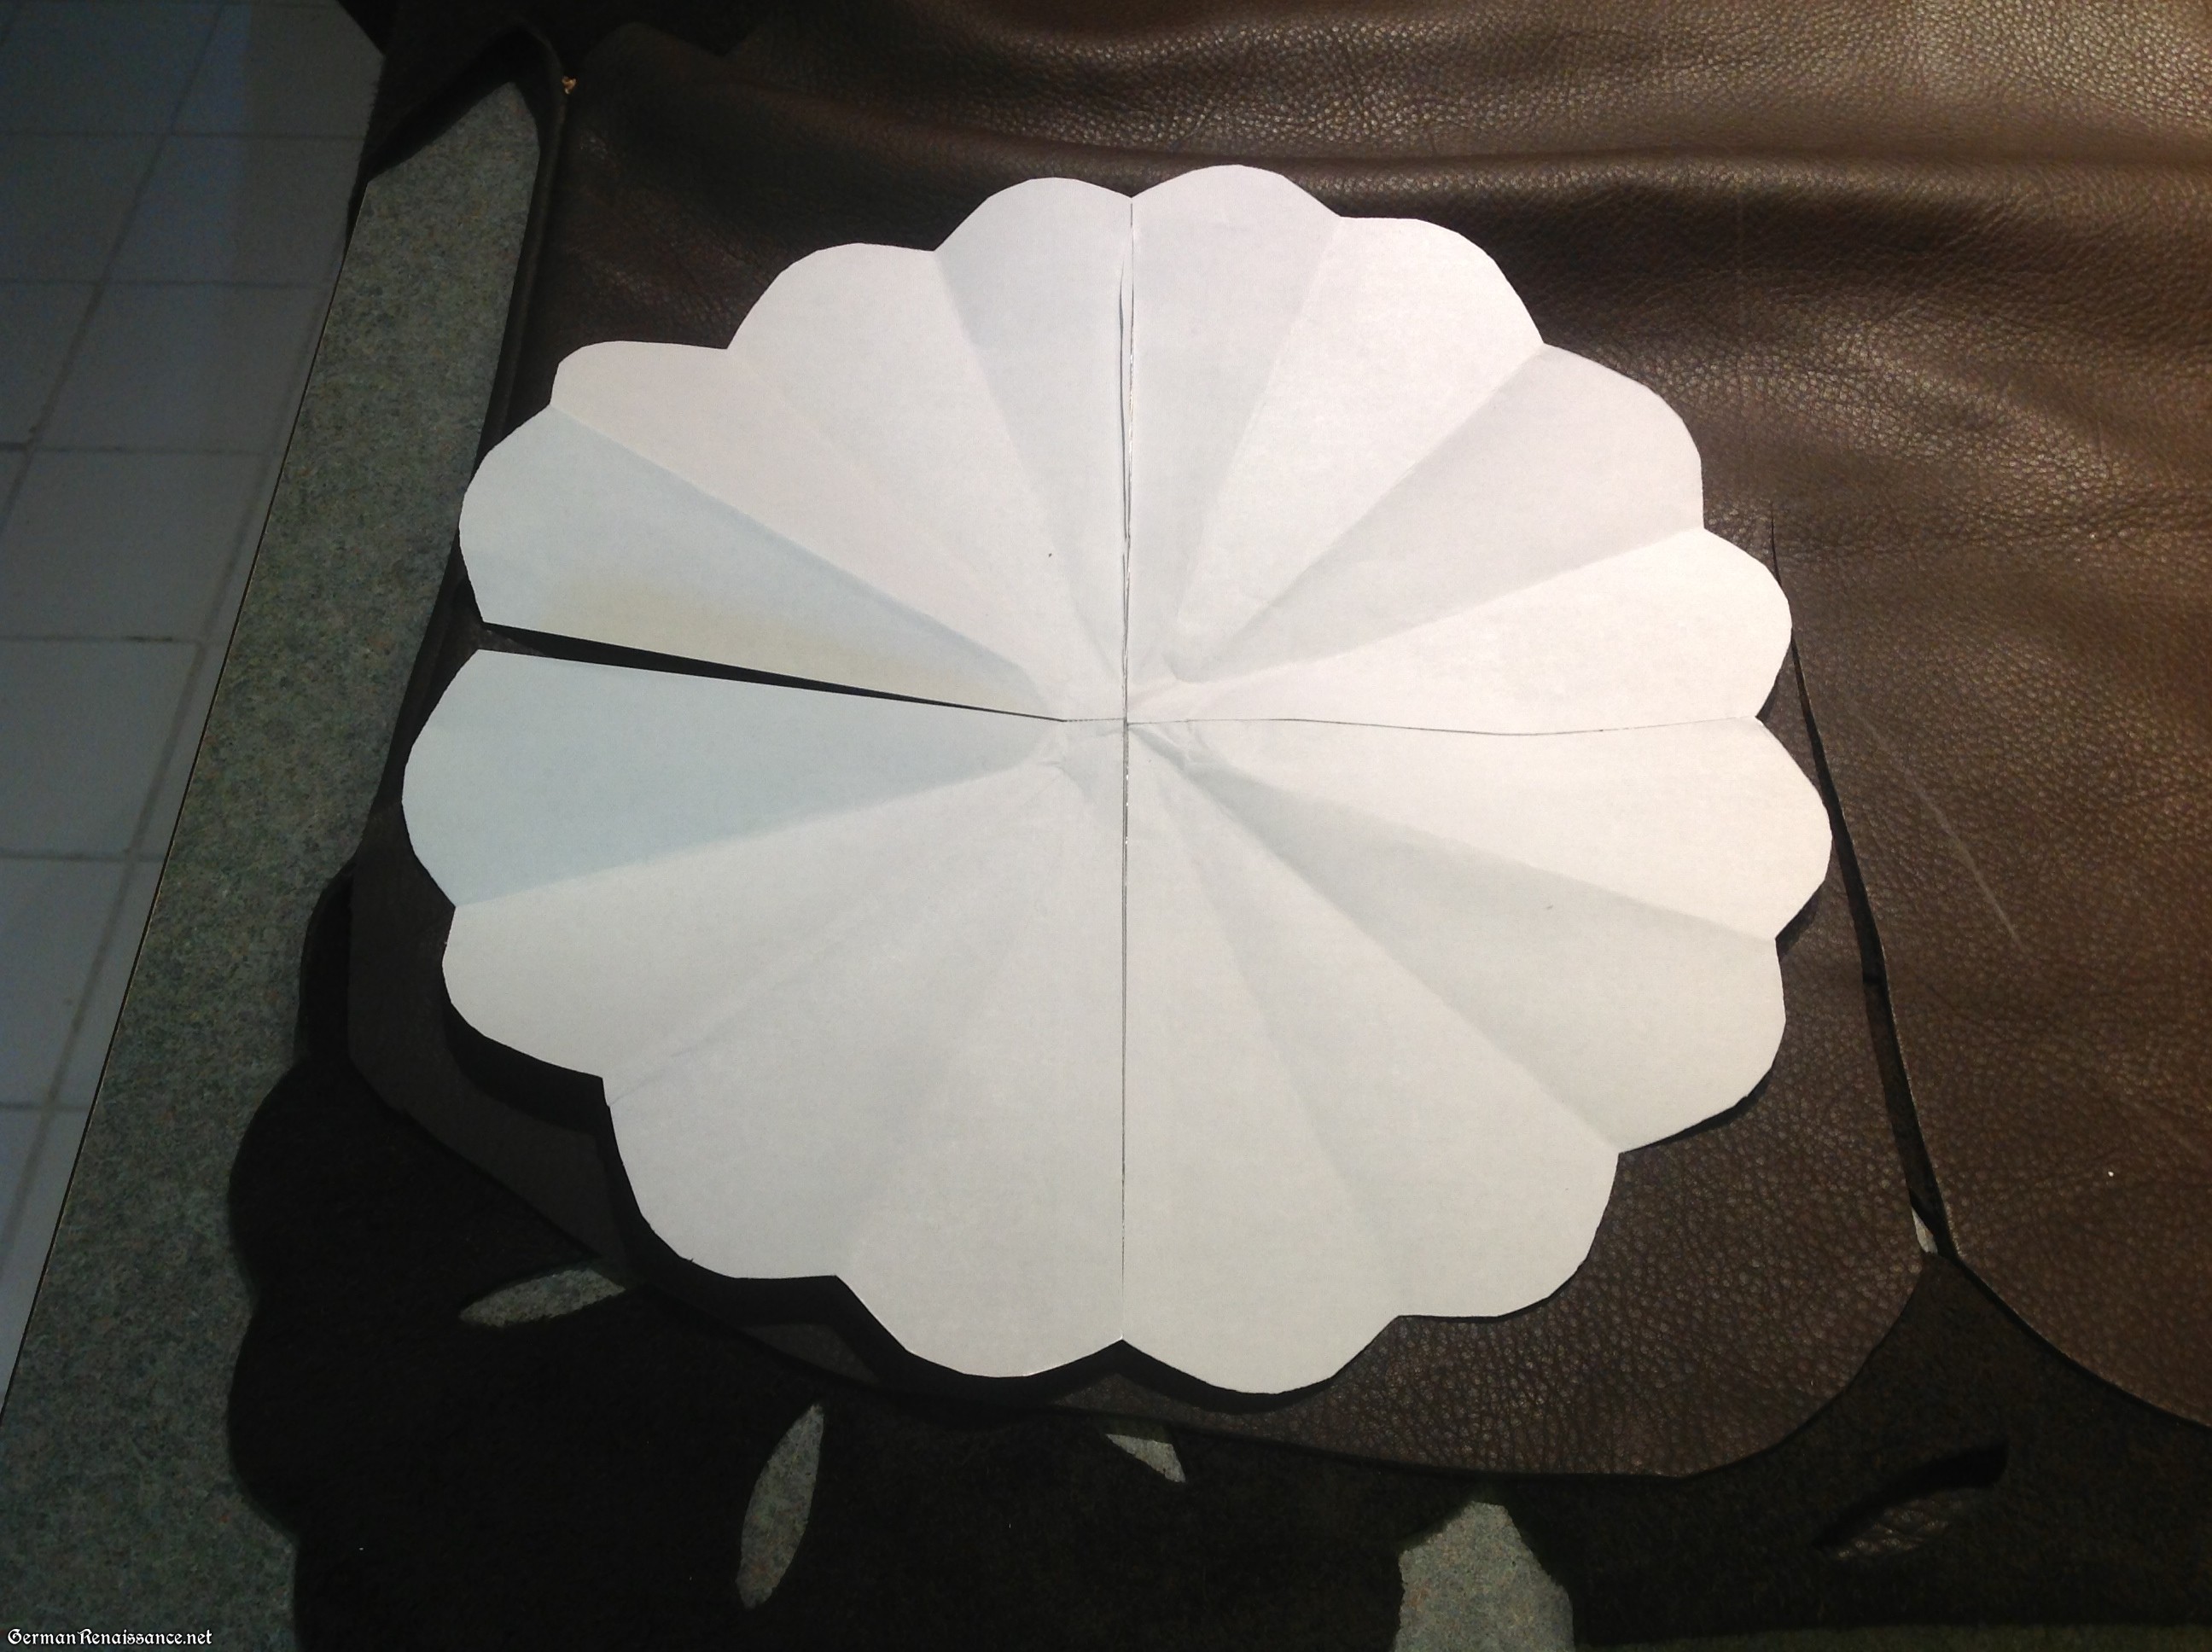
A pattern to scallop the edges
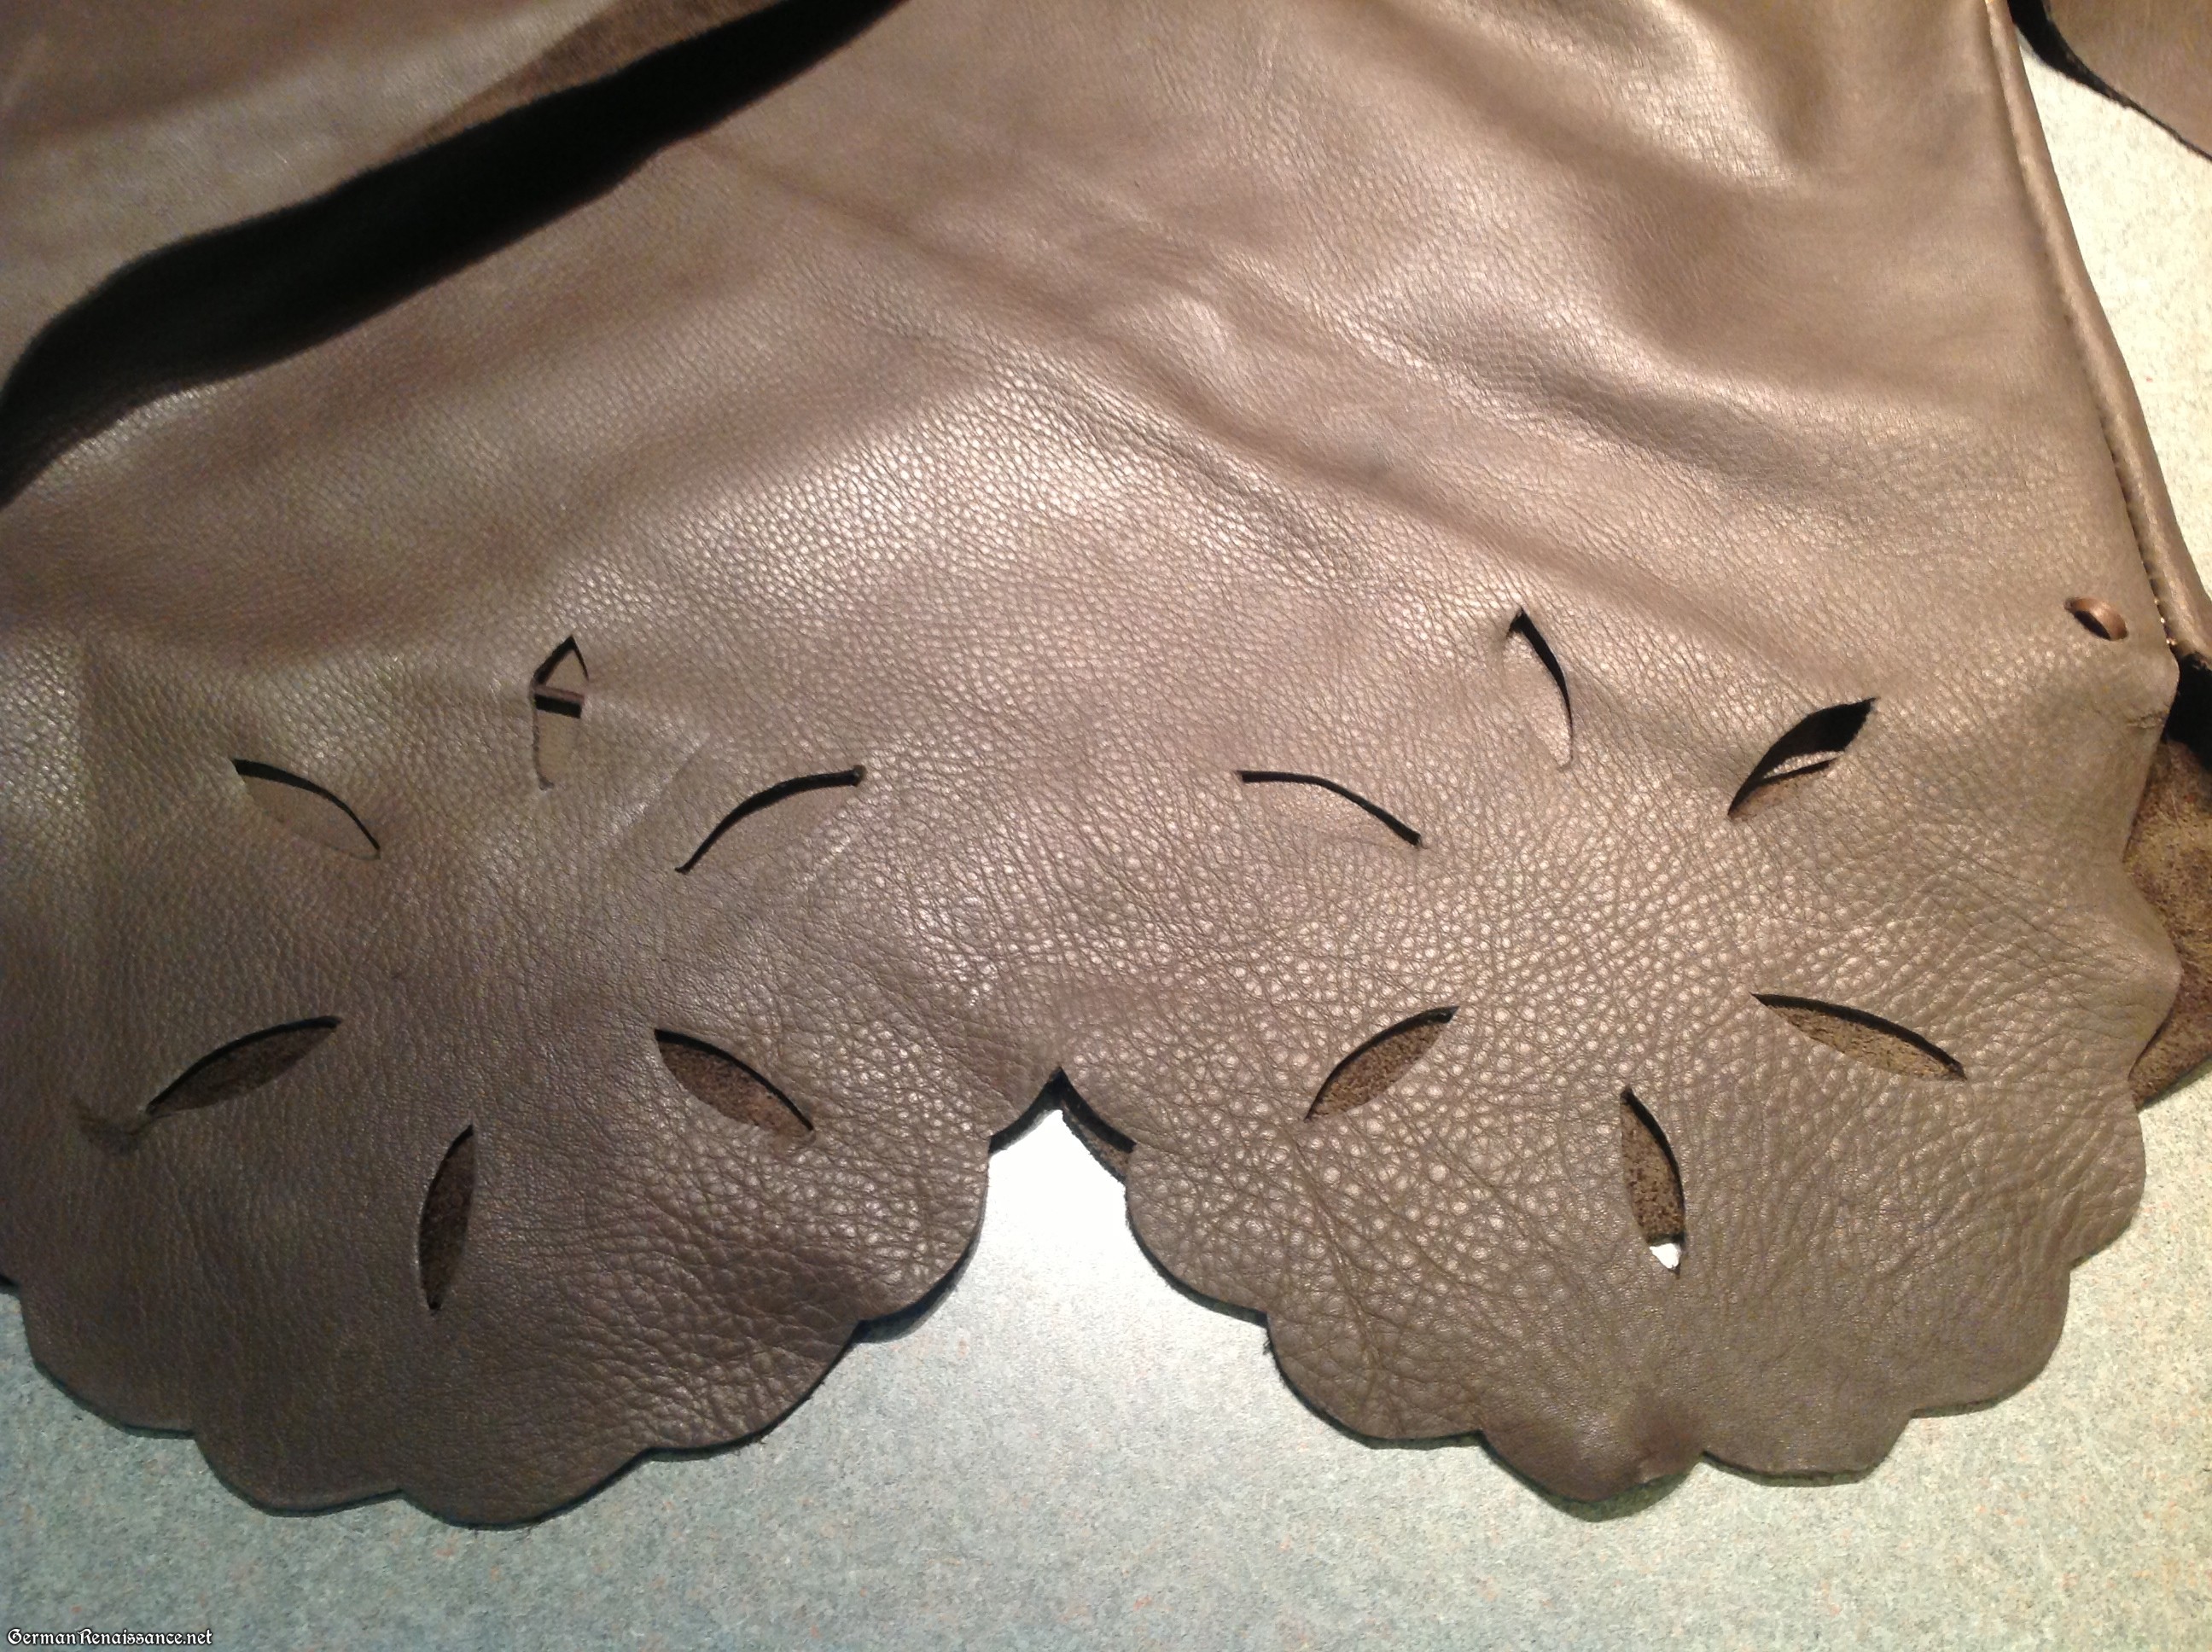
Cutting leather is fun!
And that’s it! You have a leder wams! If it gets wrinkled, just hang it for a bit and the leather will smooth itself out.
Here are photos of the completed leder wams on Gregor:
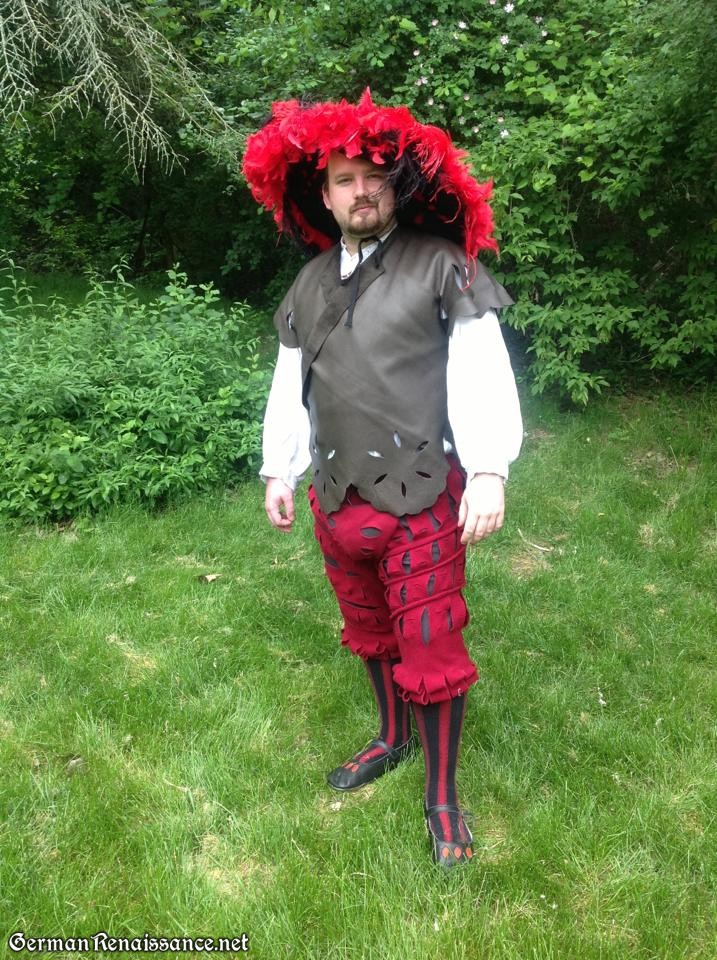
Leder wams without a belt. It’s a bit wrinkly here as was newly made.
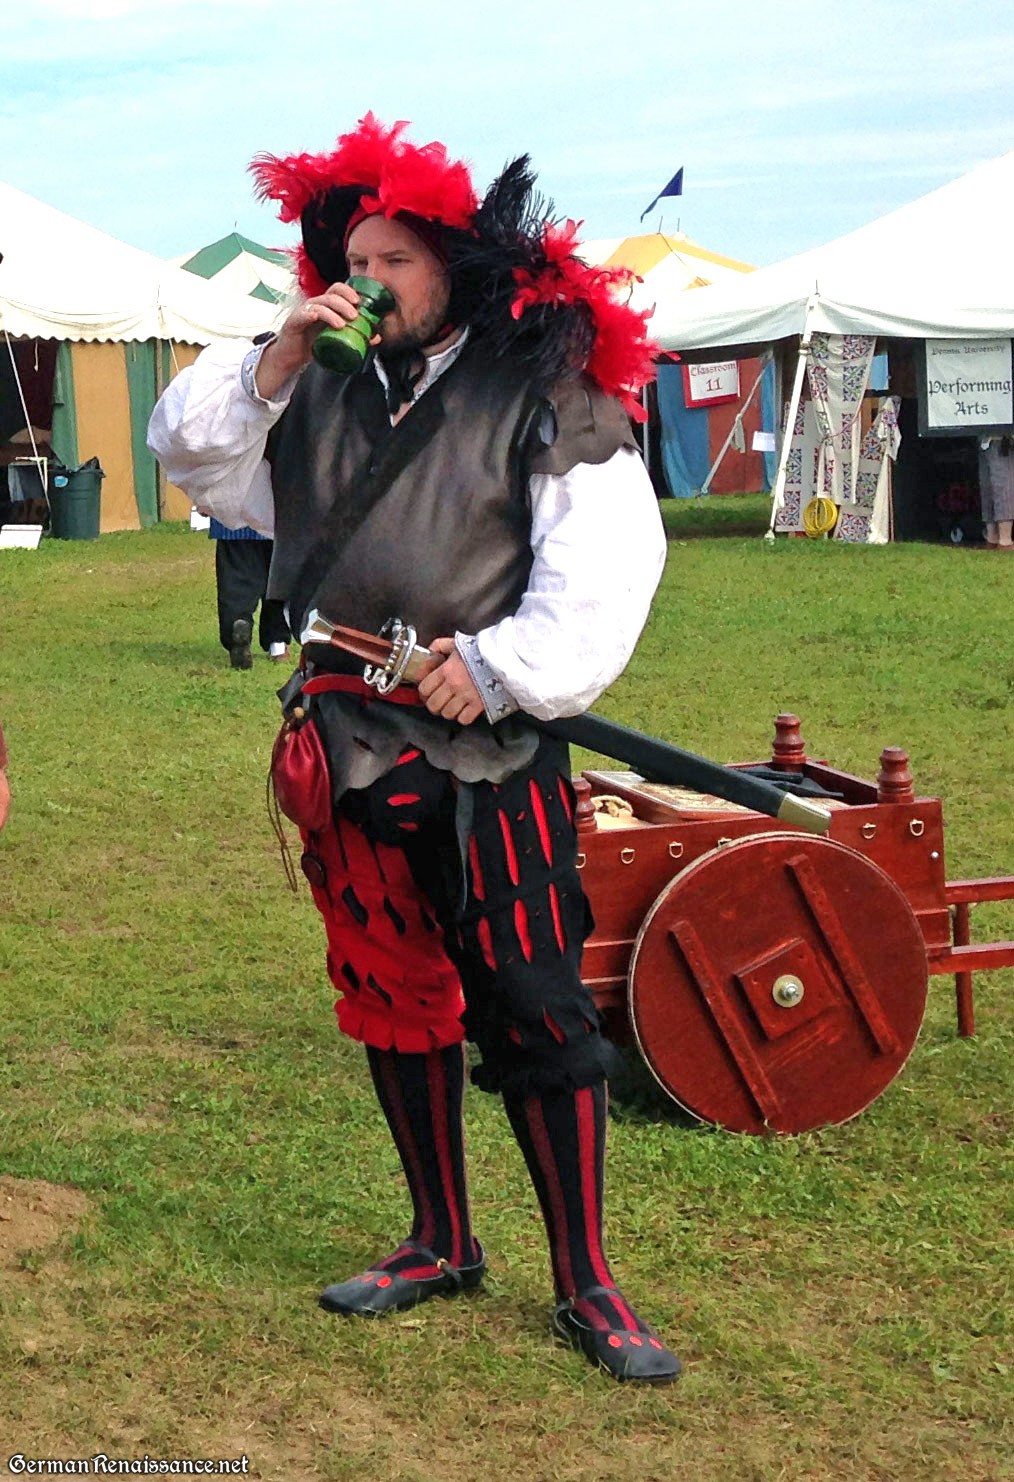
Leder wams with a belt.
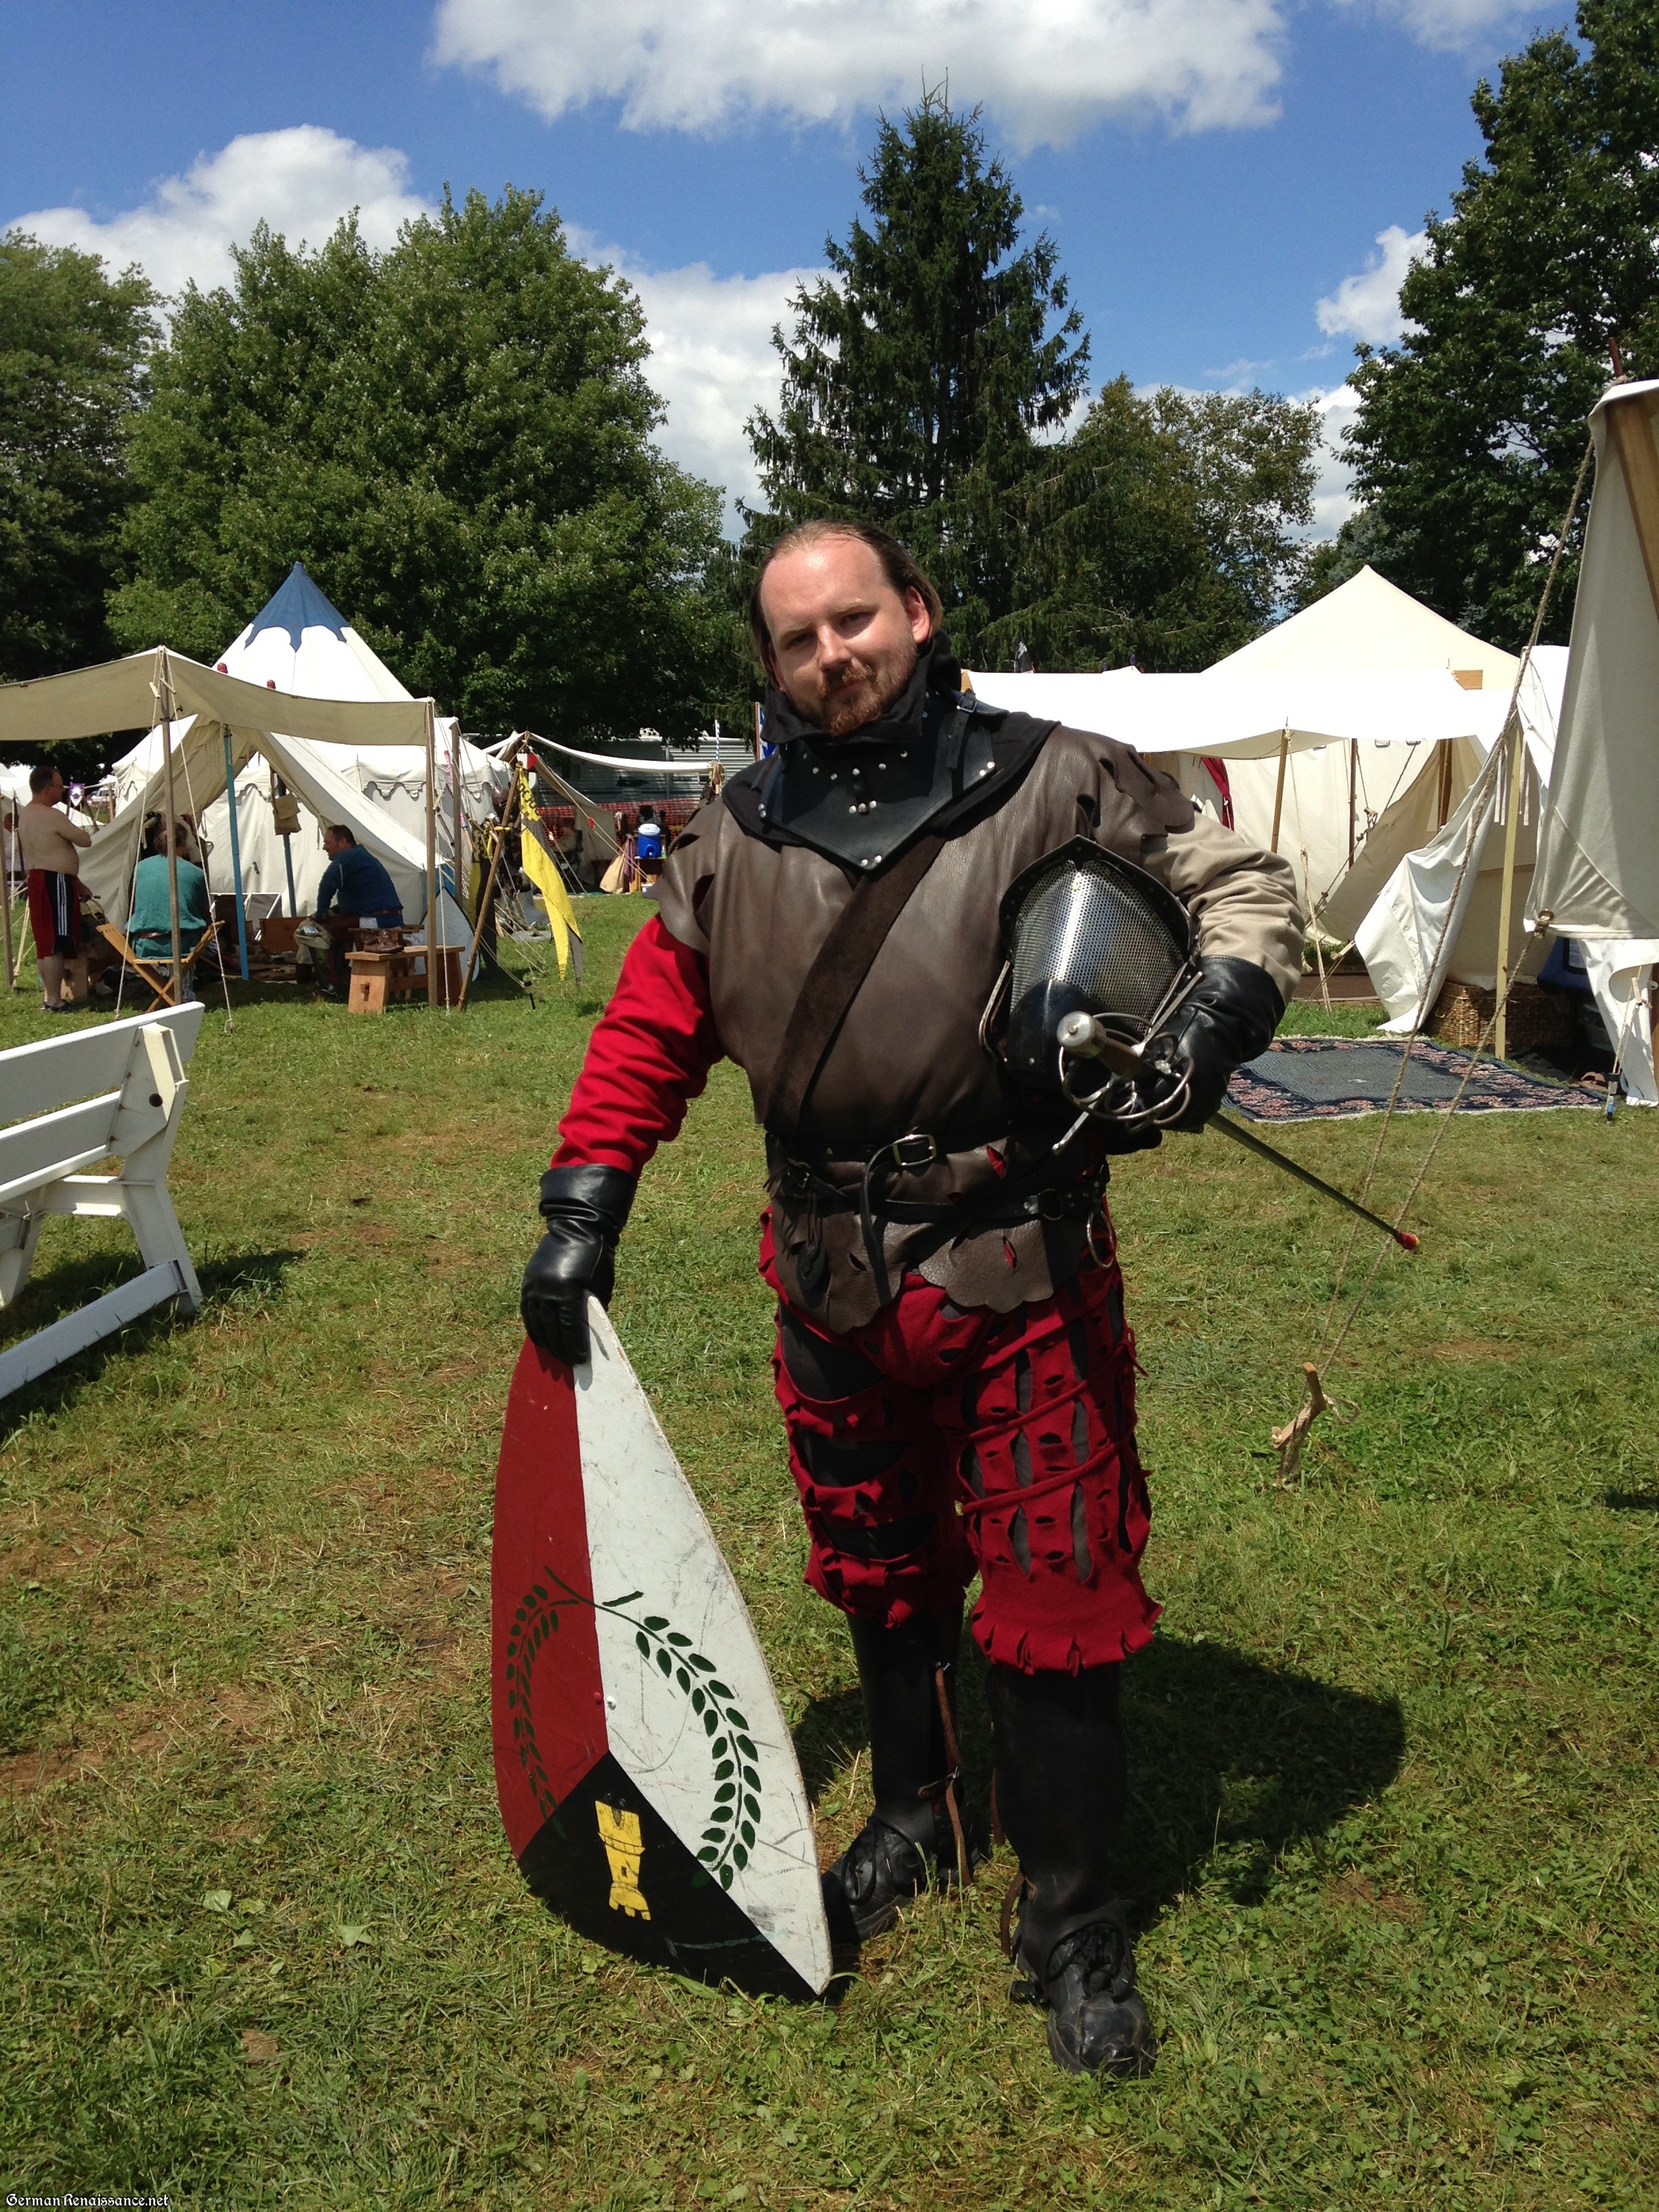
Leder wams being worn for combat (rapier).
If you have any questions or feedback at all, please reply here to message me directly. I’m also happy to take additional photos and close-ups if it helps you make your own.

How do you ensure that the Wams stay closed on the rapier field?
The leather ties seem to work well for Gregor. Having a belt over it probably helps as well. He doesn’t seem to have any issues.