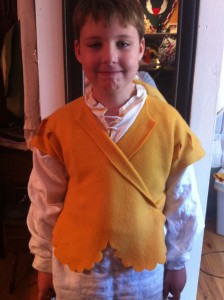
 It’s time to pattern a Lederwams (German leather vest) by draping it on a real person! My son gets to be my guinea pig because I want to make him one and because he’s available! (Note: I don’t recommend you use a young child unless you have no other choice — kids don’t like to stand still!)
So what is draping? Draping is a pattern-making technique in which you drape muslin (or another fabric similar in weight to your desired fabric) directly onto the wearer (or a dress form of exact dimensions) to make a pattern. After the fabric is draped on the wearer in the manner you wish, you make markings on the fabric at key points, such as seams. It can get much more complicated than this, with seam intersections, pleats, and other details, but this project does not require it. In fact, it seems like the perfect project to try out draping for the first time. There are only two seams, both on the sides, and only one piece of material will be required for the entire garment.
As I’ve never made a Lederwams before, nor have I actually even seen one in person, I’m using some written directions I found at the GermanRenCostume list at YahooGroups by “Robert in Reno” (thank you!). I have altered them slightly, based on my actual experience with the draping.
First, you need some materials:
- Large piece of non-stretch fabric you don’t mind cutting, such as an inexpensive cotton sheet (I chose to use some cheap fleece because I wanted a thicker material)
- Scissors
- Pins
- Chalk or a removeable marker
- Another person who is either your helper and will perform the steps below on you, or is the wearer upon which you perform the steps
Note: My model was not the most patient, so my pictures aren’t ideal. If there is a discrepancy between the directions and the images, do as I say, not as you see. 🙂
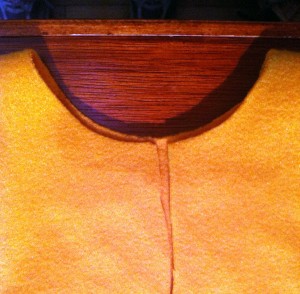
Step 1: Find the center of your material and cut a hole the diameter of your neck (not your head), then cut a slit down one side from neckhole to the bottom of your fabric.
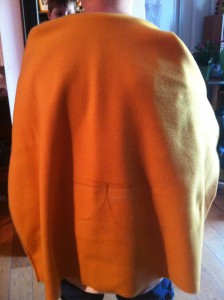
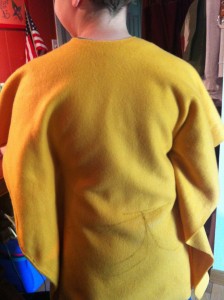
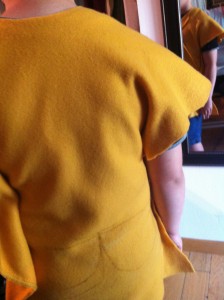
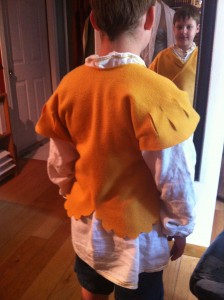
Step 2: Have your wearer put on their garb (and armor, if this will go over it), slip the material over their head, and smooth the material down their back. Use your chalk/marker to indicate where the waist is and where the back dags (the half-circle things at the bottom of the lederwams) will be. Based on the woodcuts, the dags begin just below the natural waist and extend down a bit. You can see that I had to re-mark the waist and the dags thanks to my wiggly model!
Step 3: Pin the sides of the material together, keeping the material as smooth as possible across the back and over the shoulders. Note that you do not want the front to be taut and smooth when you do this, just the shoulders and back — the front of the fabric will be a bit baggy. This is key to achieving the right look.
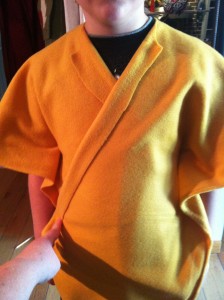
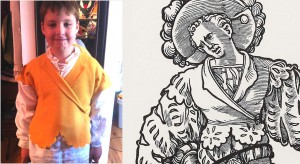
Step 4: Move around to the front and fold one side over the other (doesn’t matter which — you can see both directions in woodcuts). If you want the front pieces to form a lapel like they do the woodcuts, fold it the way you wish now. Mark the waist and the point where the lederwams should attach from the wrap-over side to the underside, so you have a good reference point later on.
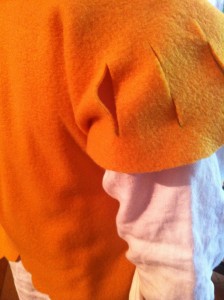
Step 5: Trim the shoulder. I referred to woodcuts as I did this, making sure to start it low enough as well as trim it up high enough. I did just one the one shoulder at this point.
Step 6: Take the material off the wearer and lay it out on a flat surface, being careful to arrange the neck line properly and match up the connection point you marked in the previous step. Now measure, mark, and trim the other shoulder so it matches. I found it easier to get a matching shoulder by doing this than by doing it while on the wearer, but you’re welcome to try it that way, of course.
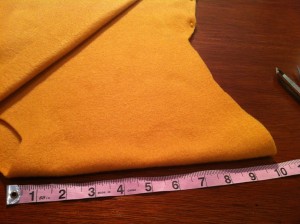
Step 7: Cut out the circular dags on the front and back, based on your markings. I recommend you cut the dags a little big on your first pass so you have room to adjust if necessary. Also cut off the excess material on the sides, leaving about 1/4″ seam allowance here, and the excess material on the front flap that goes underneath.
Step 8: Try on the wams (keep pins in sides) to see how it looks. Adjust as necessary.
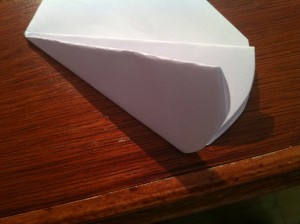
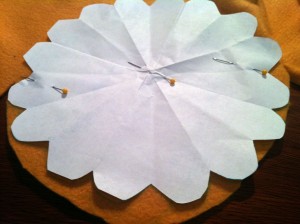
Step 9: If you want your dags to have the little curved cuts like you see in the woodcuts, make yourself a pattern by creating a circle from paper (same size as your dags), then fold it 4 times and cut half-circles on the wide end.
Step 10: Put your pattern on your dag and trace it, then cut it. Repeat for all dags. The sleeves typically have the same circular cuts, so do those now as well.
Step 11: If you want your sleeves slashed, or any other parts slashes (such as the dags, the front, or the back — refer to woodcuts for ideas), mark them and cut your material in those spots to see how it looks. I recommend you at least do the shoulders for the classic Lederwams look.
Step 12: Try it on and admire how fabulous you look!
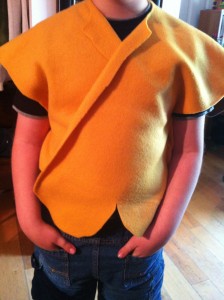
(Yes, I know I didn’t cut the half-circles on the bottoms of the shoulders, nor cut slashes in the dags — my son and I are still discussing how those will appear. Also, I think I made the pattern the right size, but he’s a growing boy — maybe I should make it larger? Or perhaps he’ll just wear wams made out of something else until he’s older. It’ll depend on how much the leather costs me.)
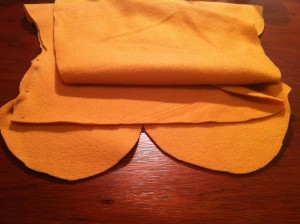
Here’s what the pattern actually turned out like:
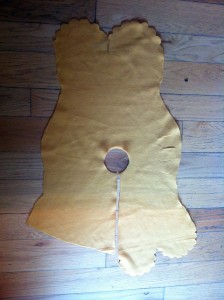 As you can see, I cut the overlapping front flap with the dags. But I probably could have done it with one dag on each of those flaps. I chose not to because it didn’t appear that they were done that way in the woodcuts I looked at. If anyone has any information on which way this would be done, I’d love to hear it!
If you’re happy with your pattern, it’s time to procure some leather and make it for real. When I find some appropriate leather, I will create one and show how I did it step-by-step for you.

Very good piece. The sewing is clear, the photos are complete and the model looks like a terrific boy. Been thinking of a German persona, since my Elizabethan group is smaller and smaller, but I wasn’t sure if I could do this or not. You make it look pretty easy. Take care!
I found your post on your ledergollar draping and have to say I’m overjoyed! Its funny though because Roberts original post was in reference to a question that I asked so I guess you can thank me for his long informative post. I’m curious to see the leather version when you have it finished. Have you started on it yet?
He is so cute! And this outfit is just going to be extra cute on him!
this is wonderful!!! I don’t have any leather on me right now, so am going to make one of 2 layers of linen/rayon for an event next weekend. 🙂
I think I have about a yard and a half, and a very skinny husband, who would love an extra layer for winter ^_^