 One of the iconic German hats seen in paintings and woodcuts is an oversized, brimmed hat with cuts/overlaps in the fold of the brim. They appear frequently in Cranach paintings, for example. To my knowledge this hat has no name, so I’m naming it the German Split-Brim Beret! Knitted versions of this hat, or ones very like it, appear in the Germanishces Nationalmuseum, but judging from the paintings some of them are made out of velvet or felt as well, which is what this tutorial shows. In many ways, this is a just large flat cap with a wide brim that is flipped up. Here’s a very quick and dirty tutorial on how to make a German Split-Brim Beret for one of my readers who needs to make one TODAY to wear this weekend. Plus, today is my birthday and I took the day off from work and dashing off a quick tutorial was a fun treat for myself.
German Split-Brim Beret Tutorial:
- Velvet, Heavy Felt, or Heavy Wool (no wimpy materials) — the color you see this hat in the most often is RED!! I only picked brown because I had a heavy brown velvet and I wanted it to match my pink and brown gown.
- Iron-on interfacing (not period) or some sort of glue stiffener (more likely period)
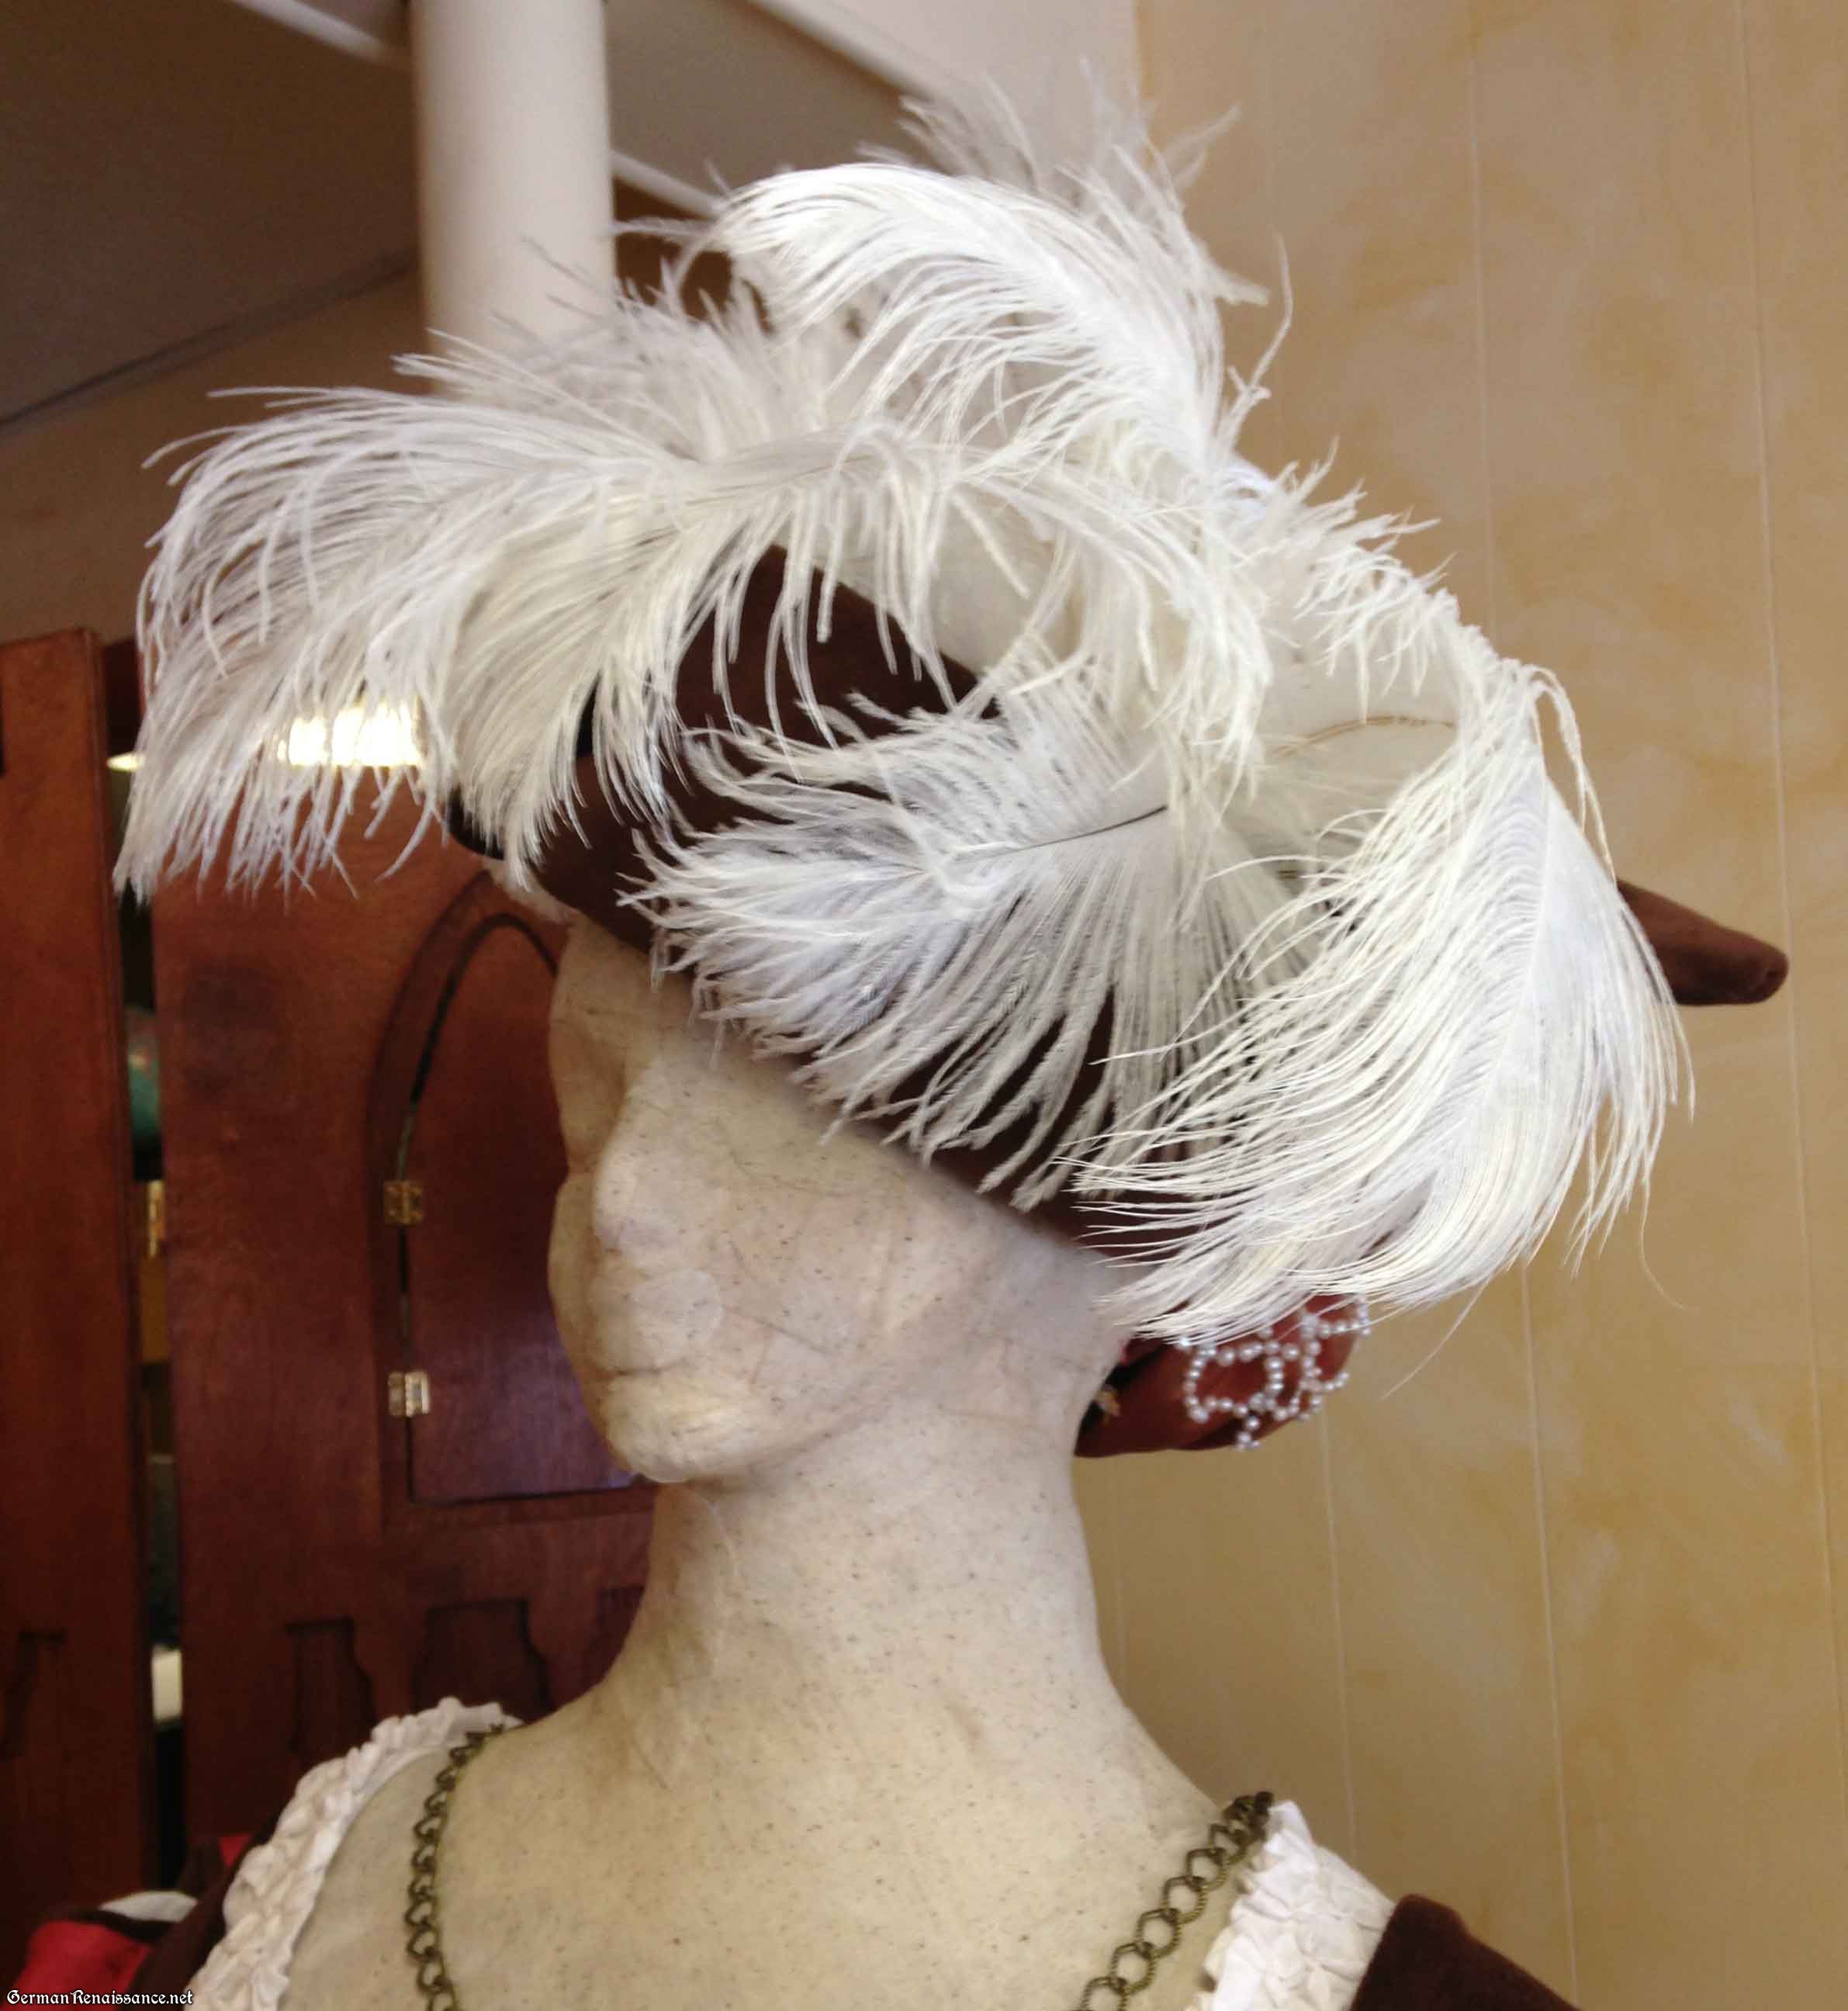
- Two dozen ostrich feathers (optional)
- Thread, needle, scissors, chalk
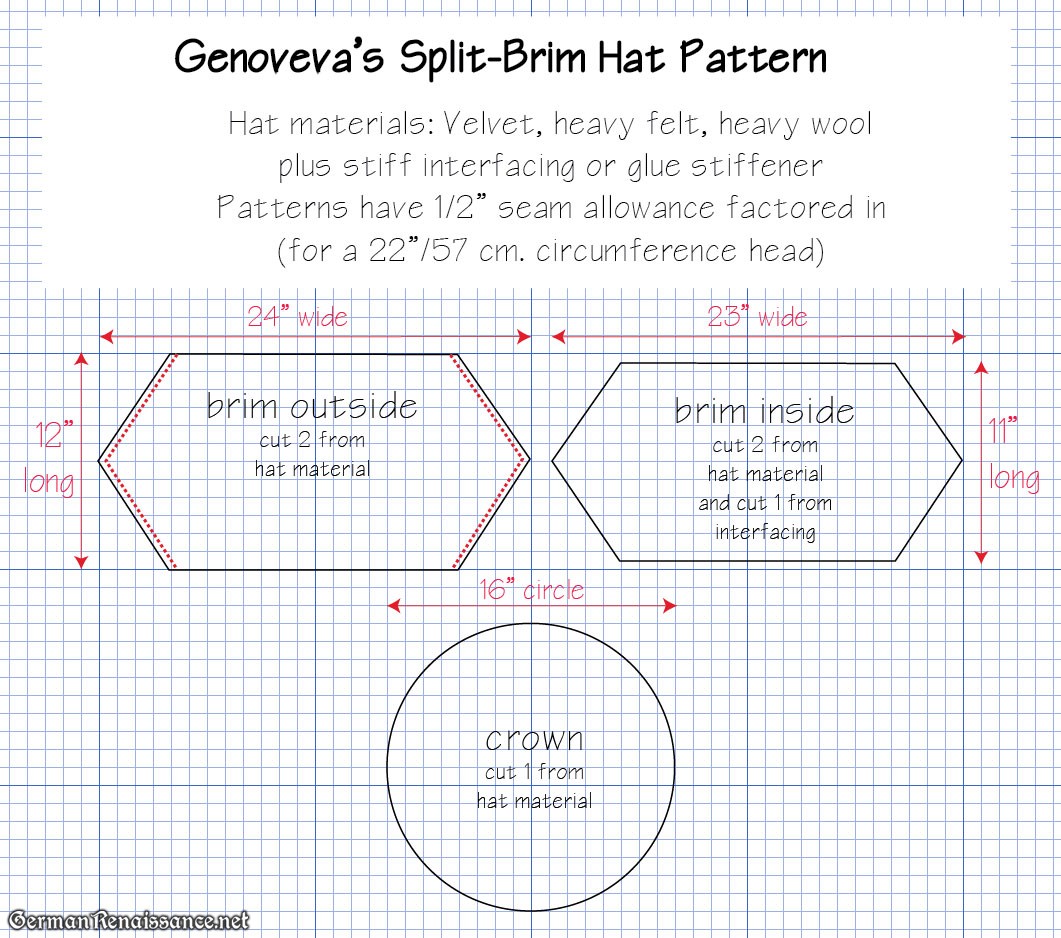
- My Split-Brim Hat Pattern
German Split-Brim Beret Steps:
1. Cut out your pattern pieces from your hat material. You need four brim pieces and one crown piece from your hat material, plus two brim pieces from your iron-on interfacing. If you decide not to use the interfacing to essentially meld the two pieces of brim material together, this is possible but you’ll need to take more care when making your cuts in the brim later on (the cuts are optional, however).
2. Iron the smaller brim pieces to the larger brim pieces, wrong sides together, centering the smaller one inside the larger one. The 1/2″ edge where one piece is longer than the other piece will be called the margin from this point forward.

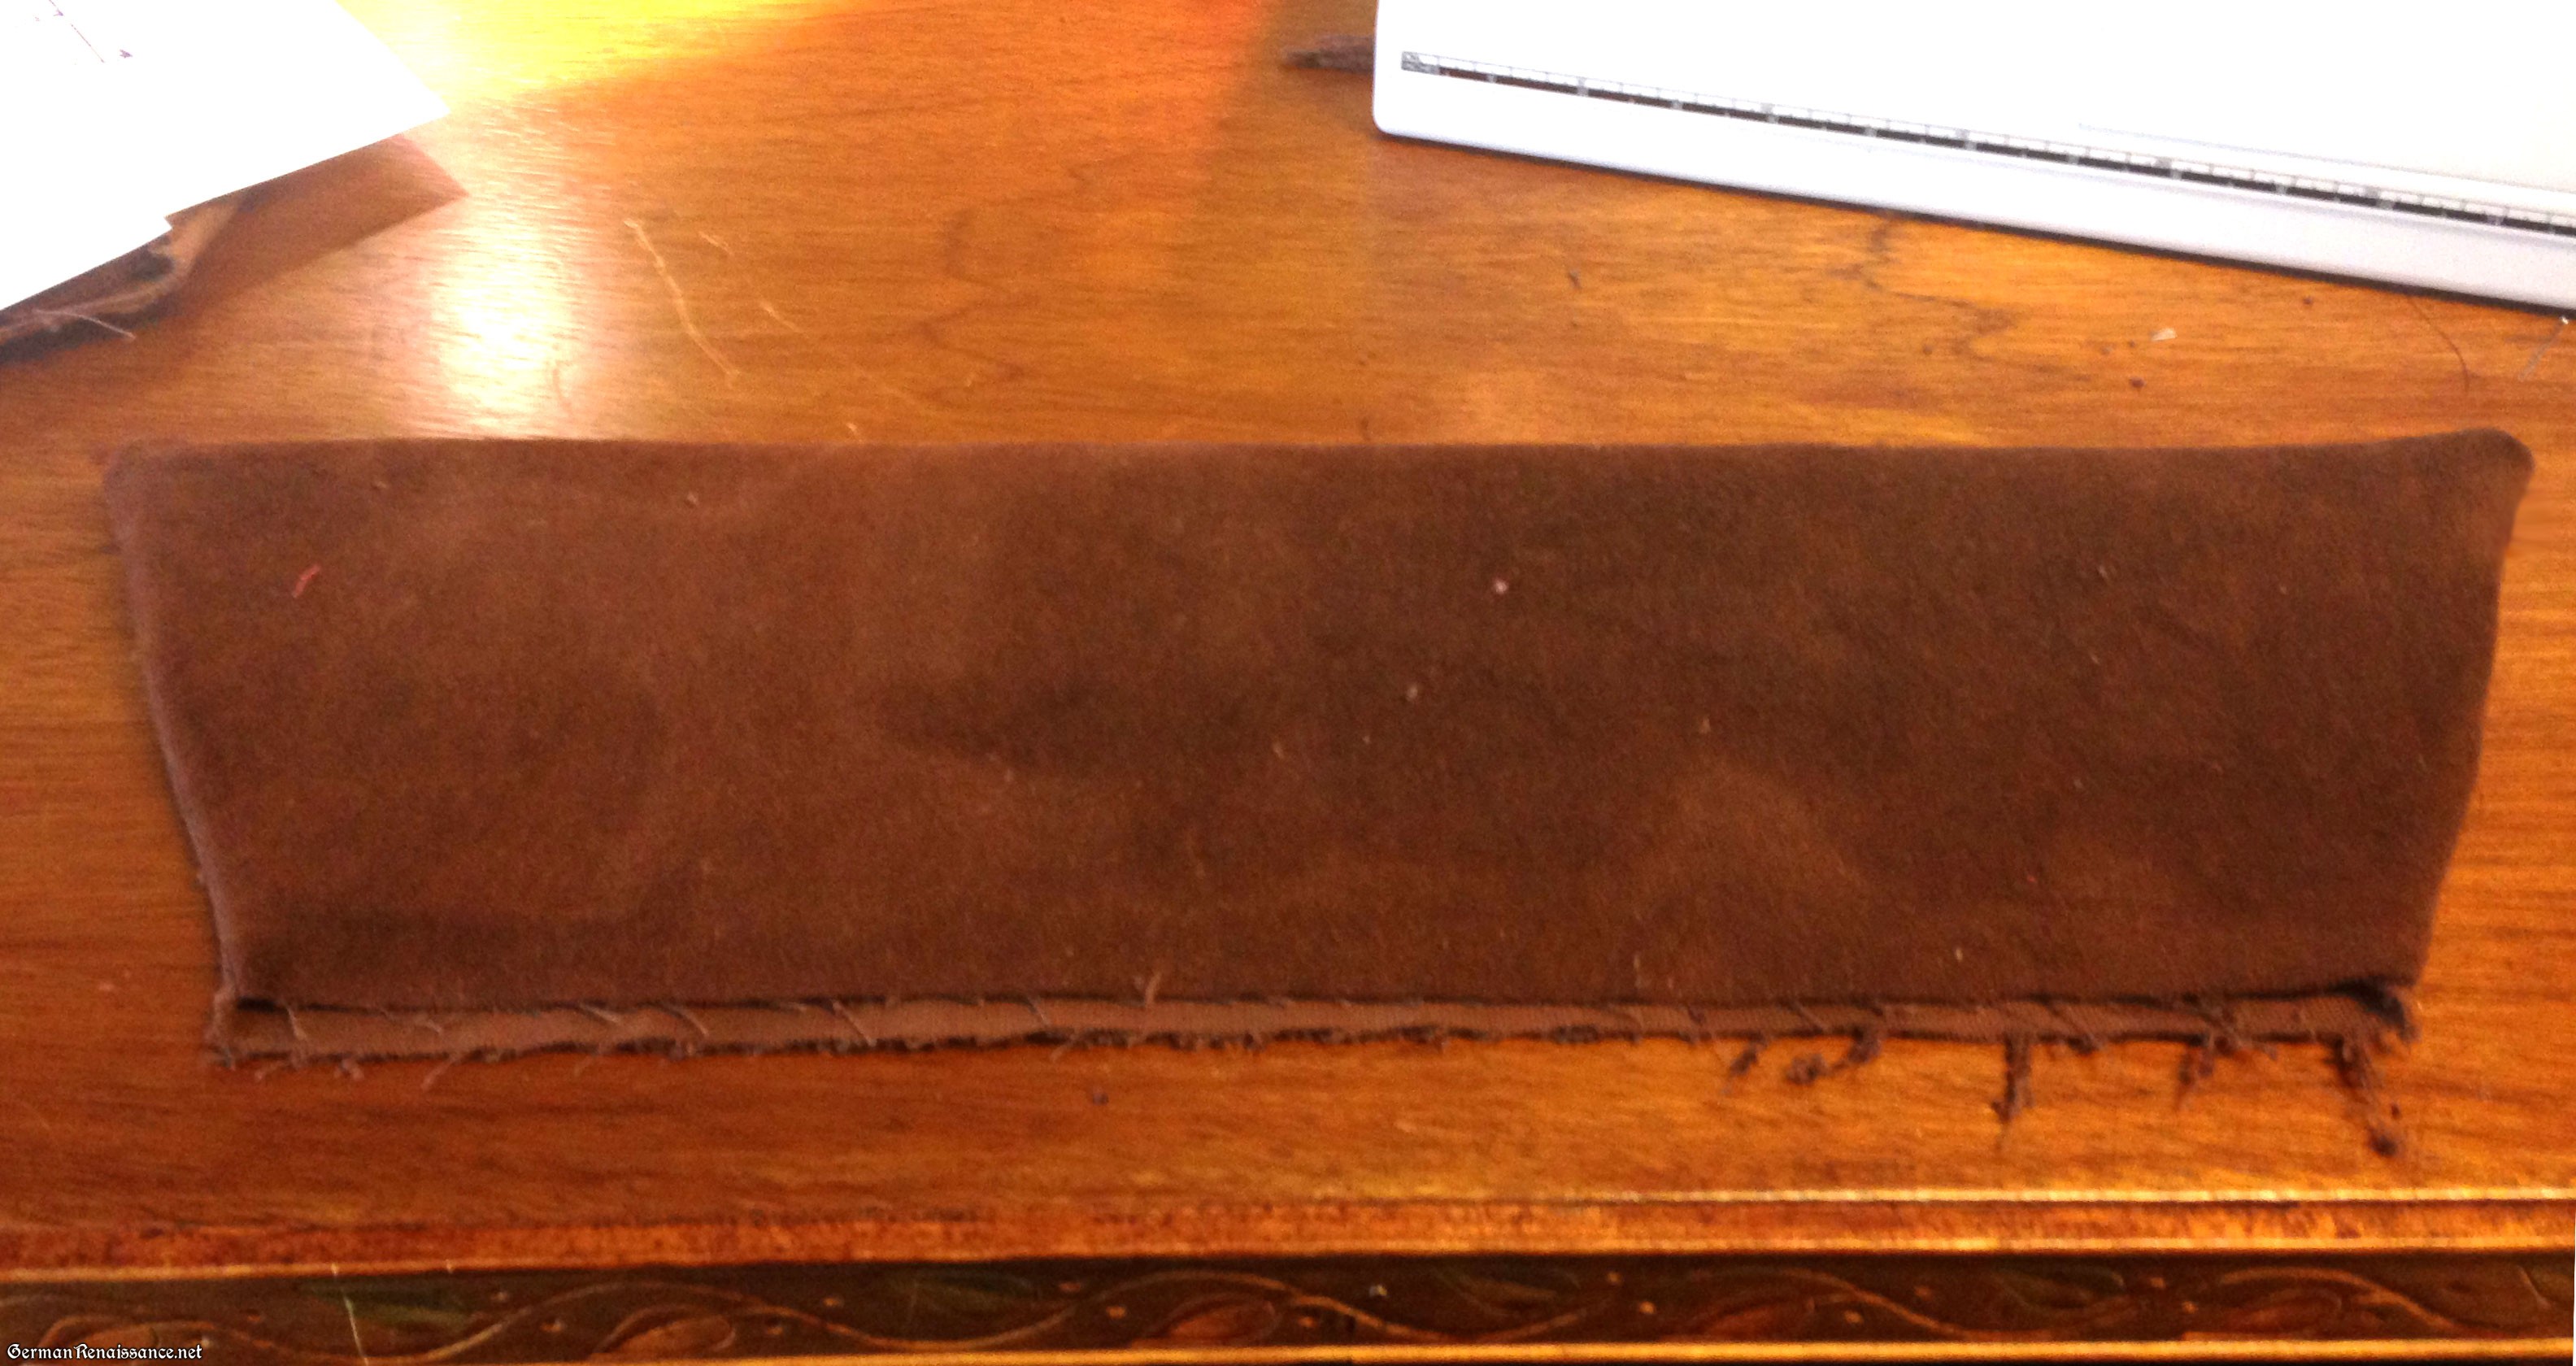
4. Fold over your brim pieces into a trapezoid shape with the longer margin facing out. The wider edge of the trapezoid is the top and the narrower edge is the bottom from this point forward.

5. Sew the two side edges of a brim piece closed along the narrow margin edges (stay at the edge of the margin where there are two layers, not four layers), then turn it inside out. I marked the place you should sew with a red dotted line on the pattern. Repeat with the other brim. You should now have two brim pieces with three finished sides and one unfinished side along the bottom.
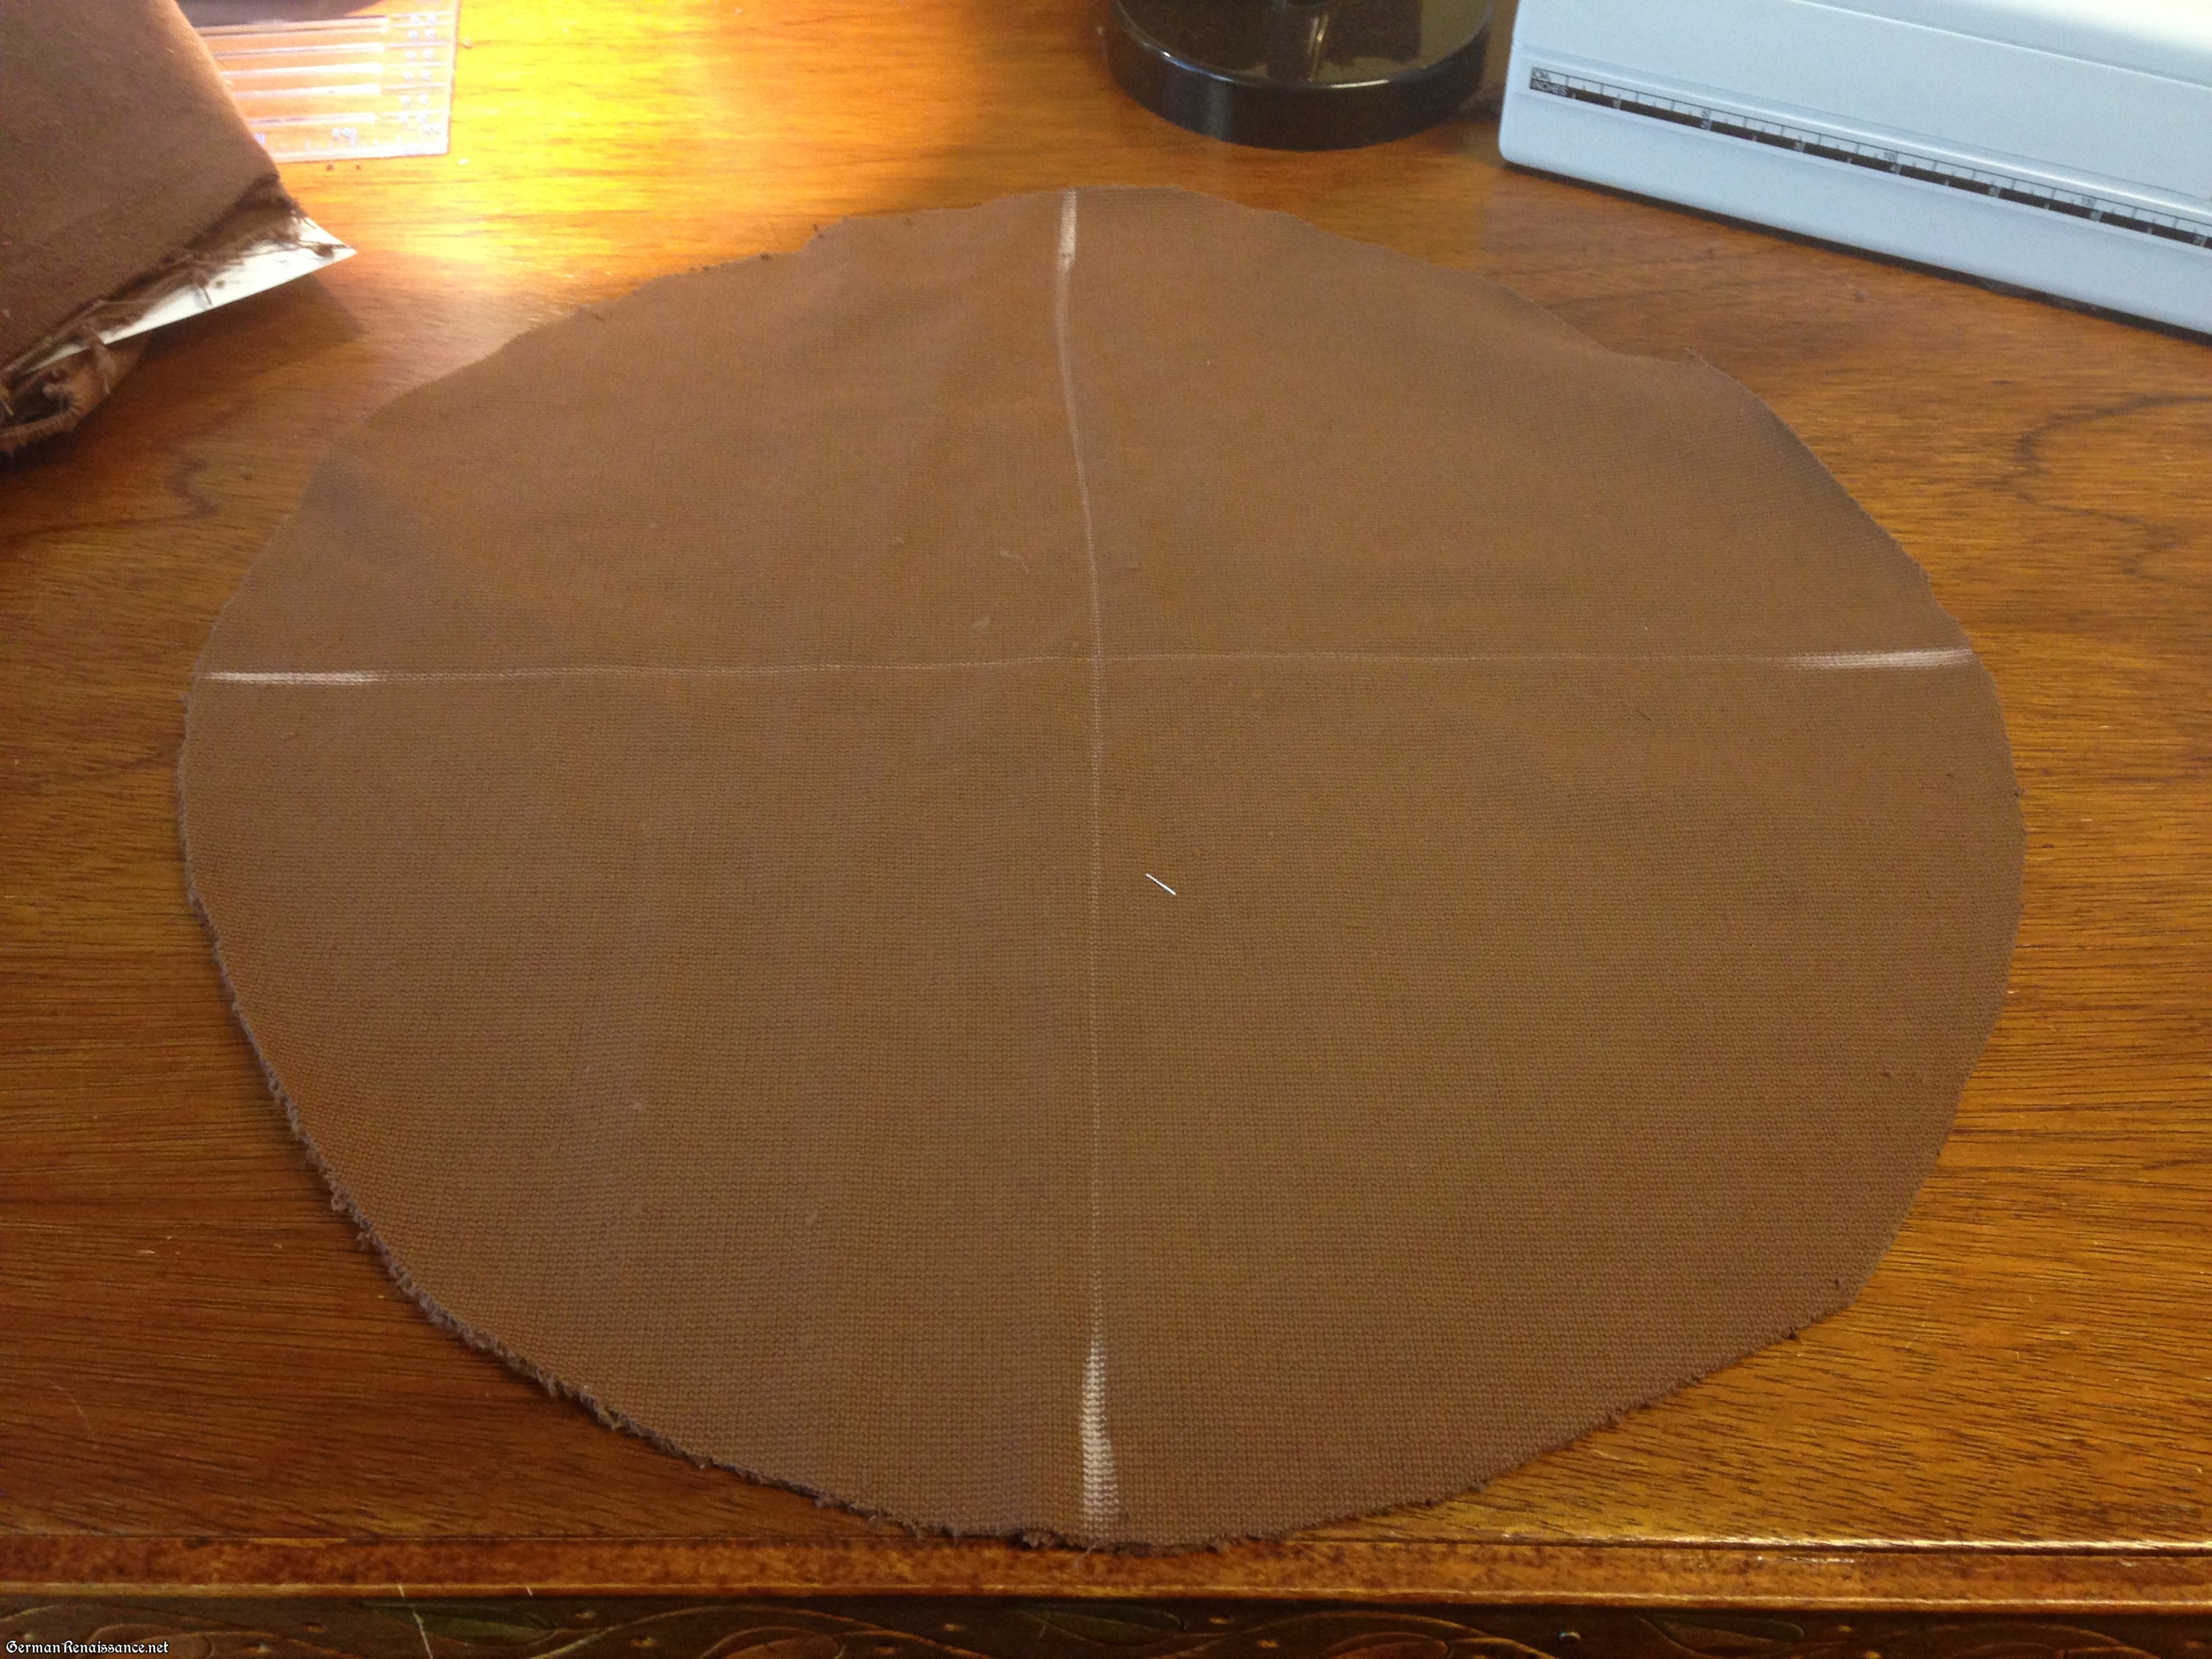
6. Now take your crown piece and turn it wrong side up. Using chalk, mark the circle into four equal parts. You’ll use these marks as reference points when you pin in the next step.
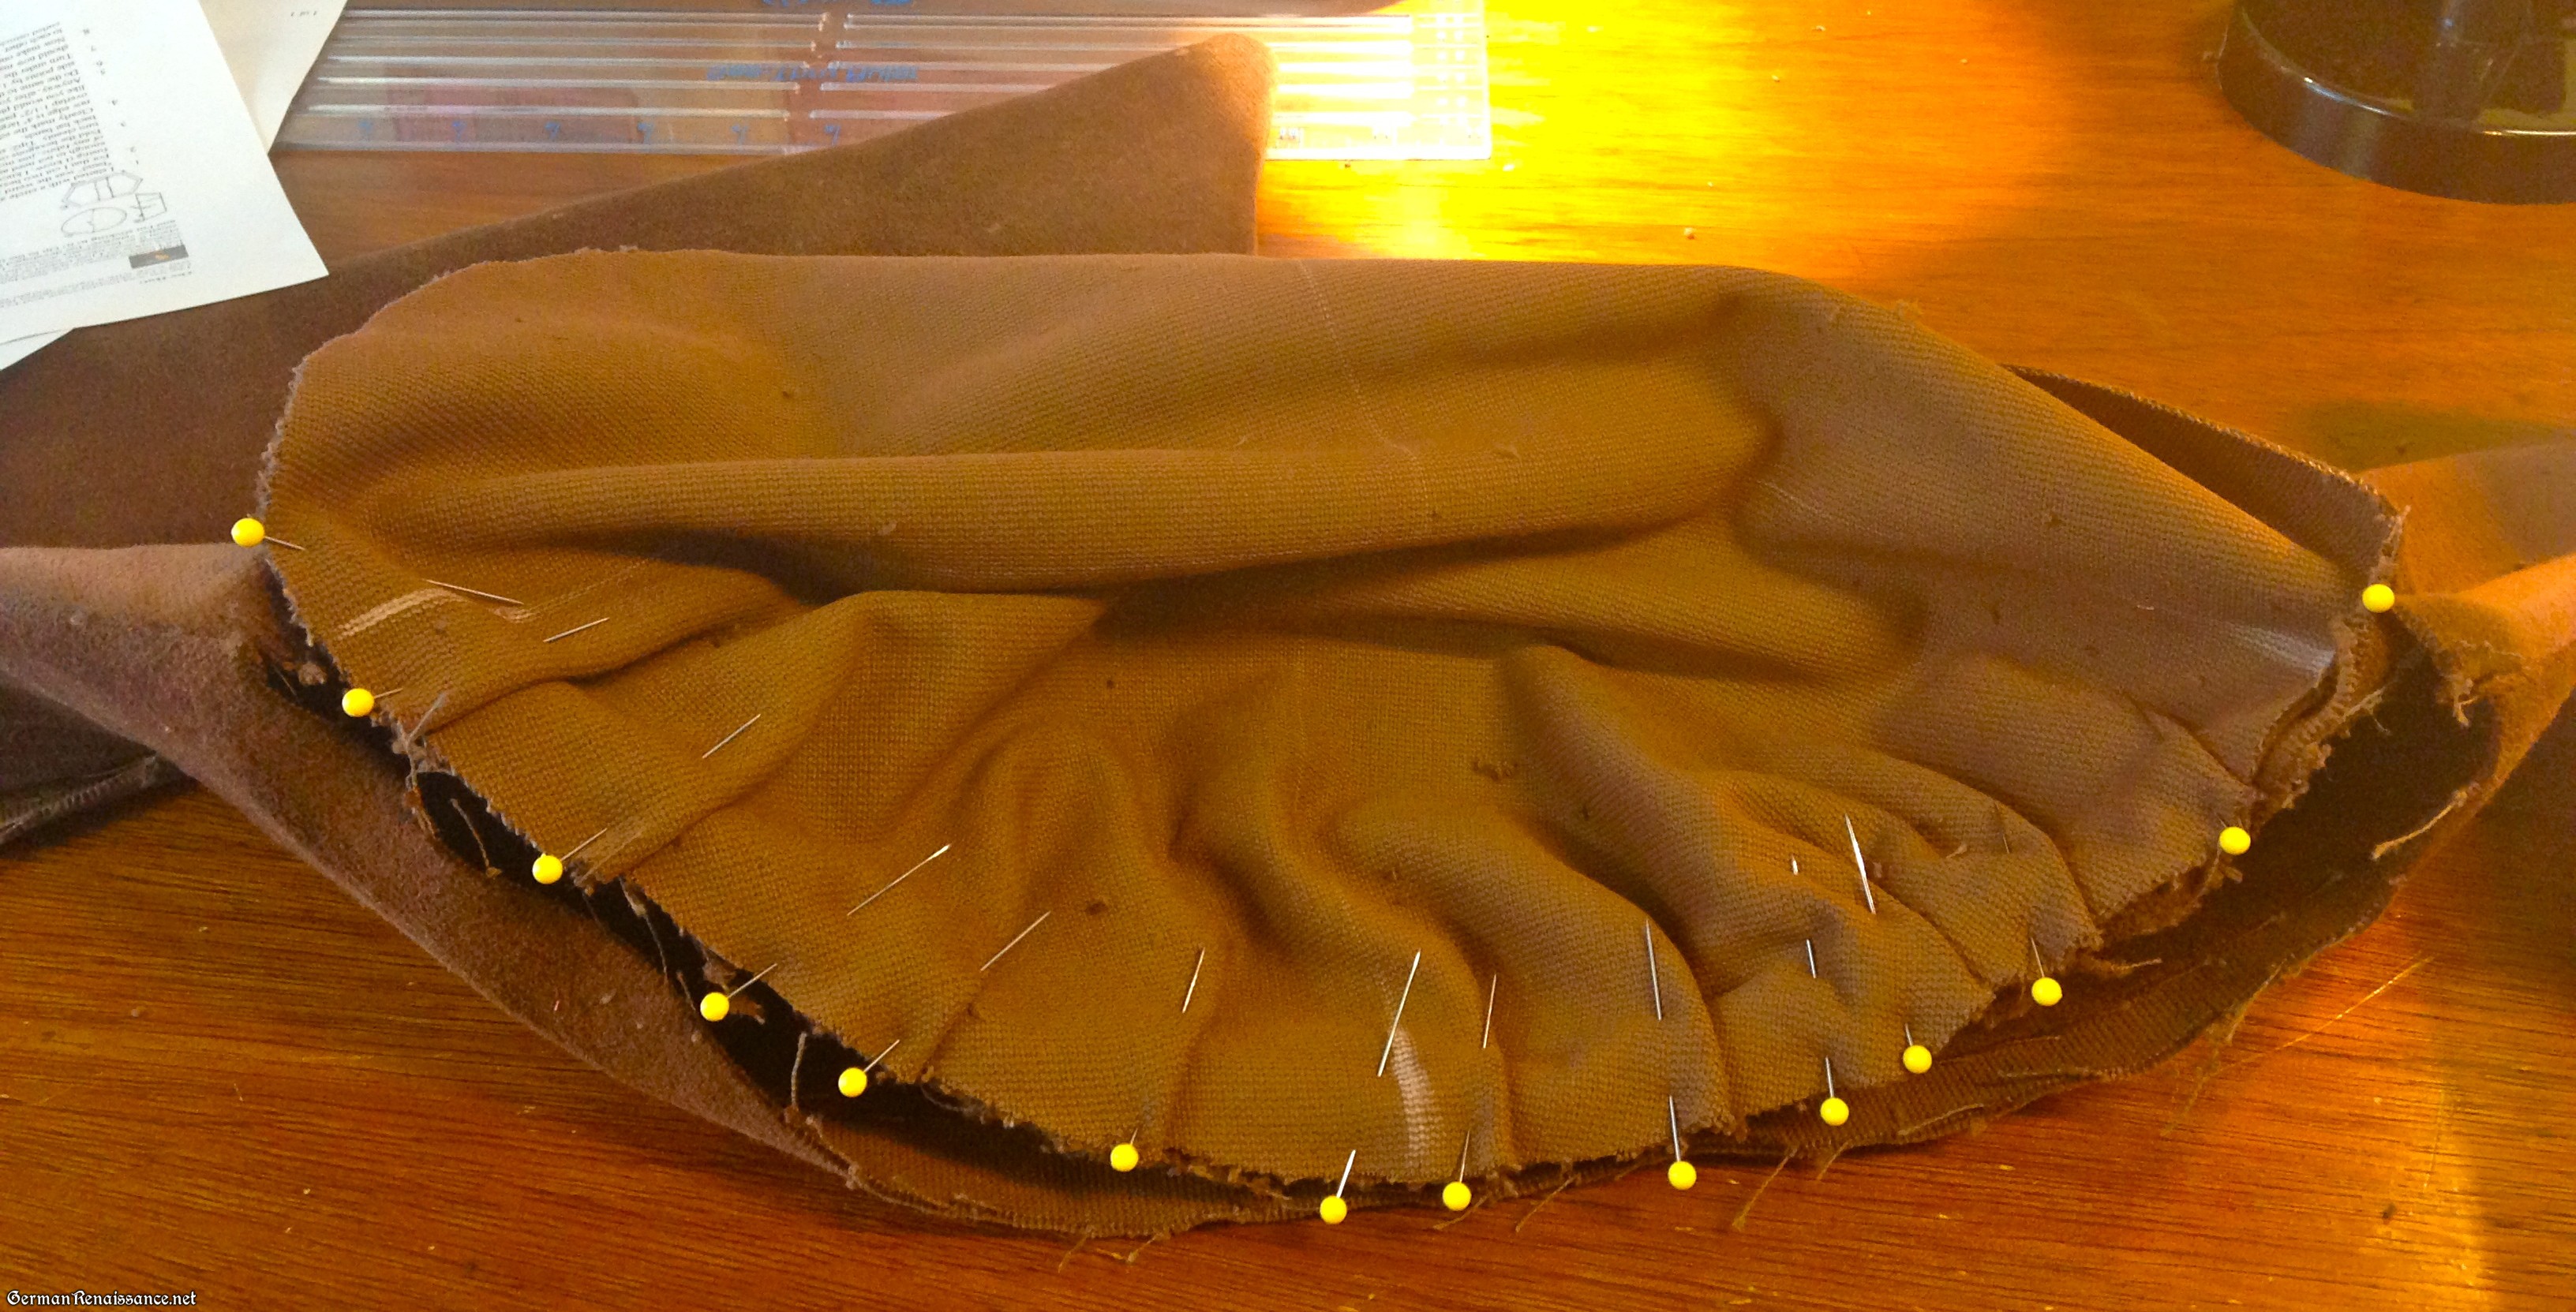
7. Pin half of the crown edge to the bottom of one of the brim pieces, right sides together, pleating the crown as necessary to allow it to fit on the brim. That 1/2″ margin at the bottom edge of your brim pieces is there to help you pin and to avoid unnecessary bulk that makes it hard to sew. Do the same with the other side of the crown circle and the other brim. Note that you want the ends of the two brims to overlap slightly, which both hides the edges and gives the hat it’s proper look.
8. Sew the crown to the brim where you pinned it in step 6. I used a sewing machine, but you could do it by hand, of course.
9. Turn the hat right side out and flip up the brim. Now cut the brims halfway down each side from the top down about 1-2″ depending on your preference. Refer to paintings, such as this one of the Saxon princesses, for placement and depth.

10. Curl your ostrich feathers. I did this by gently bending the spine of an ostrich feather over the edge of the dull back of a table knife, starting at the bottom of the feather. I walked the moved up the spine, bit by bit, gently bending and pressing the the feather against the blunt edge with my thumb. This makes a series of small dents. Avoid deep cuts or creases, which might cause your feather to break.
11. Place the feather spine stems in between the brim and the crown, so they curl over the outer edge of the hat, and sew down.
Voila! You have a hat. Note that the hat was oversized on me on purpose — the hat had to cover my goldhaube and it sits at a pretty drastic angle on my head.

AWESOME!!! Yet another hat I need to make…
Lovely but still trying to figure how to sew it.