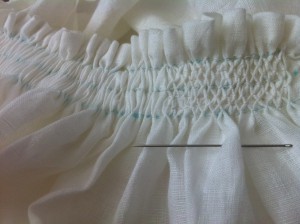
Honeycomb Pleatwork Collared Smock: Simple, Easy Pleatwork

Yesterday I discussed how I constructed my favorite high-collared smock which I wore through most of Pennsic. Today I will explain how I finished the collar with honeycomb pleatwork (smocking). (For those looking to make the honeycomb pleatwork apron, check the Patterns page for the instructions!)

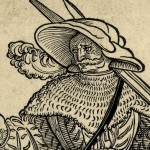
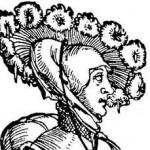
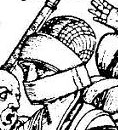
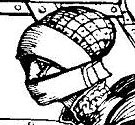
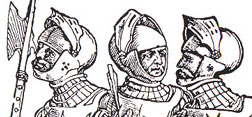
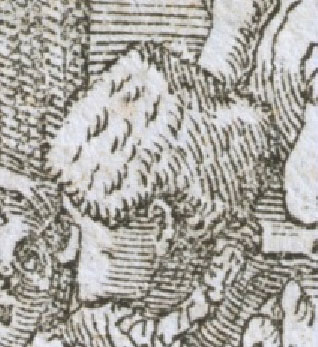
Woodcut of a trossfrau woman with a high-collar smock

Pleatwork is a very common method of gathering, sizing, and embellishing cloth in 16th century Germany. We call it pleatwork (fitz-arbeit), rather than smocking, as a way to differentiating between the creation of the pleats and the embroidery upon them (which isn’t something we’re doing here).

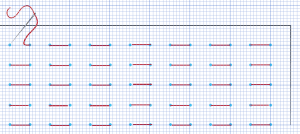
To get started, lay your constructed-but-unpleated smock collar out on a flat surface. Using a strait ruler (or one of my dot templates on the Patterns page) and a water-soluble fabric pen, place a row of small dots on your collar every 1/2″, about 1/2″ to 1″ below your top hem and 1/2″ or 1″ in from the edge of your hemmed opening (go for more space at the top of your collar for a bigger “ruffle” and more space at both ends of your collar if you’re concerned about sizing). Measure down a 1/2″ and make another row. Continue until you have five rows, which is about how many will fit on the 3″ collar you have after hemming it down to about 2.5″ or so. It’s fine to do four or six rows if it makes more sense. The dots will form a nice grid on your fabric, like this:

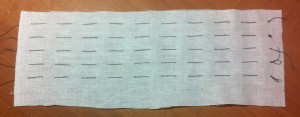
Now take thread and needle (single thread, knotted on one end) and do a full running stitch along each row of dots, with your needle coming up through the material at each dot and going back in at the next one. This gives you stitches exactly 1/2″ apart. Stitch each row with its own length of thread, leaving a long tail of the thread at the end. It does not matter the type or color of thread used here because you will be removing these stiches later.

A 10″ sample with five rows of running stitches

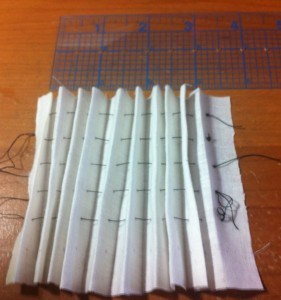
When all five rows have been sewn with the running stitch, pull on the five threads together to gather the material into pleats. You should gather the material into the length you wish your collar to be — my pattern should gather your 44″ of material into about 16″ of loose pleats (the average woman’s neck is about 15″, the average man’s neck is about 16″). Please keep in mind that the length may vary somewhat. If it the pleated collar is too short, loosen your gathering threads to the desired length. As mentioned earlier, you can start your pleats in 1″ on either side of your collar, which will give you more room to play with (and you can always go back and pleat those if it turns out your collar is too big).

Tip: Pinch and hold the pleats together with your fingers once gathered, creasing them. Ironing is also fine if you wish, but only if the marking pen you use allows it (some specifically say not to use an iron). Historically, they would have wetted the material and used a press or simple gravity to crease the pleats. Creasing them like this makes the next steps easier and makes the pattern we’re about to make stand out nicely.

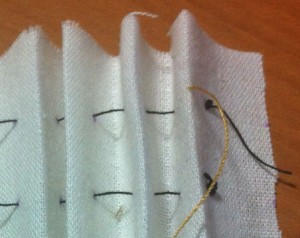
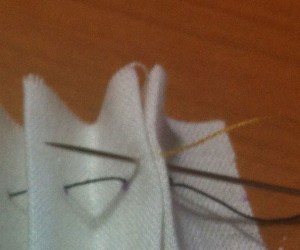
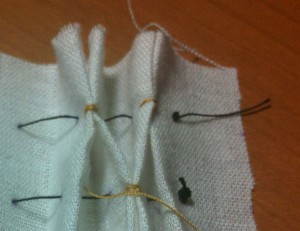
Now take some good white thread (I recommend silk), thread your needle, and knot it well at the end. (Note: The photos below show gold thread rather than white just so that you can see where the stitches appear.) Wax your thread with beeswax to strengthen and lubricate your thread. Bring your first stitch up from the back of your fabric to the front, right into the top-right pleat, as shown in the photo below.

Now put your needle through the top edge of the pleat you started at and the next one to the left, as shown below.

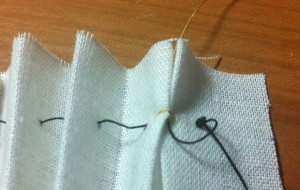
Pull the needle through, then backstitch over these two pleats twice to secure them together.

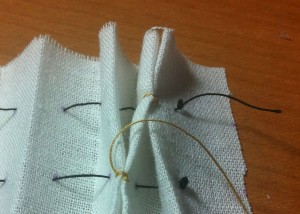
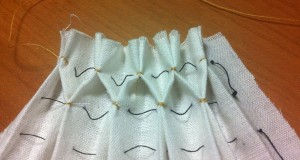
Push your needle back into the second crease, maneuvering it so it stays in the crease on the backside, then push it back through on the row below.

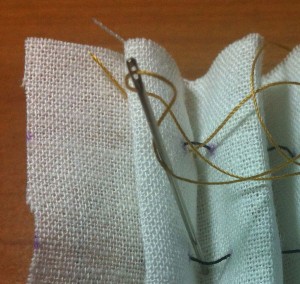
Repeat with the two creases on the row below, making sure you’re offsetting the pleats (this is how you get the honeycomb pattern). Backstitch at least twice to secure the stitch before inserting your needle back in behind the crease.

Push your needle back up through the fabric, behind the crease, at the top of the next pleat and stitch again.

Continue like this across the top two rows.

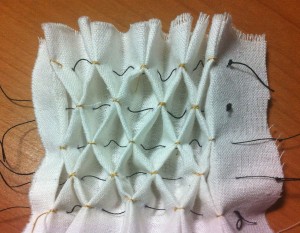
And then finish the other rows. If you have five rows, as I do in my sample, you’ll end up with the fifth row by itself — just move your thread up to the pleats above to anchor it behind the folds before moving onto the next stitch. When finished, triple knot your thread behind the fabric and cut. Here is the sample with all five rows stitched:

Now cut off the knots of the thread you used to gather your pleats and gently pull them out.

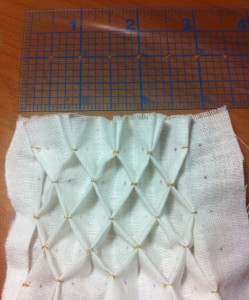
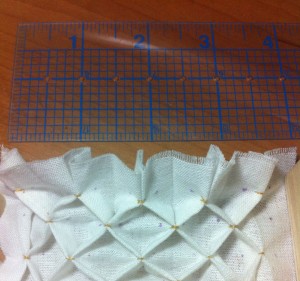
This 10″ sample of fabric pleated down into about 3.5″, give or take a bit — remember, this is stretchy, as you can see in the next photo.

The sample easily stretches to over 4″ with a little pressure. “Medieval elastic!”

My unterhemd pattern has a 44″ collar before the pleatwork. Based on the 1/2″ spacing, it pleats down to about 16″ (or 18″ when stretched). These numbers can vary a bit depending on how tight you pulled your pleats, and how much extra space you left at the end of your rows. But this method worked well for me!

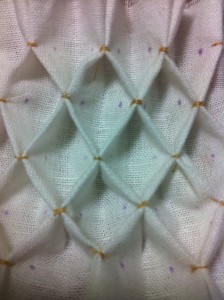
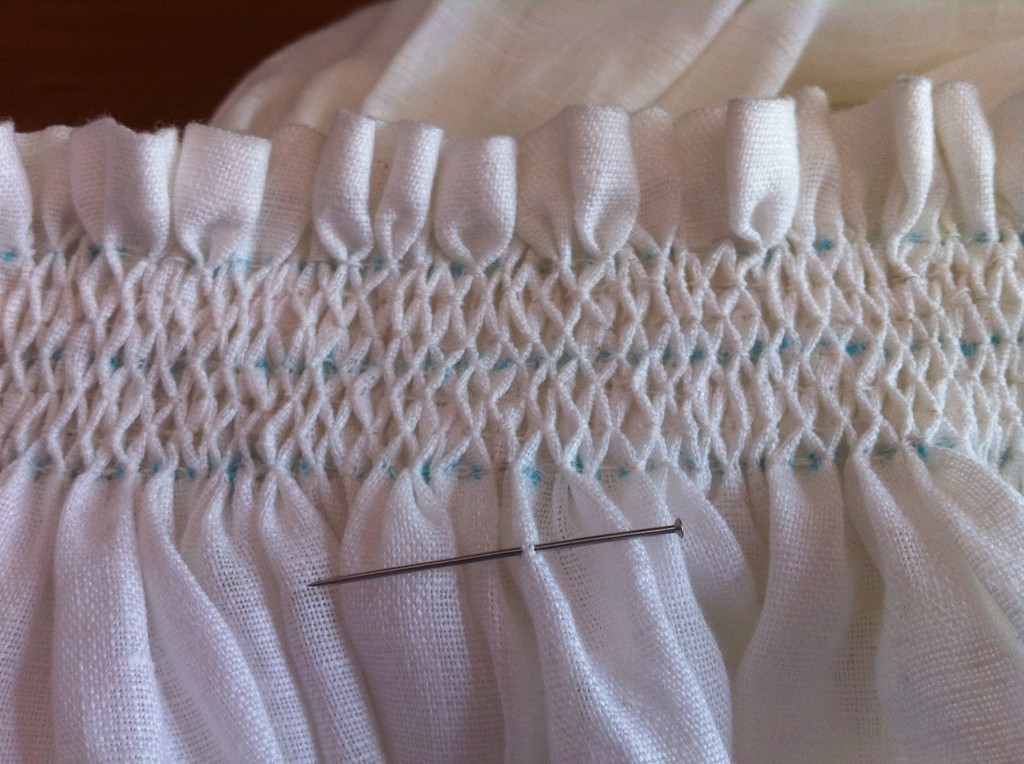
And here is a close-up of the honeycombs, just because I love them:

Don’t forget to rinse out your material to erase the marks!
My Favorite Pennsic Smock: Pattern For a High-Collared Unterhemd with Honeycomb Pleatwork

For Pennsic this year I packed seven smocks for myself — some call them chemises or white linen underdresses, the German might say unterhemd (underdress) or Wäsche (the wash). My smocks are in a variety of styles and weights of linen, all worn before with success and all in good repair. Did I wear all seven over the course of the event? No. To my surprise I discovered I far and away preferred just one smock that I’d made a few days before Pennsic, and I wore it as often as I could because it was so comfortable and went with every gown I owned. I would actually alternate that favored smock with one of the others so I could wash and dry it for the next day. And, trust me, I wouldn’t have gone to all that work if I hadn’t REALLY liked it. I think I managed to wear this particular smock at least 8 or 9 days of the event. This is SO not my style — I’m the “I-like-to-wear-something-different-every-day” sort of girl.

What’s so special about this smock? It has several features I really liked that fit me, my particular wardrobe, and the warm, humid weather of Pennsic:

  1. Fabric weight: It’s made of white “tissue linen” from Jo-Ann’s (not to be confused with tissue linen from other places, like Fabrics-store.com). This tissue linen is 60% linen and 40% cotton. It’s light and airy, and feels great against your skin on hot, muggy days. Better than 100% linen, which has a heavier feeling than this based on my experience. I did several experiments at Pennsic last year, and this tissue linen was my definite favorite. (Note: I only recommend the tissue linen for hot weather — otherwise go for 100% linen.)
  2. Length: This smock does not go down to my knees (or further) like my other smocks — it’s only about mid-thigh length. So not only is there less material to deal with in general, but when I kirtle my German gowns in the Landsknecht fashion, you cannot see the edge of my smock peeking out below immodestly.
  3. Sleeves: The sleeves are big and poofy, which meant more air circulation and it allowed the sleeves to billow out nicely on my gown with the slashed sections. Also, I put elastic at the wrists (I would have smocked/pleated them for the same effect — it’s “medieval elastic,” you know — but I ran out of time) and this allowed me to push my sleeves up and stay cooler.
  4. Shoulders: My pattern shows a triangular section cut off at each shoulder, which moves the sleeve seam higher up so it is usually hidden under your gown strap. This construction method is period — it appears on Nils Svantesson Sture shirt from 1567 (on permanent display at Uppsala Cathedral in Sweden). I should not that this is NOT a raglan sleeve, as the seam does not go up to the collar, but rather just moves the sleeve up to a more vertical position when worn.
  5. Neckline: The smock has a high collar, but a long opening cut below it, giving the smock a deep V-neck appearance. This was comfortable and cool, and flattering on me.
  6. Collar: The collar is pleated in a simple and relatively large honeycomb pattern. It only took a few hours to do it and held up to stretching, pulling, and hand-washing, and it felt very authentic!

So I thought I’d share the pattern for this fantastic smock with anyone else out there who might be looking to make such a garment. My pattern is mostly one-size-fits-all, but feel free to adjust it. My inspiration for the smock came from Baroness Sylvie’s work on her own hemd, which you can read about on her blog (thank you!). And this smock is unisex — Gregor accidentally put it on thinking it was one of his and he looked great in it.

Yes, that collar is 22″ wide on both the front and the back, meaning it’s 44″ wide. But don’t worry — it all gets smocked down into a 16″-17″ wide collar.

Here are the step-by-step directions for my collared smock:

1. Purchase (or find) at least 2 2/3 yards of linen that is at least 48″ wide (the tissue linen I mentioned earlier is 54″ wide).

2. Pre-wash (and pre-shrink) your linen. Iron it.

3. Fold your linen in half so you have a square at least 48″ wide by 46″ long, with the fold on the 48″ length, as shown in the cutting pattern above.

4. Cut out your smock pieces as shown in the fabric. When done completely, you will have eight pieces — two sleeves that are 24″ long by 20″ wide, four gusset triangles, and two body pieces 43″ long by 36″ wide.

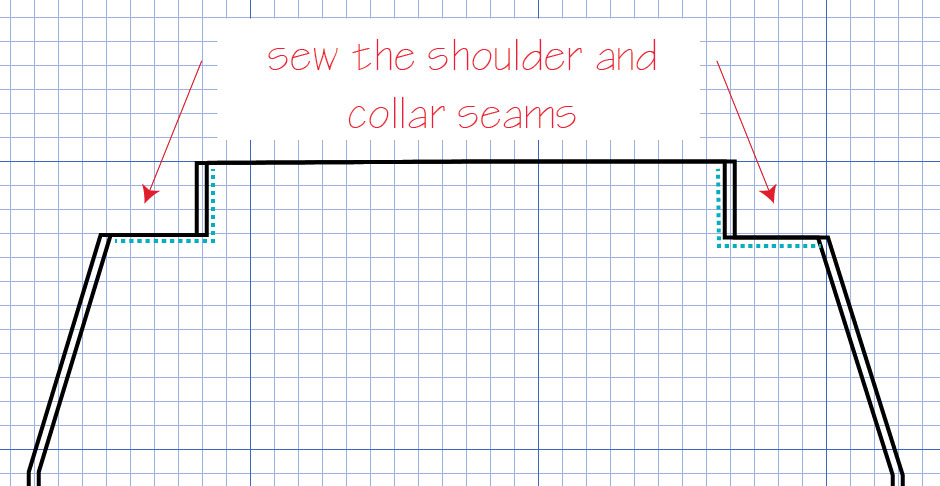
5. Sew the shoulder and collar seams of the two body pieces together, as shown below. I recommend a French seam or a flat-felled seam.

6. Decide which side you want to be the front (they should be identical) and make a 9″ cut in the top center for the collar opening. Remember: This cut is one ONE side only.

7. Hem the top of the collar and the collar opening. I recommend a small rolled hem done by hand. It doesn’t really take that long.

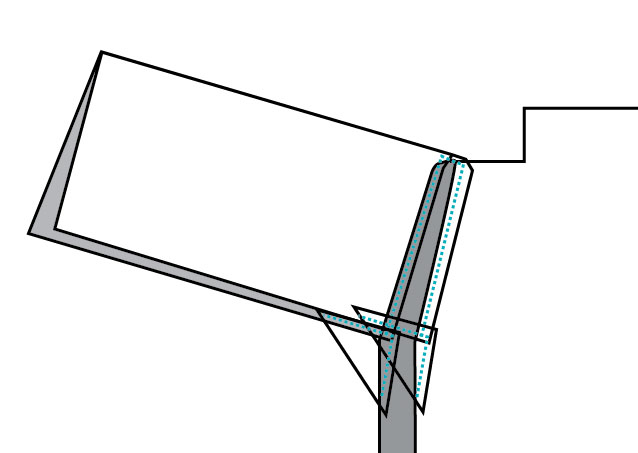
8. Lay the top end of the sleeve against the edge of the body piece, matching the center line of the sleeve with the shoulder seam of the body. Sew the sleeve to the body, as shown below. Repeat for the other sleeve. (Again, I recommend a French seam or flat-felled seam.)

9. Sew a gusset triangle to the point where the end of the sleeve and body meet, as shown below. Repeat for all the gusset triangles. I like to do French seams here.

10. Now just sew the two sides together from the wrist of the sleeve, along the gusset, and down to the bottom of the smock, as shown below:

The smock construction is complete — now all that remains is the pleatwork on the collar. I explain how to do that in my next post!

The Mystery of the Disappearing Goller/Hemd: The Halshemd

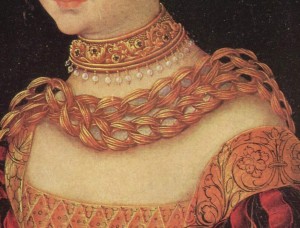
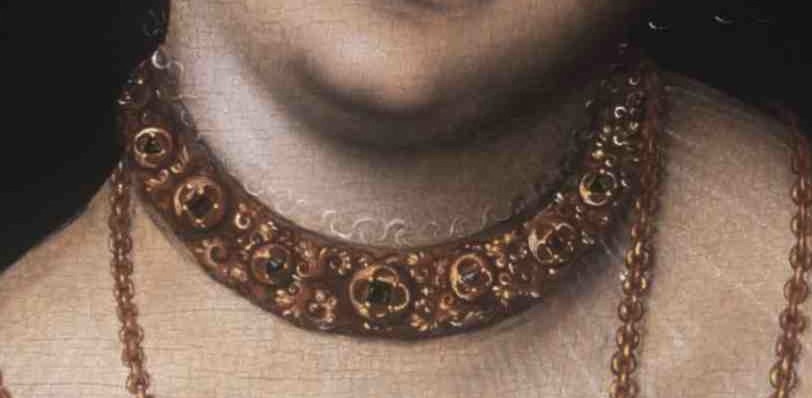
In my review of German renaissance paintings of women, I’ve seen many upper class ladies with lovely beaded chokers around their necks. I took these chokers first to be jewelry.

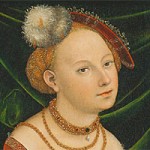
Portrait of a Young Girl by Lucas Cranach (Statens Museum for Kunst)

Later, I noticed that some of these chokers appeared with a fine, translucent material that covered the bare skin between the top of a gown and the neck.

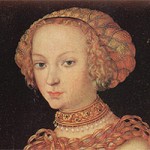
Princess Sybille by Lucas Cranach (c. 1526)

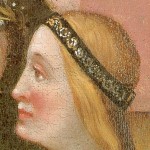
Closer looks revealed that these were not so much chokers but possibly bands into which this material was pleated. And then I realized … these could be high-necked garments, made of a fine material and pleated into a beaded and possibly jeweled neckband. For the purposes of my research, I am calling these Halshemd (Hals = neck, hemd = shirt).

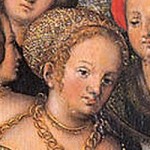
Detail from painting by Lucas Cranach

It’s interesting that sometimes the pleats of the Halshemd are painted, and sometimes not. My theory is that the tiny, translucent pleats were challenging to reproduce, and painters sometimes chose not to paint them. It’s also possible that the choice of a translucent material meant that these garments were intended to be “invisible” (in the way modern bras can have “invisible” straps) and thus were not included in the image.

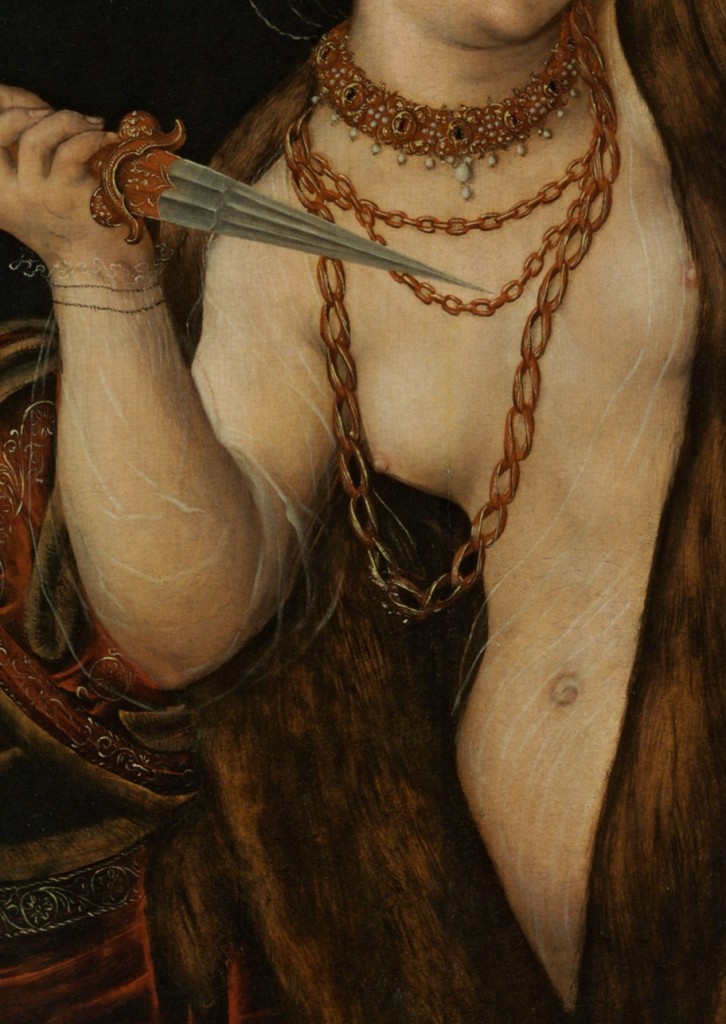
I’m not clear on is the length of the Halshemd. Are they short, like gollers or partlets, or long, like an underdress? The material is so fine that I’m inclined to think they are short, as it seems impractical to have such a fine material next to your skin that would need to be laundered regularly. But when you look carefully at the neckline of the gowns worn by the women, you can see no other garment showing besides the Halshemd. And, one nude shows the Halshemd, and it clearly has sleeves and is not goller-length.

The above painting may be misleading, however, as you cannot see any material near the neck or chains. Did the painter chose not to paint the folds of the Halshemd there so that the other details were clearer, or was the garment open in some manner? It’s also entirely possible that this painting does not reflect reality, and is rather a fantasy of the painter’s imagination. And, on the flip side, it could be evidence that the chokers were separate from the Halshemd (if you click the image to enlarge it, you can see she has a bracelet on one of her wrists which doesn’t appear to be attached to her diaphanous hemd). Mysteries, mysteries!

Discovery of My 16th c. German Ancestors — The Tode Family

Tode Family Crest

Sometimes when you go looking for something, you find a lot more than you expected.

This is what happened last November when I was researching my first real German gown. Curious what women in Lübeck were wearing in the 16th century, I went hunting about the Internet for images. Why Lübeck? My grandfather’s ancestors (the Tody family) have always claimed to have come from North Germany, specifically Lübeck and Mecklenburg, and this is why I chose a German persona in the SCA. And knowing that my first German gown was going to be fashioned after one worn by a burgomeister’s wife, I looked at past Lübeck burgomeisters and their families for inspiration.

And that’s when I discovered the Tode family. Living in Lübeck. In the 16th century.

!

For those who know German, you probably know that Tody/Tode means “death.” But, as it turns out, that’s not it’s original meaning. According to The Community of Rondeshagen in the Duchy of Lauenberg’s family history site (Rondeshagen is in the Holstein area in N. Germany), Tode comes from “Todo,” who lived before the 12th century and  whose descendents took surnames of “Todonis” which later became Tode. The family tree from Todo down to the descendents in the 15th century has been recorded, many of whom lived in Lubeck. The name was not changed to “Tody” until immigration to the U.S.

I am able to directly trace my ancestry back to a farmer named Dietrich Tode, born in the village of Malchin in 1769 based on the 1819 census of Mecklenberg-Schwerin (Malchin is 20 miles north of Mecklenberg and about 120 miles east of Lubeck). Records stop with Dietrich (the 1819 census was the first general census), but Tode is a rare name — the census shows only 23 individuals with that surname (out of 388,000 persons total). I feel confident that if I could trace Dietrich back, I would find that he’s connected to the original “Todo” line that is dated back to the 12th century. Tracing Dietrich back further will likely be a lifelong project and will require visits to Germany, I’m sure. It’s possible that a “Magnus Diedrich Tode” born earlier in the century may be related, but I haven’t verified it yet.

So, without further adieu, I present two of my indirect ancestors’ paintings from the 16th century:

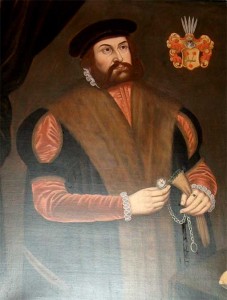
Christoph Joachim von Tode (1515-1579) - Mayor of Lübeck from 1566-1579 (image from Lübeck City Hall)


Agneta Tode Solers ( 1554-1617)


Christoph has a barett and the whole fur robe thing going on (definitely looks like a statesman), while Agneta has a lovely embroidered goller and an impressive ruff, not to mention a good display of wealth in the form of gold chains. Fascinating!

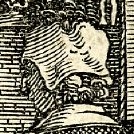
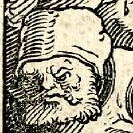
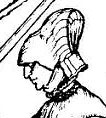
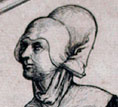
16th Century German Hats and Headwear: A Review Based on Period Woodcuts and Paintings

In my time in the SCA, I have developed just one tiny pet peeve. One could call it a passion even. “What bee’s gotten into your bonnet?” you may ask. Well, it’s simply that I believe we should all be covering our heads when dressed in European garb.

Men and women have regularly covered their heads in public since recorded history, this tradition ending only recently in the late ’60s. Whether heads were covered to protect against the elements, for humility or modesty, or for fashion, there’s no doubt in my mind that a hat makes the SCA outfit. If I could influence just one thing, it would be to encourage more people to cover their heads at events.

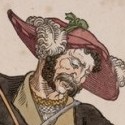
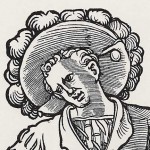
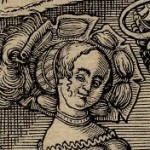
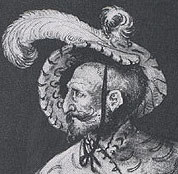
To do a review of all hats over the course of history would be a lifetime’s work, so I’ll start with my interest — 16th century Germany. Even that maybe a bit broad, so let’s narrow it down to the first half of the 16th century, with an emphasis on the German upper class and the Landsknecht who both wore a great variety of headcoverings, from simple to elaborate. Here are the categories of haube (headcoverings) I’ve observed from period woodcuts and paintings:

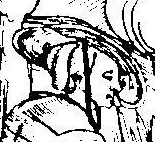
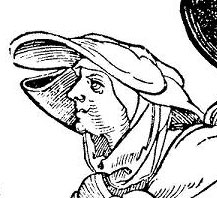
Three different types of headcoverings are depicted in this one woodcut of a tross (Landsknecht army train). From The German Single Leaf Woodcut 1500-1550 by Max Geisberg; rev. and edited by Walter L. Strauss

Bundhaube (coifs/arming caps)

Stuchlein and wulsthaube (scarves and support caps)

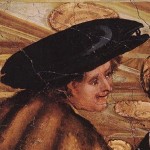
Beretts (round caps with brims)

Sebald Beham, Lansquenet, c. 1530, Woodcut, coloured with watercolour, 33 x 22 cm, Private collectionBeham, Hans Sebald Year:	about 1525

Gugel/Kogel/Kugel (hoods) – very few of these!

Gebende (headwrap with chin strap)

Goldhaube and Haarhauben (hair caps/cauls)

Haarband (black headband, used mostly by young woman of the lower classes)

Helm (helmets)

This is by no means an exhaustive representation of German headwear, but I believe it is a reasonable representation of the images available.

Resources:

http://www.historiclife.com/pdf/landsknechthatandcoif.pdf

http://scagermanrenaissance.blogspot.com/2011/08/lost-and-found-updated.html

Goldhaube: In Search of the Golden Caul-Hat-Haarhauben Thingee

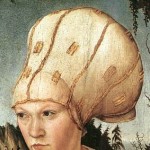
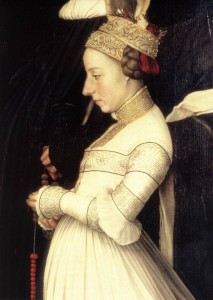
German women of high rank in the 16th century were fond of wearing what we call a goldhaube, or Haarhauben, beneath their hats or even without hats. I’ve seen countless portraits depicting goldhaube, and as best I can figure, it’s a gold-decorated caul — nothing more than a fancy golden bag for your hair. I’ve seen them solid, richly embroidered and pearled coifs and as some sort of netting reminiscent of a snood. The material, or ground, often appears to be an goldish-orangish-reddish color — my best guess is that it’s silk. The common elements are the general shape and the use of gold. Here are some portaits by Lucas Cranach — click each for a larger image.


Cauls are easy to make — they are nothing more than circles or ovals gathered into a headband. I’ve made half a dozen so far, with increasing success at how they look on MY head (I prefer to create them less gathered on the top of the caul and more gathered at the nap of the neck). The smallest diameter for the circle is about 12″ — I also go a little larger for a baggier, fuller look. The headband should be the circumference of your head measured from the top of the skull to the nape of your neck, because a caul sits on the back of your head rather than on the crown. Click here for a step-by-step guide to making a simple caul.

I have already made what one might call a goldhaube (click here for the documentation on it), but it was more in an English style than German, with white linen as the ground and floral blackwork as the main decorative element. So I’d like to create one out of gold silk, embroidered with gold thread, and beaded with pearls. Based on the above portaits, a simple lattice over the silk ground would accomplish my goal. And I’d definitely want a larger diameter circle than your usual caul, as it appears these goldhaube covered more of the head. Sounds like a fun project! Now I just need to source the silk and pearls.

Update: The more I think about it, the more I suspect that goldhaube were made from silk damask. I’ve seen several silk damask with geometric patterns, and, with some pearls beaded onto them, they would look strikingly like the goldhaube in the paintings. Damask has the right dimensional look that I see in the goldhaube.

16th Century German Tabards … Plus a Tabard Pattern!

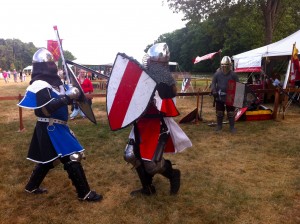
Duke Dag and Gregor wearing tabards

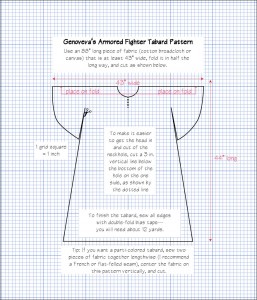
A new member of my group recently asked how to make a tabard. This got me thinking. The tabards I’ve made have been pretty generic, as many others who came before me have already done a good job of covering tabard construction throughout history. I’m fond of the tabard pattern I use — it’s adapted from Duke Dag’s design, and it looks great over armor and while fighting, giving free range of arm movement. If you’re interested in that tabard, here is the pattern as a PDF and as a simple JPG (click the image below for a larger view).

Basic Tabard Pattern

Note that the above tabard pattern is based on my guy Gregor’s 6’2″ frame. If you’re smaller, you should narrow and shorten it appropriately.

But I began to wonder — what would a German Renaissance tabard look like? It doesn’t appear the Landsknecht soldiers wore tabards at all, based upon a review of woodcuts. They did wear leather vests, called ledergoller, which one might confuse with a tabard, but they did not have the same function as far as I can tell. Nonetheless, tabards were useful with armored combat because they served as easy identification on the field and because they hid problems in armor, making it less likely your enemy might notice a spot less defended, so it’s likely they were worn by some Germans in battle, though perhaps not many.

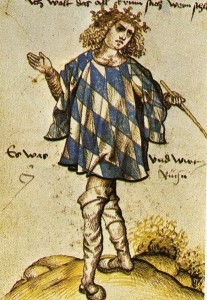
Bavarian Herald Joerg Rugenn, 1510

I have found evidence of herald’s tabards in Germany in the 16th century, however. One in particular, a Heroldsrock from Bayerisches Nationalmuseum, is dated to the 16th century. It looks like a surcoat with long sleeves, and less like the tabard that we know. There is another tabard worn by the herald of the Holy Roman Empire which looks more like a tabard, but is elaborately embroidered. The most familiar looking tabards I’ve found is on another German herald depicted in a 1555 book, Ehrenspiegel des Hauses Österreich — a heraldic symbol tabard, a diagonally striped tabard , and a more elaborate tabard with tassels. And then there is an illustration of Joerg Rugenn in a tabard, found in the Oesterreichesche Nationalbibliothek (Austrian National Library) Cod. 2936, Part 2, fol 11v), and shown on the left.


Learning German Pleatwork (Seidenfitzen) on a 16th-Century Style Hemd (a.k.a. Smocking)

One of the projects on my big wish list is to replicate Dorothea Meyer’s pleatwork and goldwork smock. Thus, it naturally follows that I need to learn how to smock. It turns out that “smocking” (the gathering and manipulation of pleats in a decorative manner) is a Victorian term, so I’m calling this silk pleatwork, which is the literal translation of the German word seidenfitzen found in Textiler Hausrat, Kleidung und Haustextilien in Nurnberg 1500-1650 (an English translation of this work can be found in the Files section of the GermanRenCostume group).

An extant hemd (smock/chemise) from the 16th century found in a cloister in Alpirsbach shows pleatwork — honeycomb pleatwork, to be specific. Honeycomb pleatwork is also evident in a number of paintings and woodcuts, so I’ve chosen to learn the honeycomb stitches first.

Starting the honeycomb pleatwork

Being the ambitious sort that I am, my first pleatwork is a full hemd in linen. I cut out four rectangles, sewed them together where the collar will be, sewed a rolled hem at the top, and then created three rows of gathering stitches 1/2 inch apart. Now I am going back along those gathering stitches with the honeycomb stitch, creating six rows of honeycombs. I initially thought I’d just have the three rows of honeycombs, but it just didn’t look right, so I doubled it. The stitches are tiny, as are the honeycombs, and it seems they are tinier than other examples I’ve seen on the web. But they are not tinier than stitches I’ve seen in paintings, so I believe I’m on the right track. It certainly looks beautiful! Alas, it is slow going. I’ve only finished 1/4 of the neckline.

The band of honeycomb pleats at the top of my hemd is coming along

Did 16th Century German Women Wear Fur?

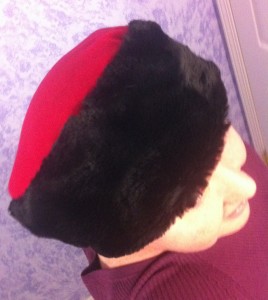
This winter I went to an outside event where I knew the temperatures would be low. So I made myself a faux fur and wool goller and hat. Did I research them in advance? Nope. I just wanted to be warm! But, of course, I found myself wondering if German women wore furs. I hadn’t come across any evidence of it, but — logically — it only made sense. Germany had cold winters in the 16th century. Women would have gone out into the cold. Furs kept humans toasty warm. Germany had plenty of critters with warm fur. Men wore fur. Thus, German women would have probably have worn fur, too. But there’s really no evidence of it in paintings. Artists rarely painted portraits of people in their outside clothing. I did find evidence of 16th German men wearing fur hats in portraits, but the ladies mostly wear scarves or other head coverings.

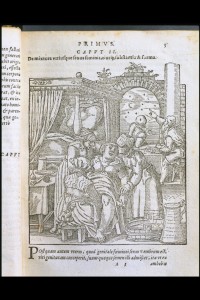
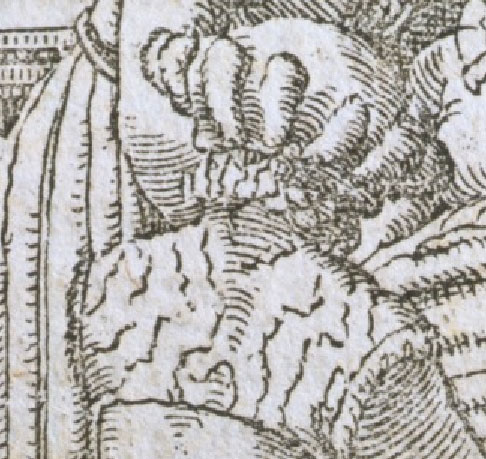
Today, however, I believe I’ve found evidence for both a fur partlet and fur hat … on German females! I was searching through 16th century German artifacts in the Victoria & Albert Museum and I discovered an obstetrical book from Frankfurt, German, published in 1587, by Jacobus Rueff. The illustrated title page shows a birthing chamber with several woman helping a pregnant woman.

If you look closely, the attendant kneeling before the pregnant woman has what looks to me to be a fur partlet, or partlet-shaped goller. The woman on the right has what definitely looks like a fur hat.


So next winter I plan to make fur accessories more along these styles, though my fur hat is already pretty similar to the one depicted.

Red and black faux fur hat

German Blackwork Modelbooks: Patterns, Designs, and Motifs from the 16th Century

Blackwork on Anna Meyer's gown (Detail of Darmstadt Madonna by Hans Holbein the Younger, 1526)

Blackwork embroidery was prevalent during 16th century Western Europe, including Germany (where it was known as Schwarzstickerei). Unfortunately, most of the extant embroidered items, books, and online resources are heavy on the English blackwork styles. So what’s one to do if you want to embroider blackwork that would be appropriate to renaissance Germany? Well, we can thank Johannes Gutenberg, who started the Printing Revolution right in Germany! We have at least three reliable German embroidery pattern books (Modelbücher) with counted blackwork patterns to work from, meaning we can go right to the source when we want German blackwork patterns. And two of these modelbooks are online, too!

German Blackwork Pattern Books:

Hoefer, Hans. Formbèuchlein. 1545, Augsburg (pages 78-82, 84) – Sample Page PDF – Digital Edition available from the HathiTrust Digital Library.

Gilbers, Georg. Modelbuch aller art Nehewercks und Stickens. Reprint of 1527 book. (many of these patterns could be adapted to blackwork, though only a few are clearly linear).

Bassée, Nicolas, New Modelbuch of 1568. Located in the rare book collection on the Newberry Library in Chicago, Illinois, USA. (Alas, I have yet to find this book online, but you can see charted patterns from this book by Claudette Ziemann at 16th c. German Blackwork Patterns / PDF) – A copy of this book was published in 1994 by Curious Works Press (ISBN 0-9633331-4-3).

I want to note, however, that modelbooks like this often borrowed/purchased woodcuts from one another and other books, making things a bit confusing at time. For example, the Hans Hoefer Formbeuchlein noted above was reprinted in 1913 as Zwickauer Facsimiledrucke No. 23 and appears to have different woodcut charts than the version I’ve linked above. I am going to hunt down more copies of these books so I can compare them better!

In the meantime, I have identified a pattern that comes from both Hoefer and Bassee that I’d very much like to try in the future:

Blackwork pattern from Hoefer and Bassée