Goldhaube Pattern: Getting the Right Look and Shape

I’m stumped. I am not quite sure how to make my gold silk haube (what some call a goldhaube). I’ve been studying paintings, drawings, and woodcuts for close to a year (see my post on goldhaubes for more background). Here are my observations of the gold haube:

1. No visible gathers in any period depictions (i.e., not a simple, gathered caul)

2. Most likely not a netting over a silk cap — while some look like they could be netting, most do not. Netting would pull and push the fabric underneath it in a specific way. You can see that the goldhaube in Cranach’s painting of the Beheading of Salome has a slight fold on the side, and this would not occur if it was netting over fabric.

3. Most, but not all, of these hauben have a tight band. Those that do not are more likely to look like they are netting. (I realize some of these bands could be separate from the haube, but I think most are not.)

4. All of these hauben accommodate the “braid bulge” on the side of the head without obvious straining.

I thought perhaps a half oval, with the straight side around the head and the curved side gathered in the back might create the right look, but there just didn’t seem to be enough material to accommodate the braid bulge on the side. Also, when I tried this on myself I could see folds and gathers near the side neck that you just cannot see in the paintings. And, frustratingly, I can find no paintings, drawings, or engravings that show this style of haube from the back, so I cannot see how they did this. You can see a good number of the hauben images I’ve found at http://pinterest.com/genovevalubeck/german-hats-and-hairstyles/

I plan to make more muslins of different shapes and experiment with them. But if anyone out there knows — or has theories on — how these hauben were constructed to show no gathers/folds and yet have a tight band and accommodate the braids, please let me know! I have the special order orange/gold silk in, I have my vintage fresh water pearls ready, I have my slate frame ready to go — but I don’t have the right shape yet!

If you have any ideas, PLEASE reply to this post or e-mail me at genoveva.von.lubeck [at) gmail.com. Thanks!


Zopfe: German Braids (False Braids/Artificial Braids) – History, How to Make, and How to Wear

German women are well known for their braids throughout history. But did you know German women of the 15th and 16th centuries augmented their own locks with false braids (zopfe)? Take a look at any number of paintings, drawings, or woodcuts of women with large braids or lumpy caps and you’ll begin to see that these ‘dos were not done without some help!

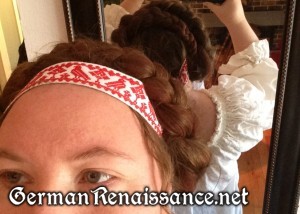
Compare the braids on Sidonia (left) and Genoveva (right)

Princess Sidonia in 1535 (left) and Genoveva (me) in 2013 (right), both with zopfe!

You can see many more images of braids, and braids under caps, at my Pinterest page: http://pinterest.com/genovevalubeck/german-hats-and-hairstyles/

A Brief History of Zopfe in Period

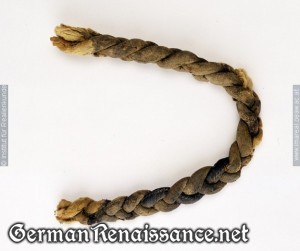
The use of false braids during this time period is documented. There is at least one extant fake braid in existence, created from padded linen cloth-tubes.

Extant false braid from the 15th-16th centuries.

Extant false braid (15th/16th century, Allgäuer Landesmuseum, Kempten, Germany)

False zopke are also depicted in a painting quite clearly. In two of the scenes of St.Clare of Assisi,1465-70, first we see a woman with large braids. Then we see the same woman with her hair being cut off — her fake braids are seen nearby.

Scene from St.Clare of Assisi,1465-70

Scene from St. Clare of Assisi, 1465-70

Zopfe are also mentioned in “Textiler Hausrat : Kleidung und Haustextilien in Nürnberg von 1500-1650” by Jutta Zander-Seidel. This is a book, written in German, that gives descriptions of clothing and household articles common to Nurnberg in the years from 1500-1650. And it turns out there’s a section on braids (zopfe) in her book thanks to a table of contents I found online. Sadly, the book is not in print, nor is it online. I was, however, able to find a translation of the section on braids in the GermanRenCostume Yahoo Group. And, according to that book, the German ladies did indeed wear false braids. Not only that, but it seems women from all classes wore them, the author having found them noted in the wills of working women and married women, as well as in the inventory of Heironymus Imhoff in 1571.

Based on the evidence and the notes in Textiler Hausrat, zopke were made from silk (seiden), waste silk (Flidtseide), linen, and (later in the 17th century) cotton. Predominate colors were red, green, and yellow, but  also found are liver color, flesh color, gold color, brown, black, blue, nail color, ash color and sea green color. We get a hint as to the creation of the artificial braids by an entry made in 1571 into the household account book of the Behaim family where they purchased blanket weaver’s wool to fill two pairs of braids. Four years later this was recorded, “the 15th of December I paid for an ell and a quarter of black sendal for a pair of braids, and sewing silk 2 pfund, 6 pfennig…. same year the 18th of December 1575 I paid for an ell and 1/8 of brown ormesin for Maria a pair of braids and for sewing silk and for wool 18 pfennig.” The braids were mostly stuffed with waste wool. There was even a “Zopfmacher” (braid maker), whom you can see pictured below with a bundle of braids in his right hand.

Der Zopfmacher (Braid Maker) - Hausbuch der Landauerschen Zwölfbrüderstiftung, Band 1. Nürnberg 1511-1706

Der Zopfmacher (Braid Maker) – Hausbuch der Landauerschen Zwölfbrüderstiftung, Band 1. Nürnberg 1511-1706


How to Make Zopfe

Wanting to present the proper German appearance, I’ve made my own pair of zopfe with great success, and you can, too.

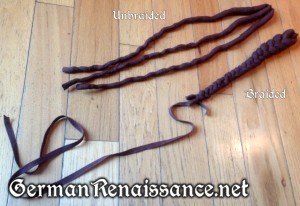
My pair of zopfe. The top set are unbraided and ready to go into my hair. The bottom set is braided so you can get an idea of how easily they braid together.

My pair of zopfe. The top set are unbraided and ready to go into my hair. The bottom set is braided so you can get an idea of how easily they braid together.

Materials:

  • Linen in any reasonable color (I chose a color close to my hair)
  • Wool roving, about 1/3-1/2 pound.
  • Linen or silk thread
  • A long, thin wooden stick (like those used for kebobs)
  • Scissors
  • Needle
  • Pencil with eraser

Directions:

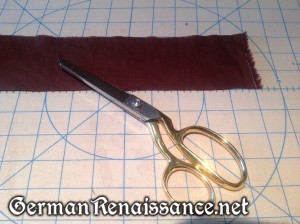
1. Cut out six lengths of linen about 2 3/4” wide by 26″ long.

Cut out your linen strips.

Cut out your linen strips.

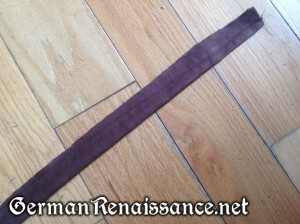
2. Fold each strip of linen lengthwise and sew along it’s length, closing it — note that at the top of the strip you’ll want to sew about 1/4″ from the raw edge but by the time you get to the bottom your seam should be closer to 1″ from the raw edge. Your are bringing your seam closer to the folded edge as you go creating a tapered tube. Trim off the excess fabric along the seam.

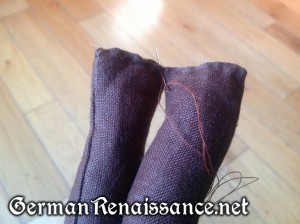
You can see how I've tapered the seam here.

You can see how I’ve tapered the seam here.

3.  Turn each tube inside out using your wooden stick. To do this, place the blunt end of the wooden stick near the end of the tube, bunch the fabric down around the stick until the fabric begins to encase the stick, then push the fabric down the stick. It’s a bit hard to explain, so I made a video for you at http://youtu.be/XQAXcdlqAL0

Tube being turned right side out with a stick

Tube being turned right side out with a stick

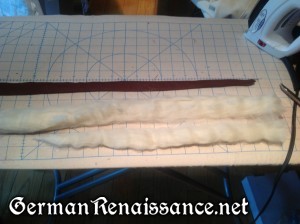
4. Lay your linen tubes out on a flat surface and measure out six strips of wool roving the same length as your tubes. Trim the wool so that it’s thinner at the bottom end — add the wool you trimmed off to the top to make it thicker.

Trimming the wool so it's narrower at one end.

Trimming the wool so it’s narrower at one end.

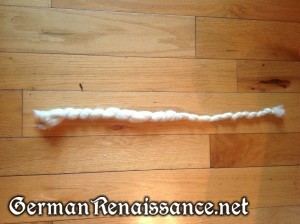
5. Twist the wool lengthwise and then wrap thread around it (opposite direction from the twist) to keep the hairs neatly contained.

The length of twisted, bound wool.

The length of twisted, bound wool.

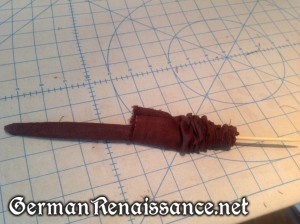
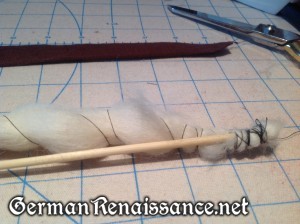
6. Attach the narrow end of the twisted, bound wool to the blunt end of your wooden stick, wrapping the tip of the wool around the end of the stick securely.

Wrapping the wool around the stick securely.

Wrapping the wool around the stick securely.

7. Insert the wool-with-stick into the wider end of your linen tube, carefully pushing it down into the tube. Work the stick all the way to the end of the tube and pull the other end over the length of wool. Tip: If bits get stuck, you can use the eraser end of your pencil to push parts into the tube.

8. Once your stick is pushed all the way to the end of the tube, pull it out just a bit and snip off the bit of wool covering the end, then pull the stick out — the wool will stay behind.

9. Sew the ends of the tubes shut, then sew three of the tubes together at the wider ends. I thought it worked best to sew the edges together creating a three-pointed star, and then sew those edges down again, creating a sort of flower shape.

Sew the wider ends of the tubes together.

Sew the wider ends of the tubes together.


How to Wear Your Zopfe

If you have short hair and will be wearing a cap over your braids, you can just braid the zopke up together and attach them to your head with pins.

If you have hair long enough to braid up with the zopfe, do this:

1. Make two pigtails in the back of your head, tie with bands.

2. Take one pigtail in one hand and put the wide end of your zopke into the pigtail so the hair goes all around it.

3. Braid your hair with the zopke just as you would normally braid your hair. The zopke will stay in place once you do the first set of plaits. Continue braiding, paying attention to how your own hair falls over the fake braids.

4. If you run out of your own hair before you reach the end of the zopfe (as I do), just keep braiding the zopke — your hair will stay inside the plait.

5. When you reach the bottom, tie the zopke with a long ribbon. I use a cotton twill ribbon.

6. Repeat for the other pigtail. (If you want to wear a headband, put it on now.)

7. Now wrap one braid up and over your head. How far forward your braid falls on top of your head depends on the hairstyle you’re trying to recreate and the shape of your head. Tuck the end of the braid behind the ear opposite from where it began, then bobby pin in place.

8. Repeat with the other braid. You may be able to tuck the end of the second braid under the first one on top of your head, depending on how thick it ends up and the hairstyle you want to recreate. Pin in place.

9. Using the ribbons tied to the end of your braids, wrap them around the back of your head, cross them up over the top of your head (behind your braids), and back down to the base of your head where you will tie them. This keeps the braids secure to your head.

At this point, you can leave the braids uncovered. add a Gefrens (a band with a width of fringe in the back), or cover them entirely with a cap. Here are photos of me in the braids, with and without a cap — notice how the cap is filled out by the braids.


Front view

Front view


zopfe-side-view

Side view


zopfe-back

Back view

With cap

With cap


With cap and hat!

With cap and hat!


Make Your Own Custom-Sized Garment Bag with All Natural Materials (with Optional Carrying Strap and Pockets for ID and Accessories)

My All-Natural Garment Bag

With all the travel I’ve been doing lately, I need reliable garment bags that protect the clothing I make. After much research into the features I want (breathable fabric, long length, fold-over design with shoulder strap) and those I do not want (zippers and obviously modern touches), I’ve developed a pattern. If you’d like to make your own garment bag, here’s what you’ll need:

Garment Bag Materials:

  • Unbleached canvas 60″ wide (length = garment length + 12″; I used 2 yards for a long dress)
  • Cotton thread
  • Your favorite hanger
  • Wood dowel (1/2″ in diameter, 36″ long) – optional for a fold-over feature with carrying strap
  • 12″ strip of unbleached muslin for ID and accessory pocket – optional for ID and accessory pockets


Garment Bag Instructions:

1. Lay out your fabric with the 60″ wide section at the top and the selvedge at the sides.
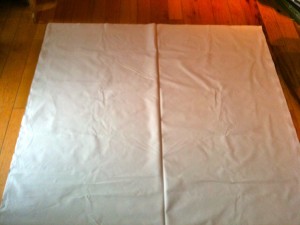
My 60" wide canvas spread out on the floor.

2. Center your garment (on its hanger) on top of the fabric, making sure the top of your hanger lines up with the top of the fabric.
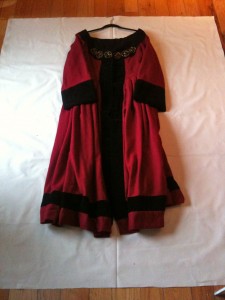
My red German gown, on a hanger, centered on the canvas.

3. Fold over the left side of the fabric. I like to leave a 1/2″ of room between the fold and my garment for roominess.
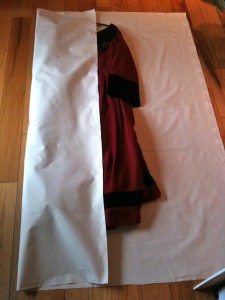
Left side folded over my dress.

4. Fold over the right side of your fabric, overlapping the two sides. This will be the width of your garment bag. (My width is about 25.5″.)
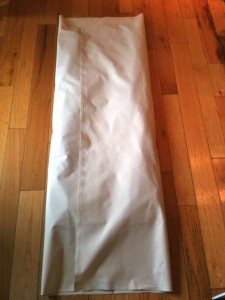
Right side folded over. Note the overlap.

5. Put a pin at the either fold to mark the spots and mark the length you want your garment bag to be. Remove your garment and re-fold at the pins.
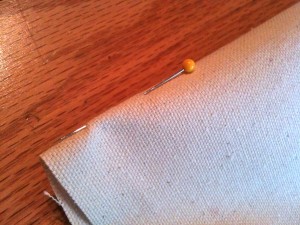
Marking a fold with a pin.

6. Cut the fabric to the length you want your bag. (Note: If you’re going to do the optional fold-over, you’ll want to cut off at least 5″.)
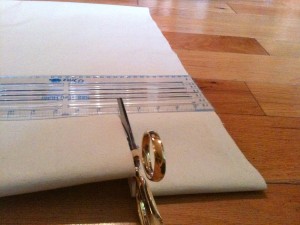
I cut off 5" from the bottom.

7. Pin the edge (this will be the bottom of your bag) in place.
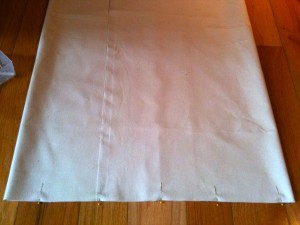
Bottom edge of bag pinned together.

8. Center the hanger at the top of your fabric (with the hook extended above the edge of the fabric, as if hanging).
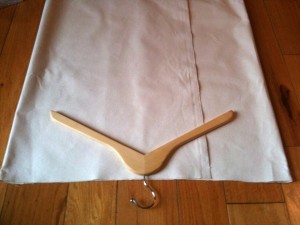
My hanger centered on the canvas

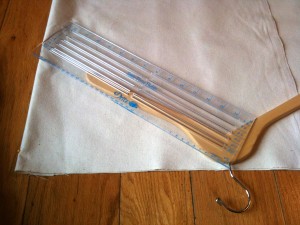
9. Mark the angles with a straight edge from the top to the sides (make sure you have at least 3″ of straight edge at the top) and cut the fabric on the angles you marked (no need to add in any seam allowance here).
Marking the angle of my hanger before cutting.

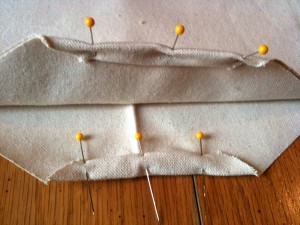
10. Fold under and press the top straight edge twice and pin in place. It’s very important that you roll over the two top overlapping edges together.
Top straight edges folded over twice and pinned.

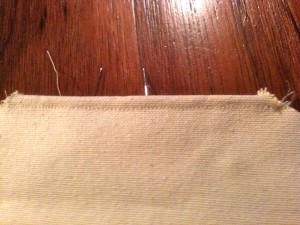
11. Sew down the hem of each of the two straight edges on the top of the bag.
One of the two top edges sewn with a rolled hem.

Note: At this point, check your fabric edges that overlap one another (the selvedge) — if you think they might unravel or fray over time, or you want this edge to look more decorative, now is the time to do something. The simplest thing you can do is a rolled hem. Or you could cover the edges with bias tape. (My selvedges were just fine and I did nothing.)

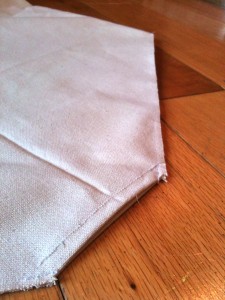
12. Sew together the top angled edges of your bag 1/4″ from the edge.
Top edges all sewn.

13. Sew the bottom edge of your bag 1/4″ from the edge.

14. Clip the corners, turn your bag inside out, press the edges, and sew the top and bottom edges again (we’re making French seams).
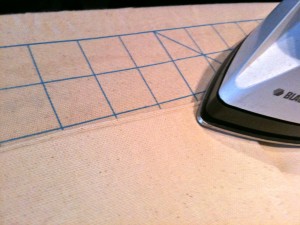
Turned inside out and pressing seams.

15. Turn the bag right side out again, press the all four edges of your bag.
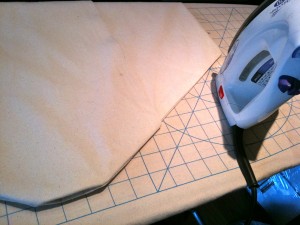
Bag turned right side out and pressing all edges.

Now just put your hanger through the top, and voila … you have a hanging garment bag!


Optional Feature: Fold-Over Feature with Carrying Strap

If you’d like to be able to fold over your garment bag (handy for long bags) and carry it with a shoulder strap, you’ll want to add this feature. Note also that this feature keeps your bag’s overlapped edges more secure as it acts to keep everything in place.

A. Lay out your garment bag, mark the spot you want it to fold over (halfway down), and place your wood dowel on top edge to edge. If your dowel is too long, cut it to the exact width of the bag. Set aside.

B. Take that strip of canvas you cut off the bottom of your bag in step 7 above, trim to 5″ wide, and fold over the bottom about 1.5″ and the top about .75″, and press as shown below.
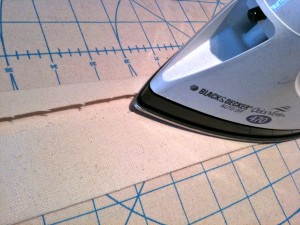
Fold and press the strip of canvas

C. Fold the top of your strip over and press again.
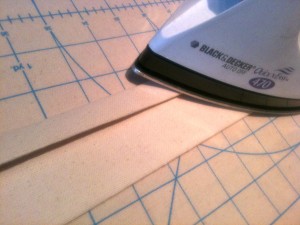
Fold over again and press.

D. Sew the strip along the fold, insert the dowel, and set aside for now.
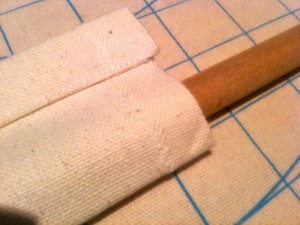
Sew the fold down and insert the dowel

E. From the corners you clipped off in step 9, cut two 1.5″ strips about 12″ long.
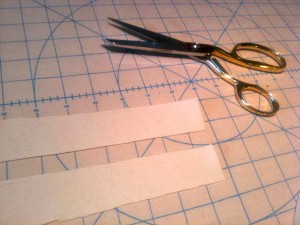
Two strips about 1.5" wide and 12" inches long

F. Fold over both the top and bottom edges of these strips and press down, then fold over again and press (you’re making cords).
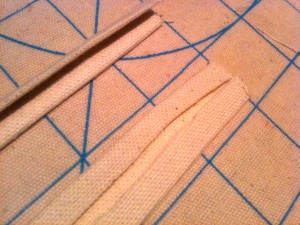
Folding and pressing strips of canvas into cords

G. Sew along the fold of the strips.
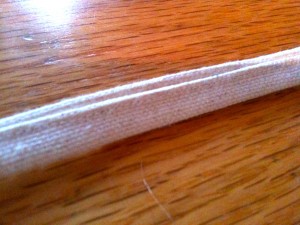
Sew along fold to make sturdy cords

H. Pick up your strap (with the dowel in it) and insert each of your cords into the ends of the strap, then sew along the strap edge to secure.
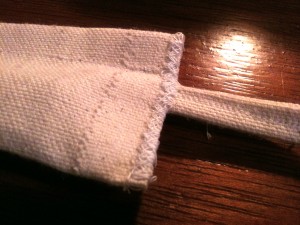
Sew the strap ends and cords

I. Place the strap with attached cords on top of your garment bag where marked the fold-point in step A. Note: You want your garment bag to fold over with the overlapping edges folded in, not folded out, for the security of the contents. Push the dowel all the way to one edge of your strap and pin it to one edge of your bag, then find the other edge of the dowel that is now in the middle of the strap and pin the strap in that spot to the other edge of your bag.
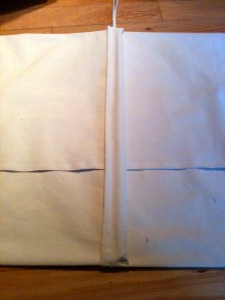
Pin the strap (with dowel) in place on your bag.

J. Tuck the other end of the strap under your garment bag, matching up the ends. Pin this strap edge to the edge of the garment bag. Now REMOVE the pin that was holding the other end of the strap to this edge, which you placed in the previous step.
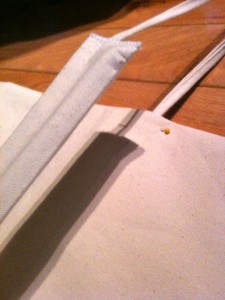
Match up the strap end and pin in place.

K. Sew strap down to your garment bag in the TWO spots you have pins (very important) — one on either side of your garment bag. That means you’ll sew the strap at one end and sew it at the middle, but NOT at the other end. You want to keep this other end unattached to the garment bag so you can swing it out of way when you want to get and out of your bag.
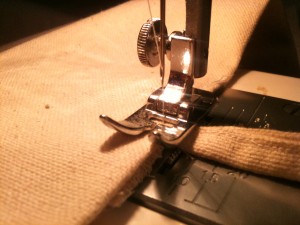
Sewing the strap to the edge of the garment bag.

Now just tie your cords together to keep your strap in place. The strap on the other side of your garment bag acts as a carrying strap.
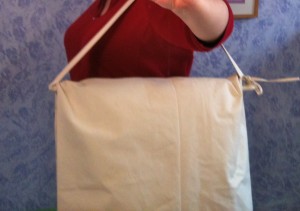
Carrying the folded garment bag with the built-in shoulder strap.


Optional Feature: ID and Accessory Pockets

I. Cut out two 12″ x 12″ pieces of unbleached muslin (you could use canvas if you have some leftover, of course).
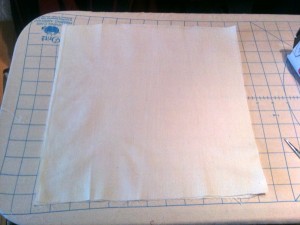
Two 12" x 12" squares of muslin

II. Sew the two squares together all around except for the last 2″. Clip corners, turn inside out, press edges, and sew the square shut.

III. Place your pocket on the lower half (very important) of your garment bag. I put mine right at the top edge of the lower half, with the dowel strap actually covering the very top of the pocket — the strap will keep the pocket secured. Pin in place.
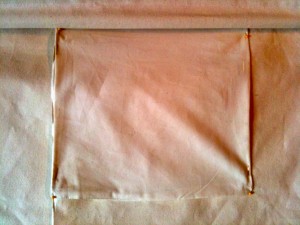
Place on lower half of garment bag so top edge of pocket is covered by strap.

IV. Sew three sides of pocket down (leave top edge unsewn). You now have an accessory pocket.

V. To make the ID pocket, cut out two pieces of muslin about 9″ x 6″. Pin in the center then cut a rectange out of the center about 2.5″ x 2.5″.
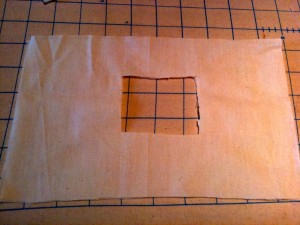
Cut the center out of the two rectangles.

VI. Stitch around the cut-out area about 1/4″ from the edge, then snip diagonally at the corners.
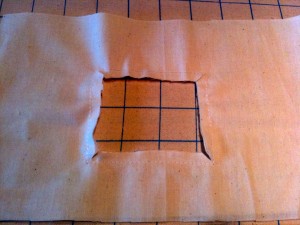
Sew around the edges and snip the corners

VII. Fold your fabric inside out and press edges.
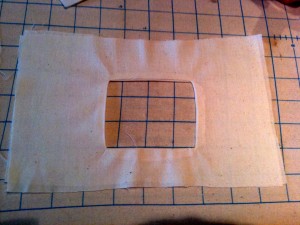
Seams pressed ... so neat!

VIII. Cut off the extra fabric to make all sides even, then fold in edges all around and press.
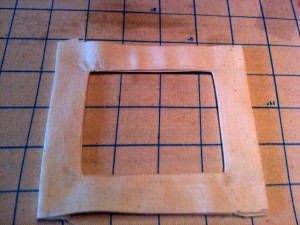
Fold in edges and press down.

IX. Pin to top of your garment bag.
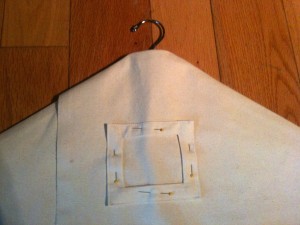
ID pocket "frame" pinned to top of garment bag.

Step X. Sew top, side, and bottom edge of ID pocket (don’t sew the other side). Now slide cut out a piece of paper a bit smaller, write your name (or the contents of your garment bag) on it, and slide it in!
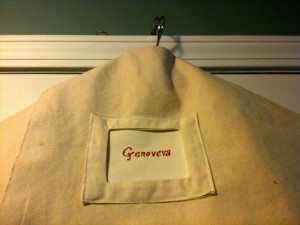
Finished ID pocket with my name!

Voila! You now have a spiffy, all-natural garment bag with carrying strap, ID pocket, and accessory pocket. This garment bag takes about an hour (for the basic bag) and 30 minutes (for the accessory pockets), so it’s not too hard or time-consuming.

Here’s my garment bag with my gown inside:
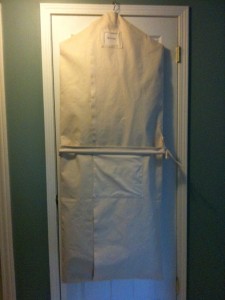
Garment bag ready to go!

Note: I don’t recommend this style of garment bag for airline travel, unless you plan to take it on as a carry-on — the overlapping edges are fine for car transport, but would not hold up to being tossed about in baggage train or cargo hold, in my opinion.

Rolled Pleats Photo Tutorial and Pleat Spacing Calculator

Tubular rolls on a skirt (left) -- compare to skirt without them on the right

Rolled pleats are a technique for neatly gathering a large amount of fabric into a small area to create long, tubular pleats from the pleated point to the end of the fabric. I like to use rolled pleats on my German gowns (skirt) because they produce the right look. Sadly, I cannot find any evidence that this type of pleating was actually used during this period. But those of us attempting reconstruct garments from the 16th century theorize that this type of pleat may have been used because it looks similar to the way skirts look in paintings, particularly those by Lucas Cranach, with the pleats falling in long rows to the ground. Lady Cerridwen verch Ioreword did a good experiment with different styles of pleats which illustrates this.

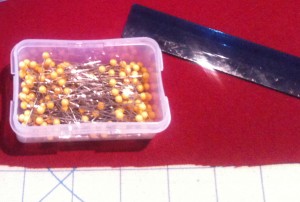
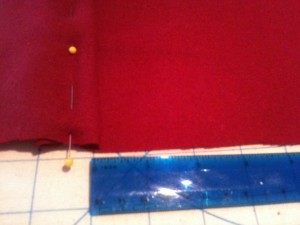
Making rolled pleats are not hard. You’ll need your fabric, a straight ruler or something similar, and pins.

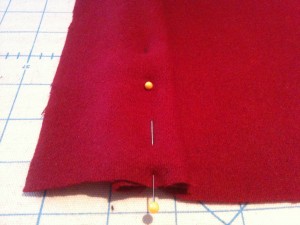
Material, ruler, and pins for rolling pleats


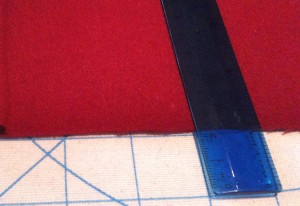
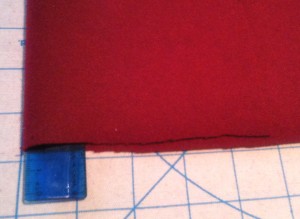
Step 1: Lay your ruler perpendicular to the edge of your fabric.


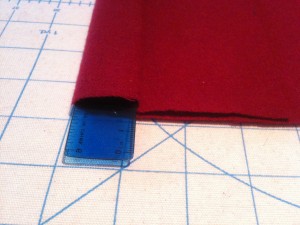
Step 2: Fold your fabric over the ruler.


Step 3: Hold the fabric that is folded over the ruler firmly and roll both over once.


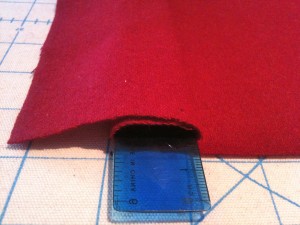
Step 4: Fold the end of the fabric back over the ruler.


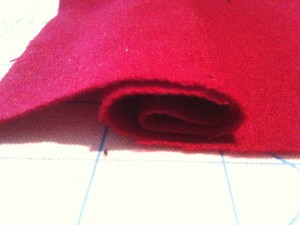
Step 5. Slide the ruler out.


Step 6: Hold roll in place with two pins, one near the edge and one a few inches down (the second pin keeps the roll tidy and in place until you sew it).


Step 7. Use the ruler to measure the distance to the next starting point (use calculator below to determine how far over) and begin again at step 1.


Pay attention to how far apart you begin your next rolled pleat and do it consistently for the best effect.

You can use something other than ruler to achieve a roll that is wider or narrower. The minimum amount of fabric needed for rolled pleats set side-by-side is 5 inches of material for every 1 inch of pleats. If you don’t have quite enough material for that, you can add a bit of space between each pleat. If you have more material than that, it’s possible to repeat step 3 and roll it again (for this method, you’ll want 7 inches of material for everyone 1 inch of pleat).

When you are finished pinning your pleats, I recommend you sew the pleats down before finishing your skirt and/or attaching it to the bodice — this keeps the pleats nice and straight, which is important for that tubular roll look.

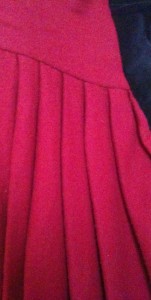
Here is a photo of my German gown with rolled pleats. Notice how the rolled pleats create the nice, long rolls down the dress! The gown was not pressed to do that — the rolls happen naturally thanks to the pleating method.

Rolled pleats on my German gown

To determine how far apart to make your next pleat, use this Rolled Pleats Calculator:

Width of object used to roll pleats (i.e., ruler or twines of fork)
Length of fabric
Length of finished piece (i.e., waist measurement)
Unit of measurement Inches CM


Based on the above measurements, this is just the right amount of material for 36 side-by-side single rolled pleats. Start your next pleat 3 inches from the last one.

If the calculator doesn’t work for you, you can calculate this manually by first getting these measurements:

A. The width of the object you’ll use to roll your pleats (i.e., a ruler). For example: 1

B. Five times number A. For example: 5

C. Width of your fabric. For example: 180

D. Width of your bodice’s (or skirt band’s) waist. For example: 36

E. Divide C by B. For example 180/5=36

If your D = E, then your pleats will fit perfectly side by side so start your next pleat 3″ to the side of your last pleat (as shown in step 1).

If your D is larger than E, you’ll need to space your pleats a little farther apart to get them even. To determine how far apart, subtract E from D to get the difference (i.e, 7) and divide the difference by E (i.e. 7 / 36 = .19). So in our example, we’d have .19 inches between each pleat, so begin each new pleat at 3 and 3/16 inches to the side of your last pleat.

If your D is smaller than E, consider an extra roll (repeat step 3) and do the math again but this time number B should be 7 times A. Now compare your D to your E, and if it is larger, make the above adjustments.

Please let me know if you have any questions!

German Gown Pattern. Assembly Notes, and Instructions (Dorothea Meyer’s Gown)

I’ve had several people ask for the pattern for my dark red German goldwork gown, which is based off Dorothea Kannengiesser Meyer’s gown as painted by Hans Holbein the Younger in 1516.

Portrait of Dorothea Kannengiesser Meyer by Hans Holbein the Younger (1516)

To make a basic version of this gown without any fancy embroidery, you’ll need the following:

  • 6.5 yards of outer material, such as wool (60″ wide)
  • 1 yard of lining material, such as linen
  • 1 yard of interlining material, such as linen canvas or cotton canvas
  • 3 yards of guard material, such as velveteen (cotton velvet)
  • 2 yards of 1/8″ grosgrain ribbon
  • 1 yard of seam binding
  • Silk thread in the same color as your outer material and your guards
  • Black hooks and eyes
  • Tailor’s chalk or some other sort of non-permanent fabric marker
  • Good scissors
  • Strong needles (sewing machine optional)

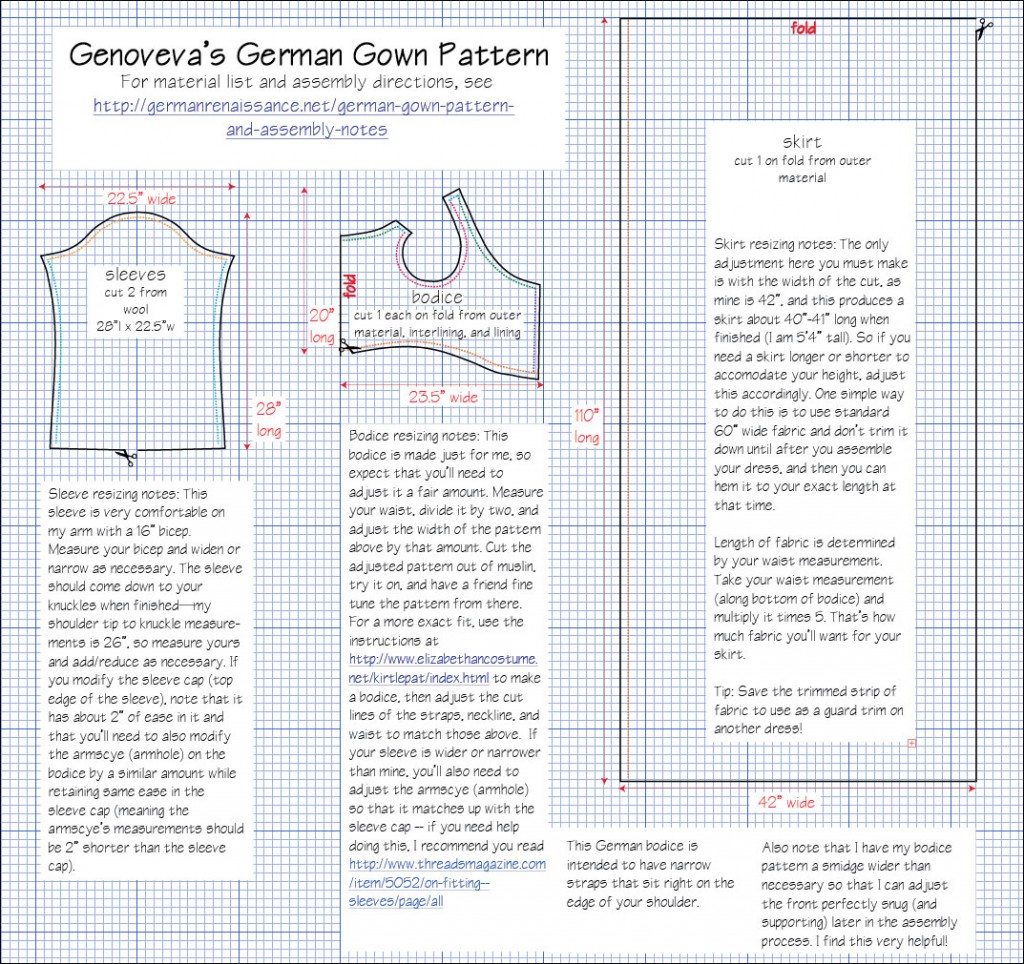
Here is the cutting pattern: German-gown-pattern.pdf (click to download)

Cutting pattern and resizing notes

Instructions:

  1. Adjust the pattern closer to your measurements. I recommend cutting a bodice out of muslin and making further refinements first. Note: As this dress has an open front (unless you choose to sew it closed), you’ll need an underdress and you’ll want to be wearing it, and your smock underneath it, when you fit your gown. If you don’t have a suitable underdress already, you can make one out of linen and linen/cotton canvas (as interlining) using this pattern — just omit the sleeves and the guards. Make the underdress first, good and snug, and it’ll also serve as practice for the main gown.
  2. Wash and press all your materials (steam your velveteen gently from the back with an iron). I prefer to wash my wool in my machine washer and dryer, but not all wool will react well to this and not everyone likes the slightly fulled appearance that usually results — test a sample before you wash all your wool!
  3. Cut out your material according to the cutting pattern above (pay careful attention to fold lines).
  4. Lay the outer material and interlining material on top of one another, wrong sides together, and pin them together. Now sew them together around every edge and treat them as one piece of material from this point forward.
  5. Match and pin the straps of your bodice outer material together (right sides of outer material together), try it on to make sure it fits right, then sew the straps together along the blue dotted line (or your adjusted line). Sew the straps of the bodice lining, too.
  6. Place the bodice lining against the bodice outer material, right sides together, and pin your ribbon 1/2″ from the top edge of your bodice (along green dotted line marked on the pattern) and sew together along the ribbon line. Then sew down the two front edges (purple dotted line) of your outer material and lining. Try it on and check to see if the front bodice edges fit around you — the edges should just meet and it should feel a little snug. If it is too large, mark where it should be with your chalk and resew along your new line. Tip: Don’t be afraid to make this bodice pretty snug if you’re using a material that is naturally stretchy, such as many wools and linens. Those times I sewed my bodice edges conservatively because I was leery of it being too snug, it ended up being too loose. Linen, in particular, will stretch as you wear it from your body heat. But if your fabric is synthetic, it may have considerably less stretch in it. If you’re not sure how your bodice will behave, sew the edges conservatively, put it on over whatever other garments you plan to wear, safety-pin it closed, and wear it for a while … then decide!
  7. Once your bodice fits perfectly, trim the seam allowance to half its width, clip the curves, and trim the corners. Turn right side out and press edges.
  8. Moving on to the sleeves, fold them in half lengthwise (right sides together) and sew along the blue line marked on the pattern.
  9. Turn the sleeve right side out and place it the armhole of your bodice (which is turned inside out), so the right sides of the sleeve and bodice are together. Pin the top edge of the sleeve into the armhole, right sides together, sleeve seam at bottom of armhole, with as few puckers as possible. (If you find that the sleeve is puckering too much, hand-baste the top edge first, then pull the threads of the basting to gather sleeve cap until it fits perfectly in the armhole.) Once the sleeve is set in perfectly, sew it to the bodice. Repeat for other sleeve.
  10. Sew the lining to the bodice around the armhole, then cover the seam with seam binding and sew it down.
  11. Moving on to the skirt, first sew a rolled hem along both short sides of your material (this gown is open in the front by design — if you prefer it be closed, you can sew it together with a French seam instead).
  12. Make rolled pleats along the top edge of your skirt until it is the width of your bodice (use my Rolled Pleats Calculator to help you determine where to start your next pleat). I like to start my pleats in the middle of the back skirt and roll them inward from that point. This creates a more voluminous point in the back and a neater, flatter front. Once I have my pleats where I want them, I like to sew along the top edge of my skirt to keep them in place.
  13. Pin your skirt to the lower edge of the outer material of bodice, right sides together — do not pin to your bodice lining yet. Once it is pinned in place, sew together — you’ll probably need to do this by hand with double-stranded silk thread because the material will be quite thick now.
  14. Once your outer material is sewn to your skirt, turn the dress inside out and fold the edge of your bodice lining under so it covers the raw edge of your skirt, then hand-sew down to your skirt. It can be tricky to do this without avoiding wrinkles that show when worn, so pin first and try on before sewing to ensure you have a smooth fit.
  15. Put the gown on, have someone help you mark the hem (should be just above floor length), mark it with chalk, trim as necessary, and sew the hem with a hem stitch. I also covered my inside hem seam with seam binding, but that is optional.
  16. If you’ll be applying velveteen guards, put the gown on, pin the front edges together, drape the velveteen around your shoulders (have a friend help), make sure it lies flat and smooth, and pin it in place.
  17. Now draw a chalk line on the velveteen where you can feel the top edge of your bodice underneath.
  18. Unpin the velveteen from your gown and lay flat — you should see a big curve. Measure inside this curve 1″ and draw another chalkline. Then measure outward four inches from this inside line and draw another line. This will be your top bodice guard. Cut out along the outer curve lines.
  19. Turn your bodice inside out and pin the guard to the inside top edge/green dotted line (right side of velvet against the wrong side of your bodice). Sew the guard to the inside top edge of bodice (green dotted line on pattern), clip the curves, and fold the guard up and over the edge of your bodice. Turn the lower guard edges under (clipping curves as necessary to have it lie smoothly), and hand-sew down to the bodice (stop about four inches from each end).
  20. Cut two four inch strips of velveteen the same measurement as the top of your bodice to the edge of your skirt (50″ in my case). Pin the edges of the velveteen strip to the edges of your bodice and skirt (right side of velveteen against wrong side of wool), then sew, fold around (tuck under top guard), press, and hand sew to outside of gown. Now finish sewing down the top guard to cover the edge of the front guards.
  21. Cut out a 6″ strip of velveteen the same circumference as your skirt (about 180″), press edges in 1/2″, then hand-sew to the bottom edge of your skirt (I prefer not to go right to the very bottom, leaving a few inches of the skirt material showing).
  22. Cut out two 6″ strips of velveteen, each about 23″ long (or however wide your sleeve is at the bottom edge). Sew each strip together at its short ends (French seam), press seam, turn inside out, pin to inside edge of your sleeve (right side of velveteen to wrong side of sleeve, line up seams), sew, fold over and around the outside of your sleeve, tuck upper edge of velveteen under, and hand-sew to your sleeve.
  23. Attach hooks and eyes to the front edges of your bodice (purple line on pattern), being careful to sew through all layers of your material to ensure a smooth fit when worn.
  24. Check for stray thread ends and clip, press your gown, and you’re done!

Finished dress on display at A&S Competition (Kingdom) in Spring 2012

I recommend you wear this gown with a pleated smock with a wide neckline that just shows above the gown’s edge!

Many thanks to Mistress Melisant who helped me fit the pattern, adjusting the strap so it would lie closer to the edge of the shoulder, and offered advice about sewing the top guard, using a ribbon to keep the bodice’s top edge snug, and using hooks and eyes. She also graciously read through these instructions and noted places I could clarify or expand upon, which I have (though I’d still like to do a photo tutorial on rolled pleats). Thank you!

Please let me know if you have any questions about constructing this gown. And if you make one, please let me know!

You can view the original A&S competition documentation on this gown, which received a first place award, at http://germanrenaissance.net/files/RedWoolGoldworkGown.pdf

Wearing the gown at Val Day

Progress on the Schaube/Rocks (German Men’s Coat) – The Beauty of a Good Pattern

Sometimes, when things come together, it’s just beautiful!

Now that I have the actual pattern and method of construction for the schaube, and I know how it all fits together, I’ve been assembling the pieces. What was a jumble of weird shapes that didn’t work together is now a very well-designed coat. A thing of beauty! And I love that I know without any doubt this coat was designed at least over 450 years ago, and quite probably a bit older than that as this style of coat was popular for some time in the 16th century in Germany, England, and Italy.

Here’s my progress on my wool version of this coat:

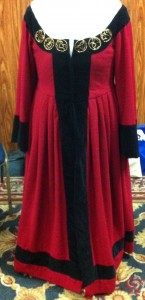
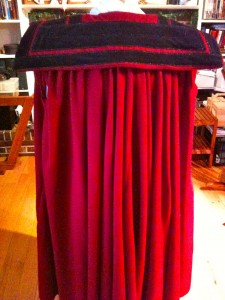
  • 8 yards of dark red wool, pre-washed, pre-shrunk, cut, and ironed (I believe I could have gotten away with a little less, maybe 7 yards)
  • Coat, collar, lapels, and lining assembled and sewn with silk/cotton threads (machine stitched long inside seams, hand-stitched the collar and yoke)
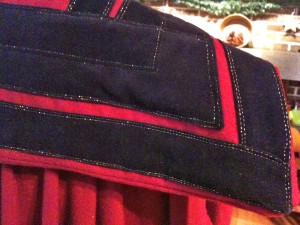
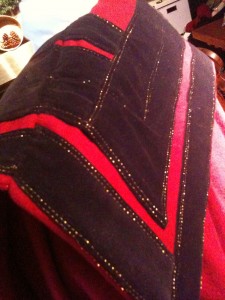
  • Black cotton velvet guards cut, sewn, and attached to the collar with gold metallic thread (note: I machine stitched all of this gold metallic thread on the guards because, frankly, it’d take a year to do it by hand myself and I do not have a stable of minions to help!)


What remains to be done:

  1. Stitch velvet guards onto the puff upper sleeves and the straight lower sleeves, then attach them together and to the coat
  2. Hem the cloak to the length of Gregor’s knees
  3. Cut and sew the multiple black velvet guards to the hem
  4. Make the passementerie knot and attach it to the right sleeve


Photos of the coat in progress:

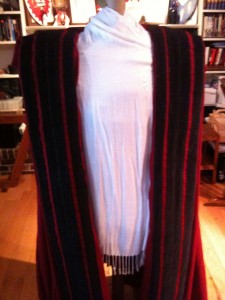
Back of Coat in Progress

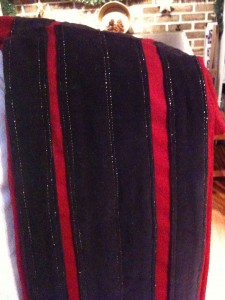
Close-up of Back Collar

Close-up of back collar where it joins the front collar

Front of coat in progress


Close-up of guards on front collar

This wool coat is my “practice” version, and I’ve learned several things already that I’ll improve upon for the one I make out of silk damask. The biggest thing bothering me right now is the metallic stitching on the guards. I did it by machine for this practice version, but because it’s harder to control than hand stitching, it isn’t consistent in places. That bugs me. So I will need to handstitch at least some of the metallic threads in my final coat.

Additionally, the point at which the back collar joins the front collar is tricky for matching up the guards. I could have done a better job at that, and I’ll pay more attention on my final coat.

Finally, I noticed that the folds of my practice coat aren’t falling as evenly as those in the photo BUT I know that the photograph of the extant coat has an unusual coat-shaped form under it, and that form has the folds in it. I also know that the original coat is gathered, not pleated, so I suspect that it has that nice, big, even drape thanks to the form more than the coat itself. It’s also likely that the velvet guards will add more volume and shape to the drape. So we’ll see how it turns out when it is done.

Now to work on the sleeves!

German 16th Century Men’s Rocks/Schaub (Dress Coat/Cloak) – Notes on Construction

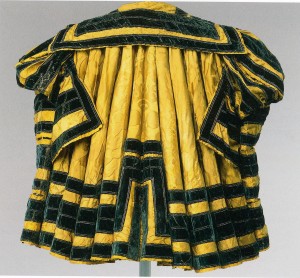
Last summer I came across a photo of Prince Elector Moritz of Saxony’s Parade Cloak, which is an extant mid-16th century garment lovingly preserved and restored. Here’s a photo of it:

Elector Moritz' Parade Cloak

Sadly, this was the largest photo I could find. I found a closeup of the collar area at the Staatliche Kuntsammlungen Dresden museum, which had it on display in 2009-2010. Searching around the Internet, I found no mention of anyone else who’d made such a garment for a man. I did find a pattern from Reconstructing History which appeared to be duplicating this exact cloak based on the drawing on its cover, so I ordered this hoping it might give me some more background. I received it, and it had some background on cloaks of this shape and style, as well as the pattern. Alas, when I tried to make the garment based on the pattern and instructions, there was not enough detail — it was like trying to put together a puzzle with various pieces, and not succeeding.

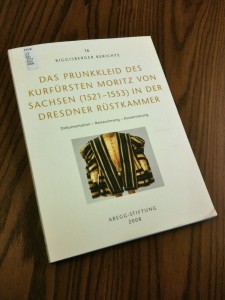
Desperate, I tried a more extensive Internet search for the garment. I needed more photos! Then I tried contacting the museum to request more information and/or photos. With no response from them, I went back to the very short description at the museum and noticed that the restoration was done by an foundation called Abegg-Stiftung. So I found the Abegg-Stifung web site, and discovered that the restorers, Bettina Niekamp and Agnieszka Wos Jucker, wrote a book about the restoration! Awesome! Except that the book was not online to browse, nor in stock to purchase. Not giving up, I searched deeper for a copy of this book and was amazed to discover, thanks to WorldCat.org, that there 41 copies around the world in libraries, and one just happened to be a mere 3 miles from me. I’m so thankful to live in a university town!

Today I adventured to the Fine Arts museum at the University of Michigan. And there, perched on the shelf, was a beautiful, full-color copy of Das Prunkkleid des Kurfürsten Moritz von Sachsen (1521-1553) in der Dresdner Rüstkammer: Dokumentation – Restaurierung – Konservierung! It’s all in German, but I’ll just have to learn how to translate the parts I need into English. The book has lots of photos, many close-up. I also discovered that the Reconstructing History is indeed based on this garment, but that it appears they simply copied the construction diagram, including some of the letters the authors used to match up parts — and then forgot to print some of the letters on the pattern, which explains why the pieces just weren’t fitting for me. So now I have the complete picture of this garment’s construction, including notes on materials, techniques, and the like.

Das Prunkkleid des Kurfürsten Moritz von Sachsen (1521-1553)

Finding this book was the best feeling! I love libraries and I love books! Thank you, Bettina Niekamp and Agnieszka Wos Jucker, for documenting your work.

I would like to make a version of this coat, first as a practice in wool for more rugged use. Then, after I’ve learned from the first, I will find some lovely silk damask and try a dress version.

German Woolen Hosen of the 16th Century: Source Images and Pattern Ideas

Among the many other bits of attire appropriate to a German male of the 16th century you’ll find a good pair of woolen hosen (pants). I’ve actually been trying to make a pair of good hosen since April. My first pair, which were based off a Reconstructing History pattern and “draped” to my guy’s leg, looked “ok” but promptly ripped when worn the first day. Hosen fail!

So for my second attempt, I’m not going to rely on someone else’s pattern. Instead, I’ve researched some source images to get a better idea of who they were constructed. Then I’m making my OWN pattern, based on Gregor’s measurements, with the help of Mistress Melisant who is the goddess of all things costuming. If you find yourself in the same boat as me, come along on my voyage. First stop — the source images!

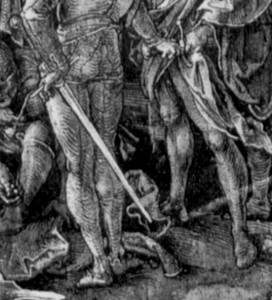
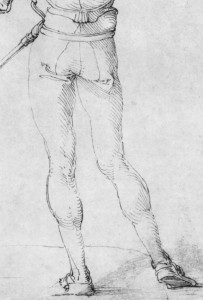
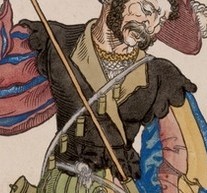
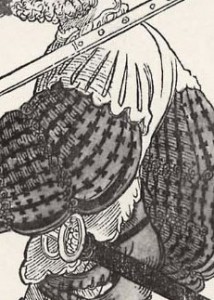
This first photo is one of my favorites, for it shows both the front and back of the hosen. The back view, in particular, shows the SEAMS, which you’ll note go up the back leg and across the rear at an angle. This is what I’ll be shooting for in my pair of hosen, too.

Detail from Calvary by Albrecht Durer in 1502


This photo shows that back seam very clearly (click on the image for a better view)! And note that the waist of the hosen go up quite high — do not mistake the belt for the waistline.

Landsknecht by Albrecht Durer


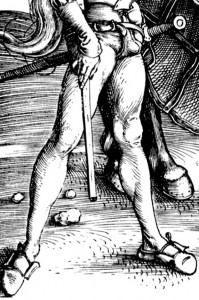
And here’s a good view of the front, including the codpiece:

Dame with Landsknecht by Durer


Other observations: the hosen are quite tight and appear to be full-footed, because they go right down into the shoe.

I did look about for extant hosen, but I could not find any with the diagonal seam.

So my next step was to visit Mistress Melisant during our monthly Garb Workday. She had me take these measurements of Gregor:

Real waist – 45″
Hip – 47″
Thigh – 25″
Knee – 16.5″
Below knee – 15 3/4″
Calf – 18″
Ankle – 10″
Around heel (widest part over top of foot and heel) – 14″
Waist to floor – 46.5″
Crotch seam – 37″
Inseam – 32″
Rise – 12″

The rise, interestingly, was measured by sitting down on a table and measuring from the tabletop to the waist. Cool!

Based on these measurements, Melisant sketched out a not-to-scale diagram with measurements, which I then drew to scale on a piece of Kraft paper to create my pattern. It’s a crazy looking pattern. I’ll take a photo of the pattern later and include it here.

Once I had a pattern, I laid out my pre-washed, pre-shrunk, and ironed wool on the cutting surface and carefully found the BIAS of the wool (the exact diagonal of the fabric’s weave). You cut hosen on the bias so that they’ll stretch and form better to the leg. And it’s important to find the exact bias, because if you’re a little off, they hosen will twist on you (thanks, Mistress Melisant, for telling me that!)

So I cut out a red wool leg and a black wool leg. Gregor’s hosen pattern wouldn’t quite fit on the fabric, so each leg in two pieces — there will be another seam inside the leg, hopefully hidden and not uncomfortable.

Now I just need to baste the legs up the back seam, baste the two legs together, and have Gregor try them on. I left about 2″ seam allowance all around for adjustments. And I’ll tackle the foot and codpiece later!

Photos to follow!

Draping a Lederwams: Step-by-step photos of draping and pattern drafting a leather vest (ledergoller)

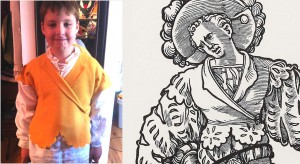
It’s time to pattern a Lederwams (German leather vest) by draping it on a real person! My son gets to be my guinea pig because I want to make him one and because he’s available! (Note: I don’t recommend you use a young child unless you have no other choice — kids don’t like to stand still!)

So what is draping? Draping is a pattern-making technique in which you drape muslin (or another fabric similar in weight to your desired fabric) directly onto the wearer (or a dress form of exact dimensions) to make a pattern. After the fabric is draped on the wearer in the manner you wish, you make markings on the fabric at key points, such as seams. It can get much more complicated than this, with seam intersections, pleats, and other details, but this project does not require it. In fact, it seems like the perfect project to try out draping for the first time. There are only two seams, both on the sides, and only one piece of material will be required for the entire garment.

As I’ve never made a Lederwams before, nor have I actually even seen one in person, I’m using some written directions I found at the GermanRenCostume list at YahooGroups by “Robert in Reno” (thank you!). I have altered them slightly, based on my actual experience with the draping.

First, you need some materials:

  • Large piece of non-stretch fabric you don’t mind cutting, such as an inexpensive cotton sheet (I chose to use some cheap fleece because I wanted a thicker material)
  • Scissors
  • Pins
  • Chalk or a removeable marker
  • Another person who is either your helper and will perform the steps below on you, or is the wearer upon which you perform the steps

Note: My model was not the most patient, so my pictures aren’t ideal. If there is a discrepancy between the directions and the images, do as I say, not as you see. 🙂

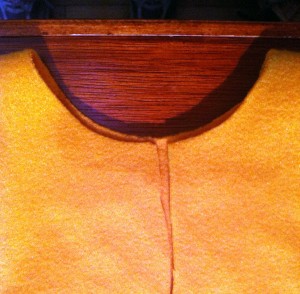
Step 1: Find the center of your material and cut a hole the diameter of your neck (not your head), then cut a slit down one side from neckhole to the bottom of your fabric.

Step 1: Cut a neckhole and slit the front from neckhole to bottom


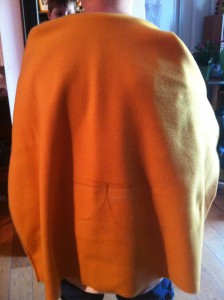
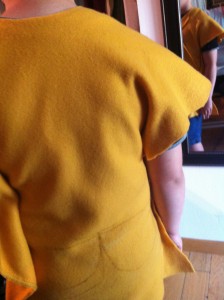
Step 2: Have your wearer put on their garb (and armor, if this will go over it), slip the material over their head, and smooth the material down their back. Use your chalk/marker to indicate where the waist is and where the  back dags (the half-circle things at the bottom of the lederwams) will be. Based on the woodcuts, the dags begin just below the natural waist and extend down a bit. You can see that I had to re-mark the waist and the dags thanks to my wiggly model!

Step 2: Mark the waist and back dags

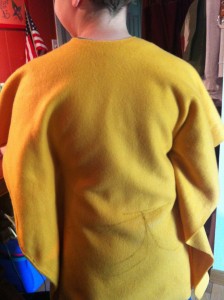
Step 3: Pin the sides of the material together, keeping the material as smooth as possible across the back and over the shoulders. Note that you do not want the front to be taut and smooth when you do this, just the shoulders and back — the front of the fabric will be a bit baggy. This is key to achieving the right look.

Step 3: Pin the sides


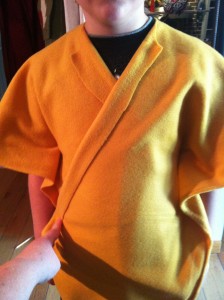
Step 4: Move around to the front and fold one side over the other (doesn’t matter which — you can see both directions in woodcuts). If you want the front pieces to form a lapel like they do the woodcuts, fold it the way you wish now. Mark the waist and the point where the lederwams should attach from the wrap-over side to the underside, so you have a good reference point later on.

Step 4: Fold the front over

Step 5: Trim the shoulder. I referred to woodcuts as I did this, making sure to start it low enough as well as trim it up high enough. I did just one the one shoulder at this point.

Step 5: Trim the shoulder

Step 6: Take the material off the wearer and lay it out on a flat surface, being careful to arrange the neck line properly and match up the connection point you marked in the previous step. Now measure, mark, and trim the other shoulder so it matches. I found it easier to get a matching shoulder by doing this than by doing it while on the wearer, but you’re welcome to try it that way, of course.

Step 6: Measure and trim the other shoulder


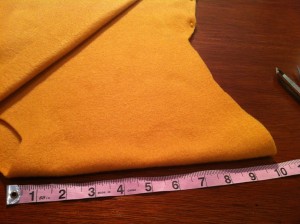
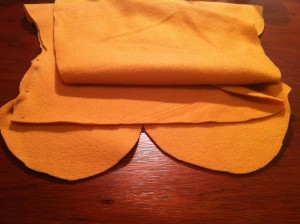
Step 7: Cut out the circular dags on the front and back, based on your markings.  I recommend you cut the dags a little big on your first pass so you have room to adjust if necessary. Also cut off the excess material on the sides, leaving about 1/4″ seam allowance here, and the excess material on the front flap that goes underneath.

Step 7: Cut out dags and trim excess material.


Step 8: Try on the wams (keep pins in sides) to see how it looks. Adjust as necessary.

Step 8: Cut and try out dags


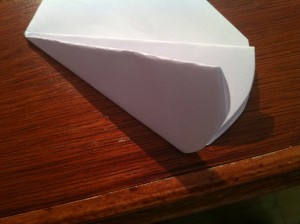
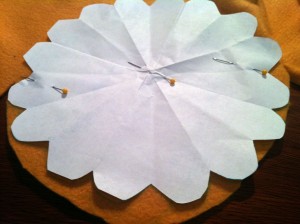
Step 9: If you want your dags to have the little curved cuts like you see in the woodcuts, make yourself a pattern by creating a circle from paper (same size as your dags), then fold it 4 times and cut half-circles on the wide end.

Step 9: Create a paper pattern for dags

Step 10: Put your pattern on your dag and trace it, then cut it. Repeat for all dags. The sleeves typically have the same circular cuts, so do those now as well.

Step 10: Cut out your patterned dag

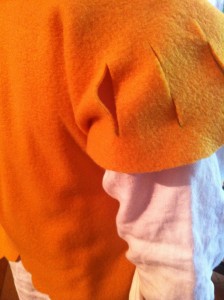
Step 11: If you want your sleeves slashed, or any other parts slashes (such as the dags, the front, or the back — refer to woodcuts for ideas), mark them and cut your material in those spots to see how it looks. I recommend you at least do the shoulders for the classic Lederwams look.

Step 11: Slash!


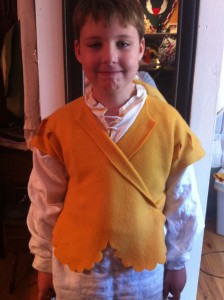
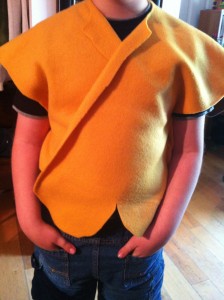
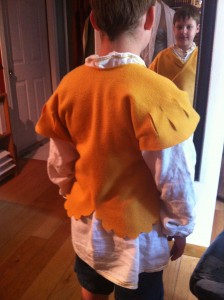
Step 12: Try it on and admire how fabulous you look!

Step 12: Fabulous!


Looks right to me! Love it!

(Yes, I know I didn’t cut the half-circles on the bottoms of the shoulders, nor cut slashes in the dags — my son and I are still discussing how those will appear. Also, I think I made the pattern the right size, but he’s a growing boy — maybe I should make it larger? Or perhaps he’ll just wear wams made out of something else until he’s older. It’ll depend on how much the leather costs me.)

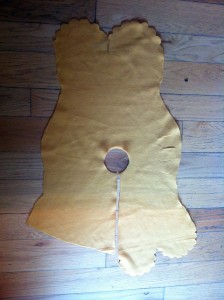
Here’s what the pattern actually turned out like:

As you can see, I cut the overlapping front flap with the dags. But I probably could have done it with one dag on each of those flaps. I chose not to because it didn’t appear that they were done that way in the woodcuts I looked at. If anyone has any information on which way this would be done, I’d love to hear it!

If you’re happy with your pattern, it’s time to procure some leather and make it for real. When I find some appropriate leather, I will create one and show how I did it step-by-step for you.

Lederwams/Leder Goller: The Leather Vest/Jerkin/Doublet Jacket of Coolness

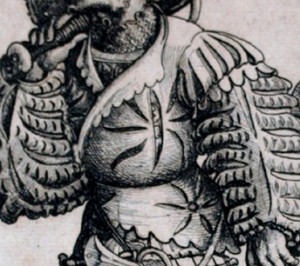
A Lederwams or Leder Goller (leather vest) is a quintessential item for a Landsknecht (German mercenary soldier), judging by how often I see men wearing them in woodcuts. And they look pretty cool, I must admit. I mean, come on … it’s a leather jacket! With slashes!

Lederwams seem to exist to provide some protection to the fighter, although I don’t believe it to be considered armor as the leather seems lightweight. Or possibly the lederwams was used as protection for clothing. I suspect both reasons. From a personal standpoint, autumn is coming and the weather will turn cooler, so lederwams would be perfect at all the upcoming events we will attend (8 SCA events planned in September-November!).

One of the fascinating things about the Lederwams is that they appear to be made of a single piece of leather which is then secured (sewn?) in some fashion at the sides and then closed in the front with a leather cord. This is both appealing and scary, from a construction standpoint. It means I need to create my own patterns, fitted specifically for those whom will wear them (Gregor and my son), but that once I have the patterns, it should be easy to make!

I came across an informative post on the GermanRenCostume on YahooGroups by Robert from st-max.org about how to drape a Lederwams. It’s all text and the directions are a bit vague, but I think I get the general idea. The post does discuss leather weights and types, which I find quite helpful. It indicates a 3-5 oz. leather is best, and that the leather should be softened in some manner if too stiff.

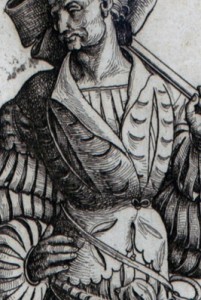
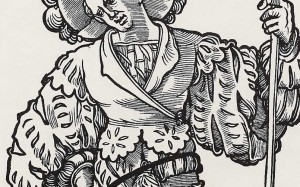
So, sometime soon (hopefully), I will attempt to drape a lederwams pattern, and I’ll take photos as I do it for the benefit of anyone else out there who wants to learn how to do it! In the meantime, here are several more woodcuts of lederwams for reference purposes: