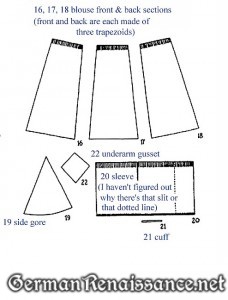
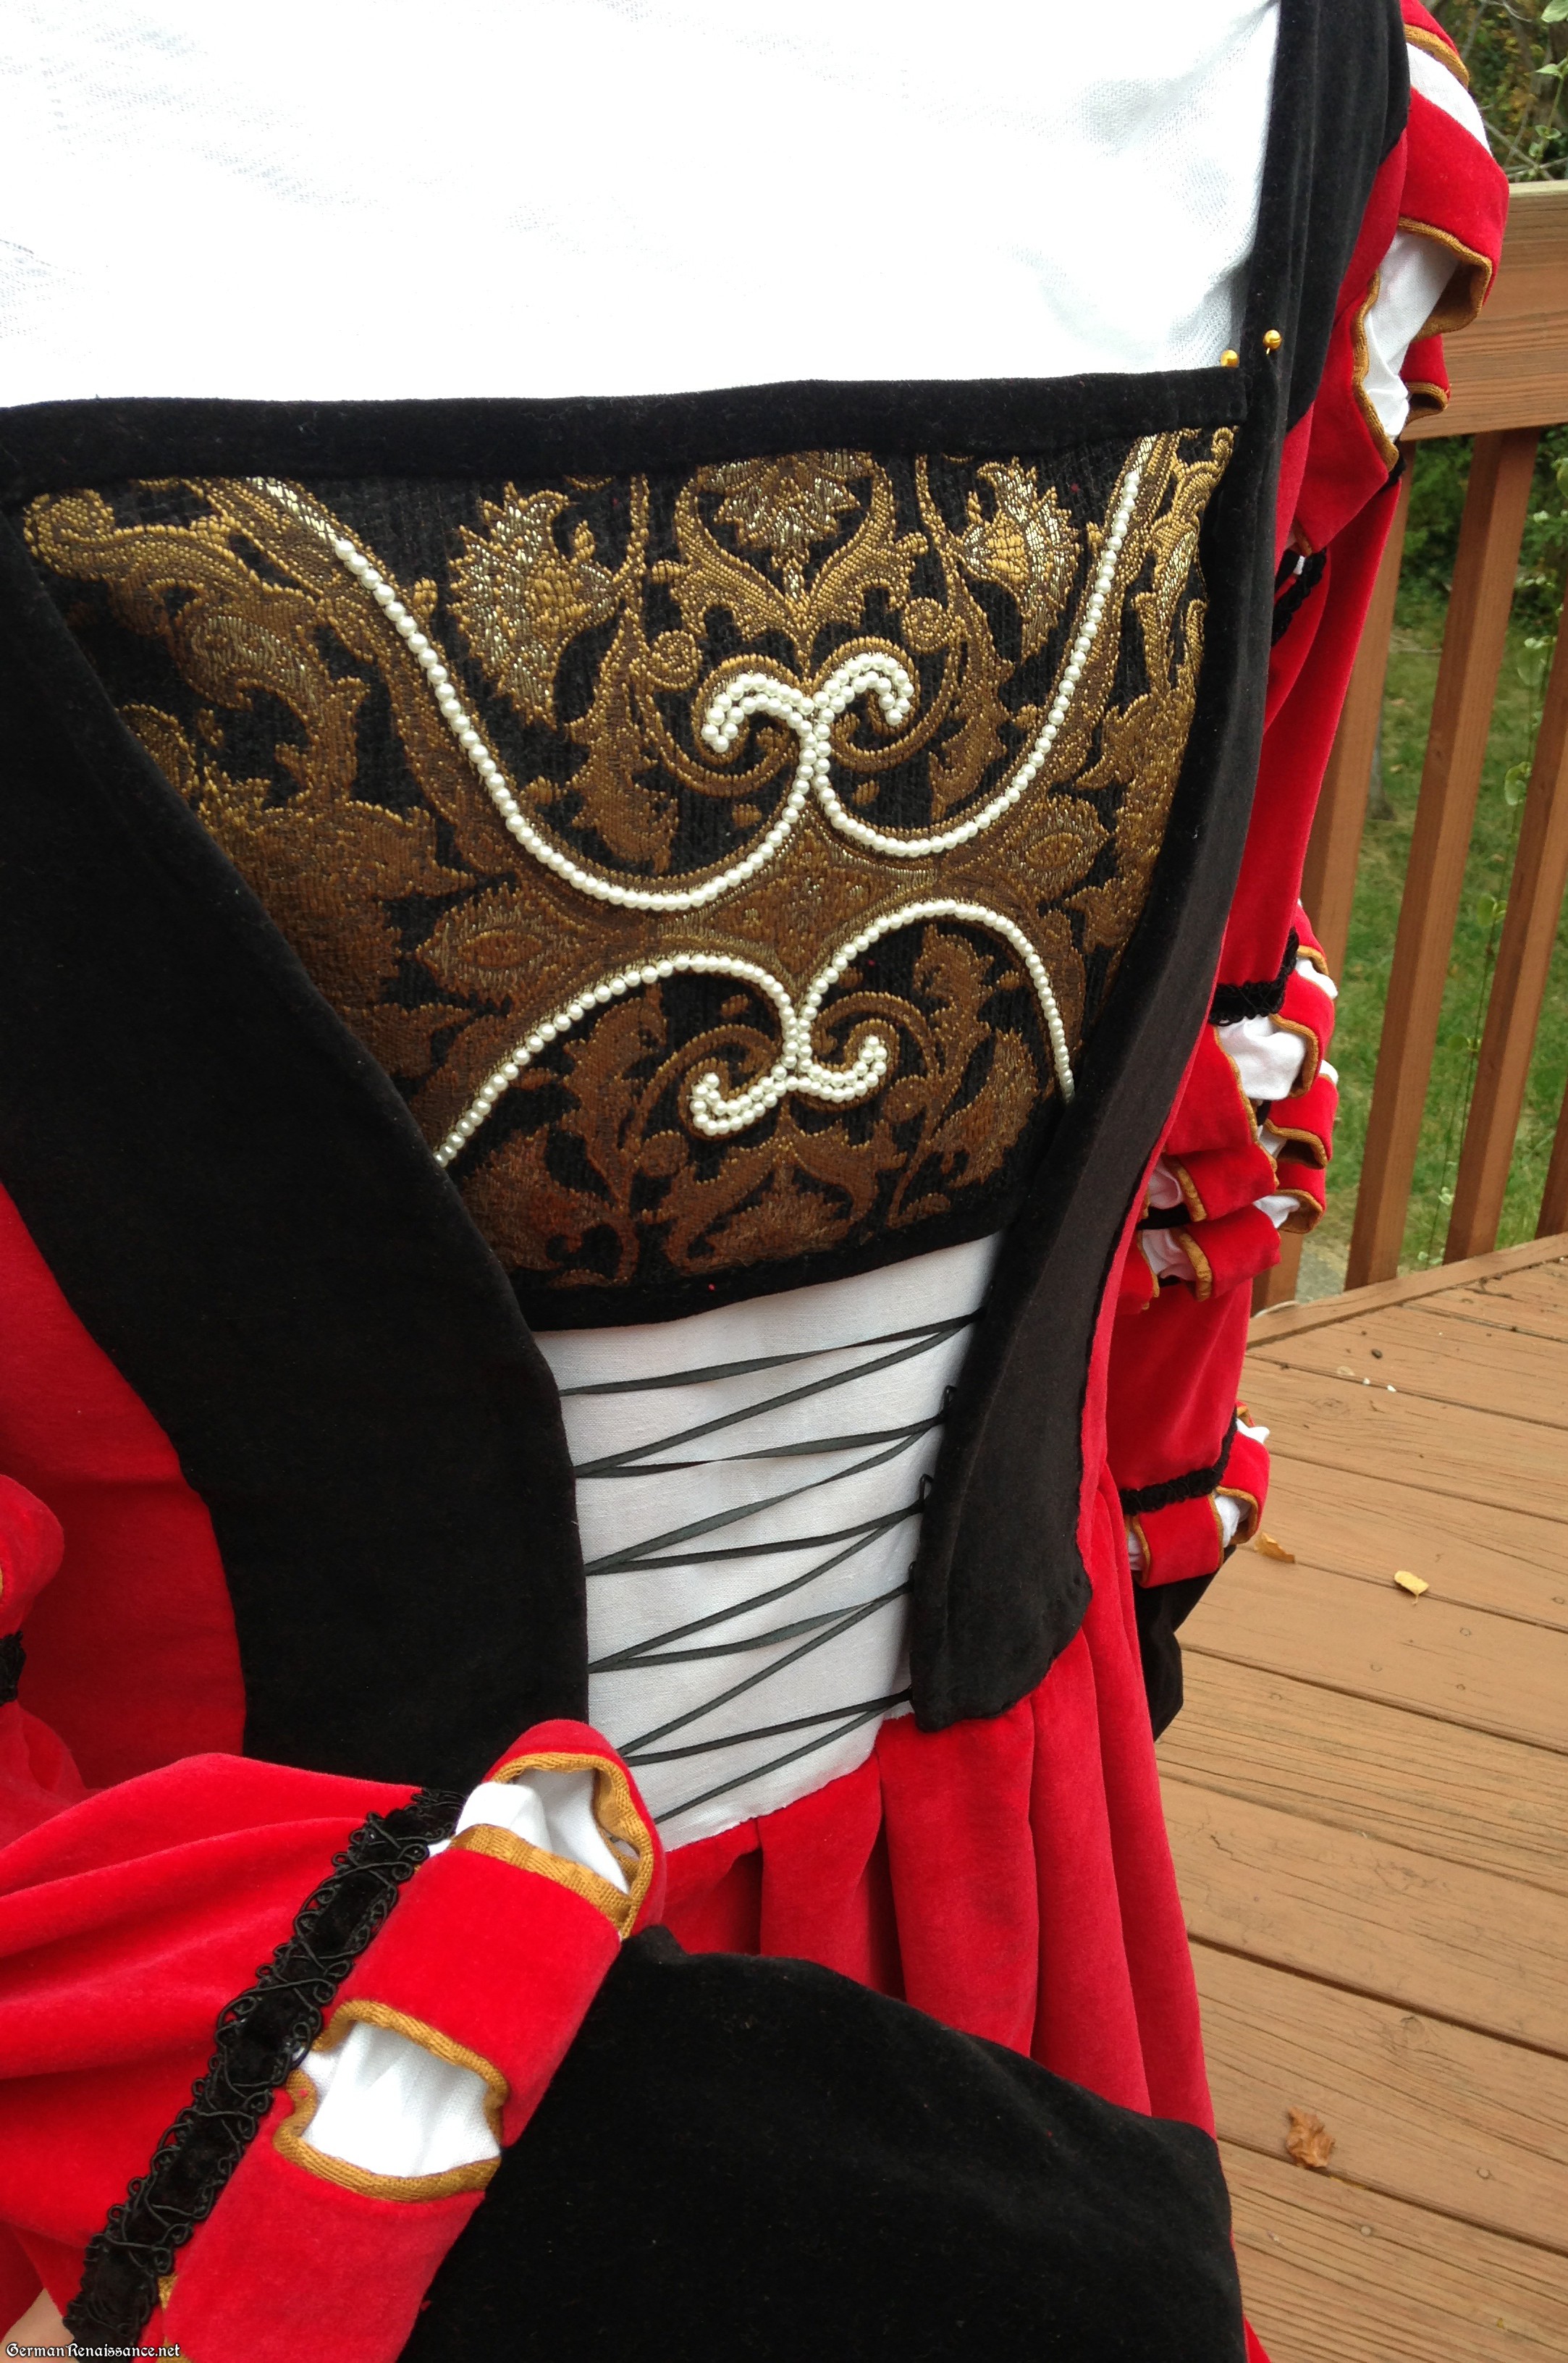
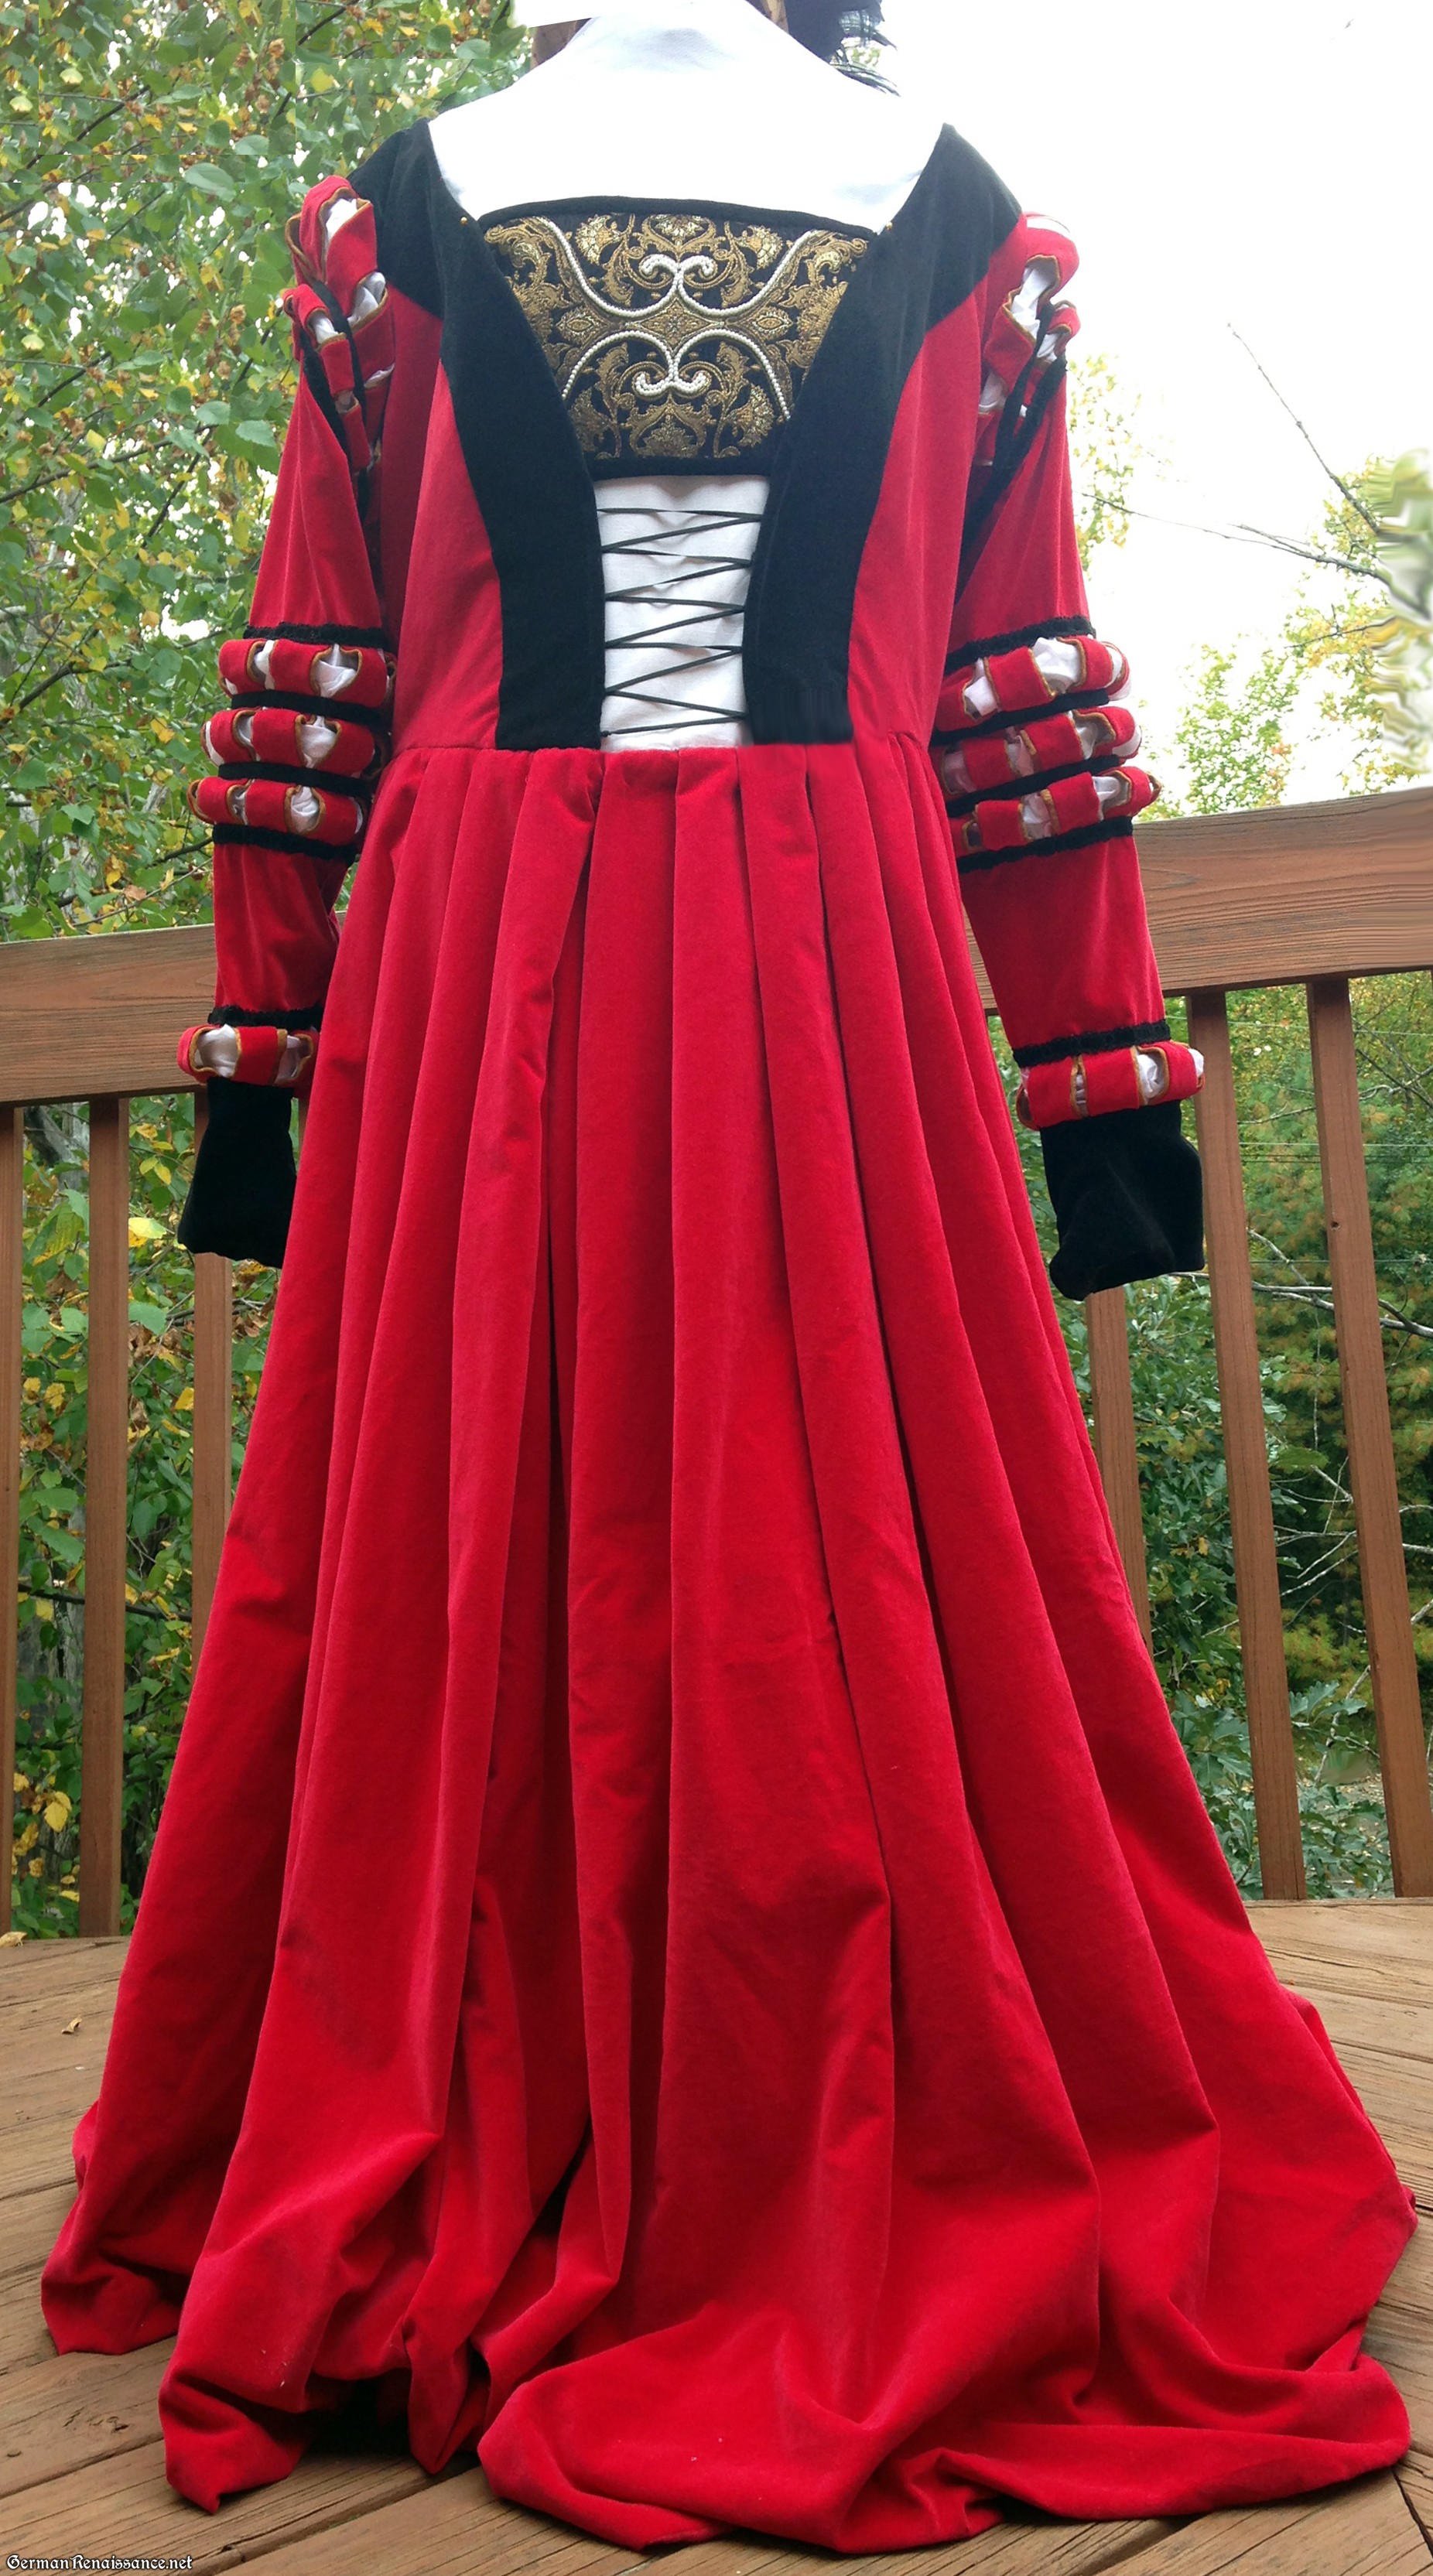
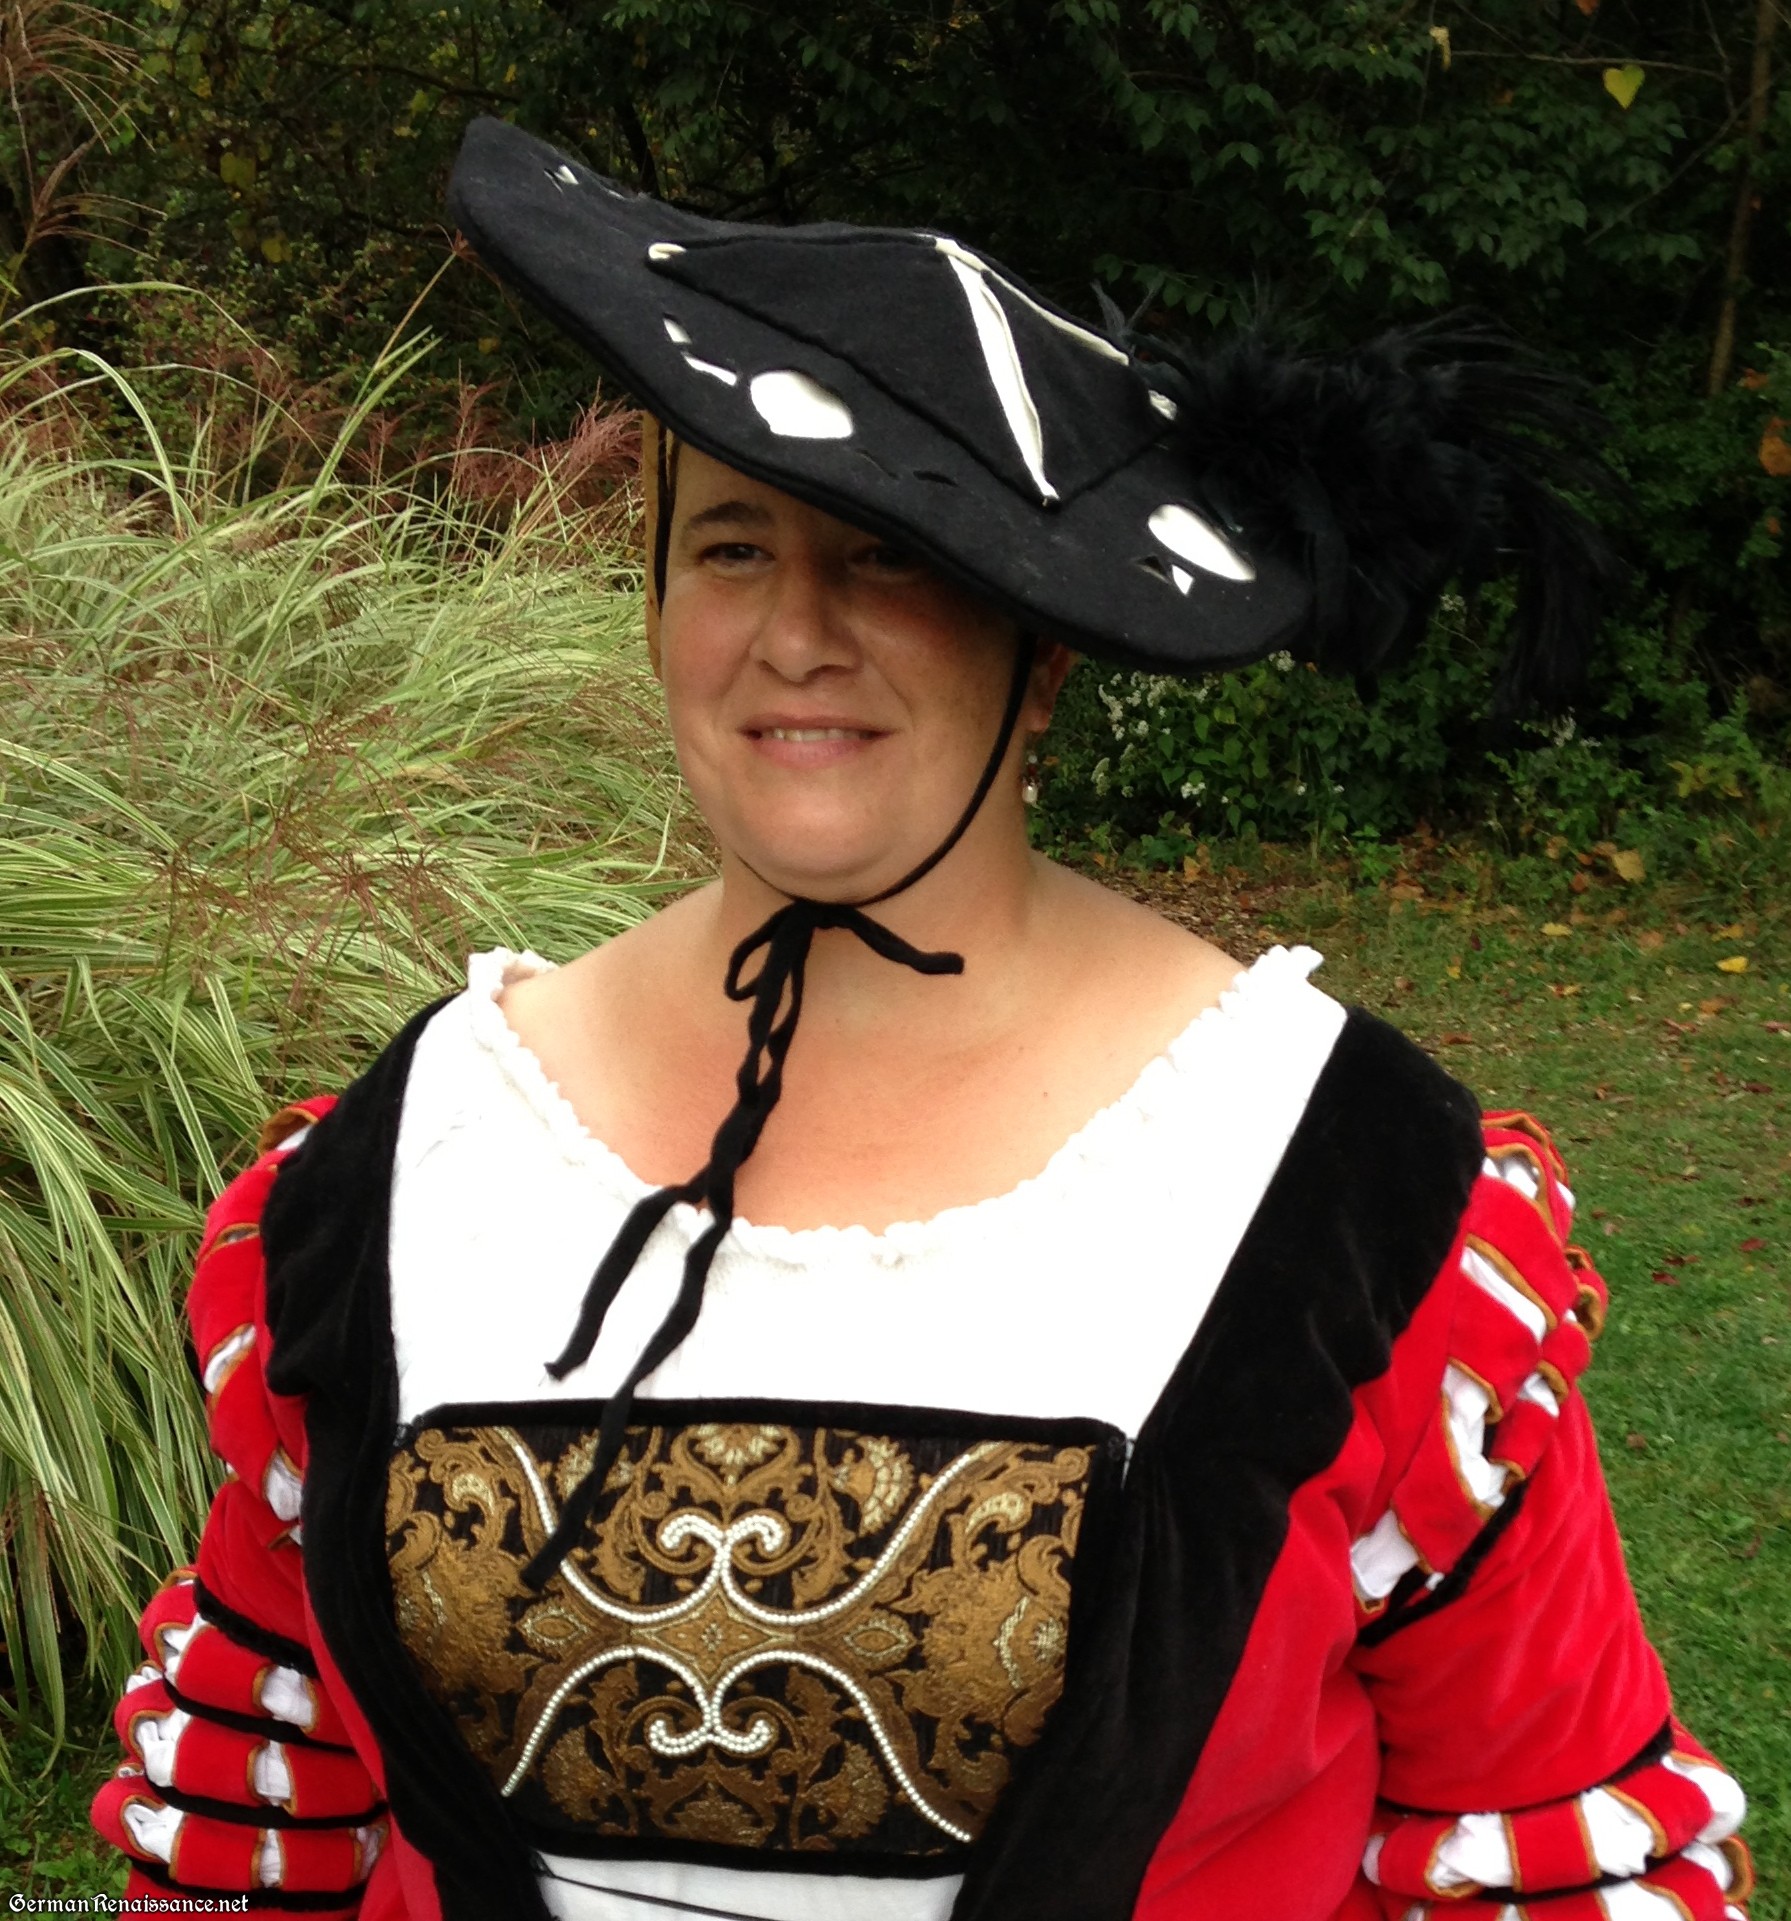
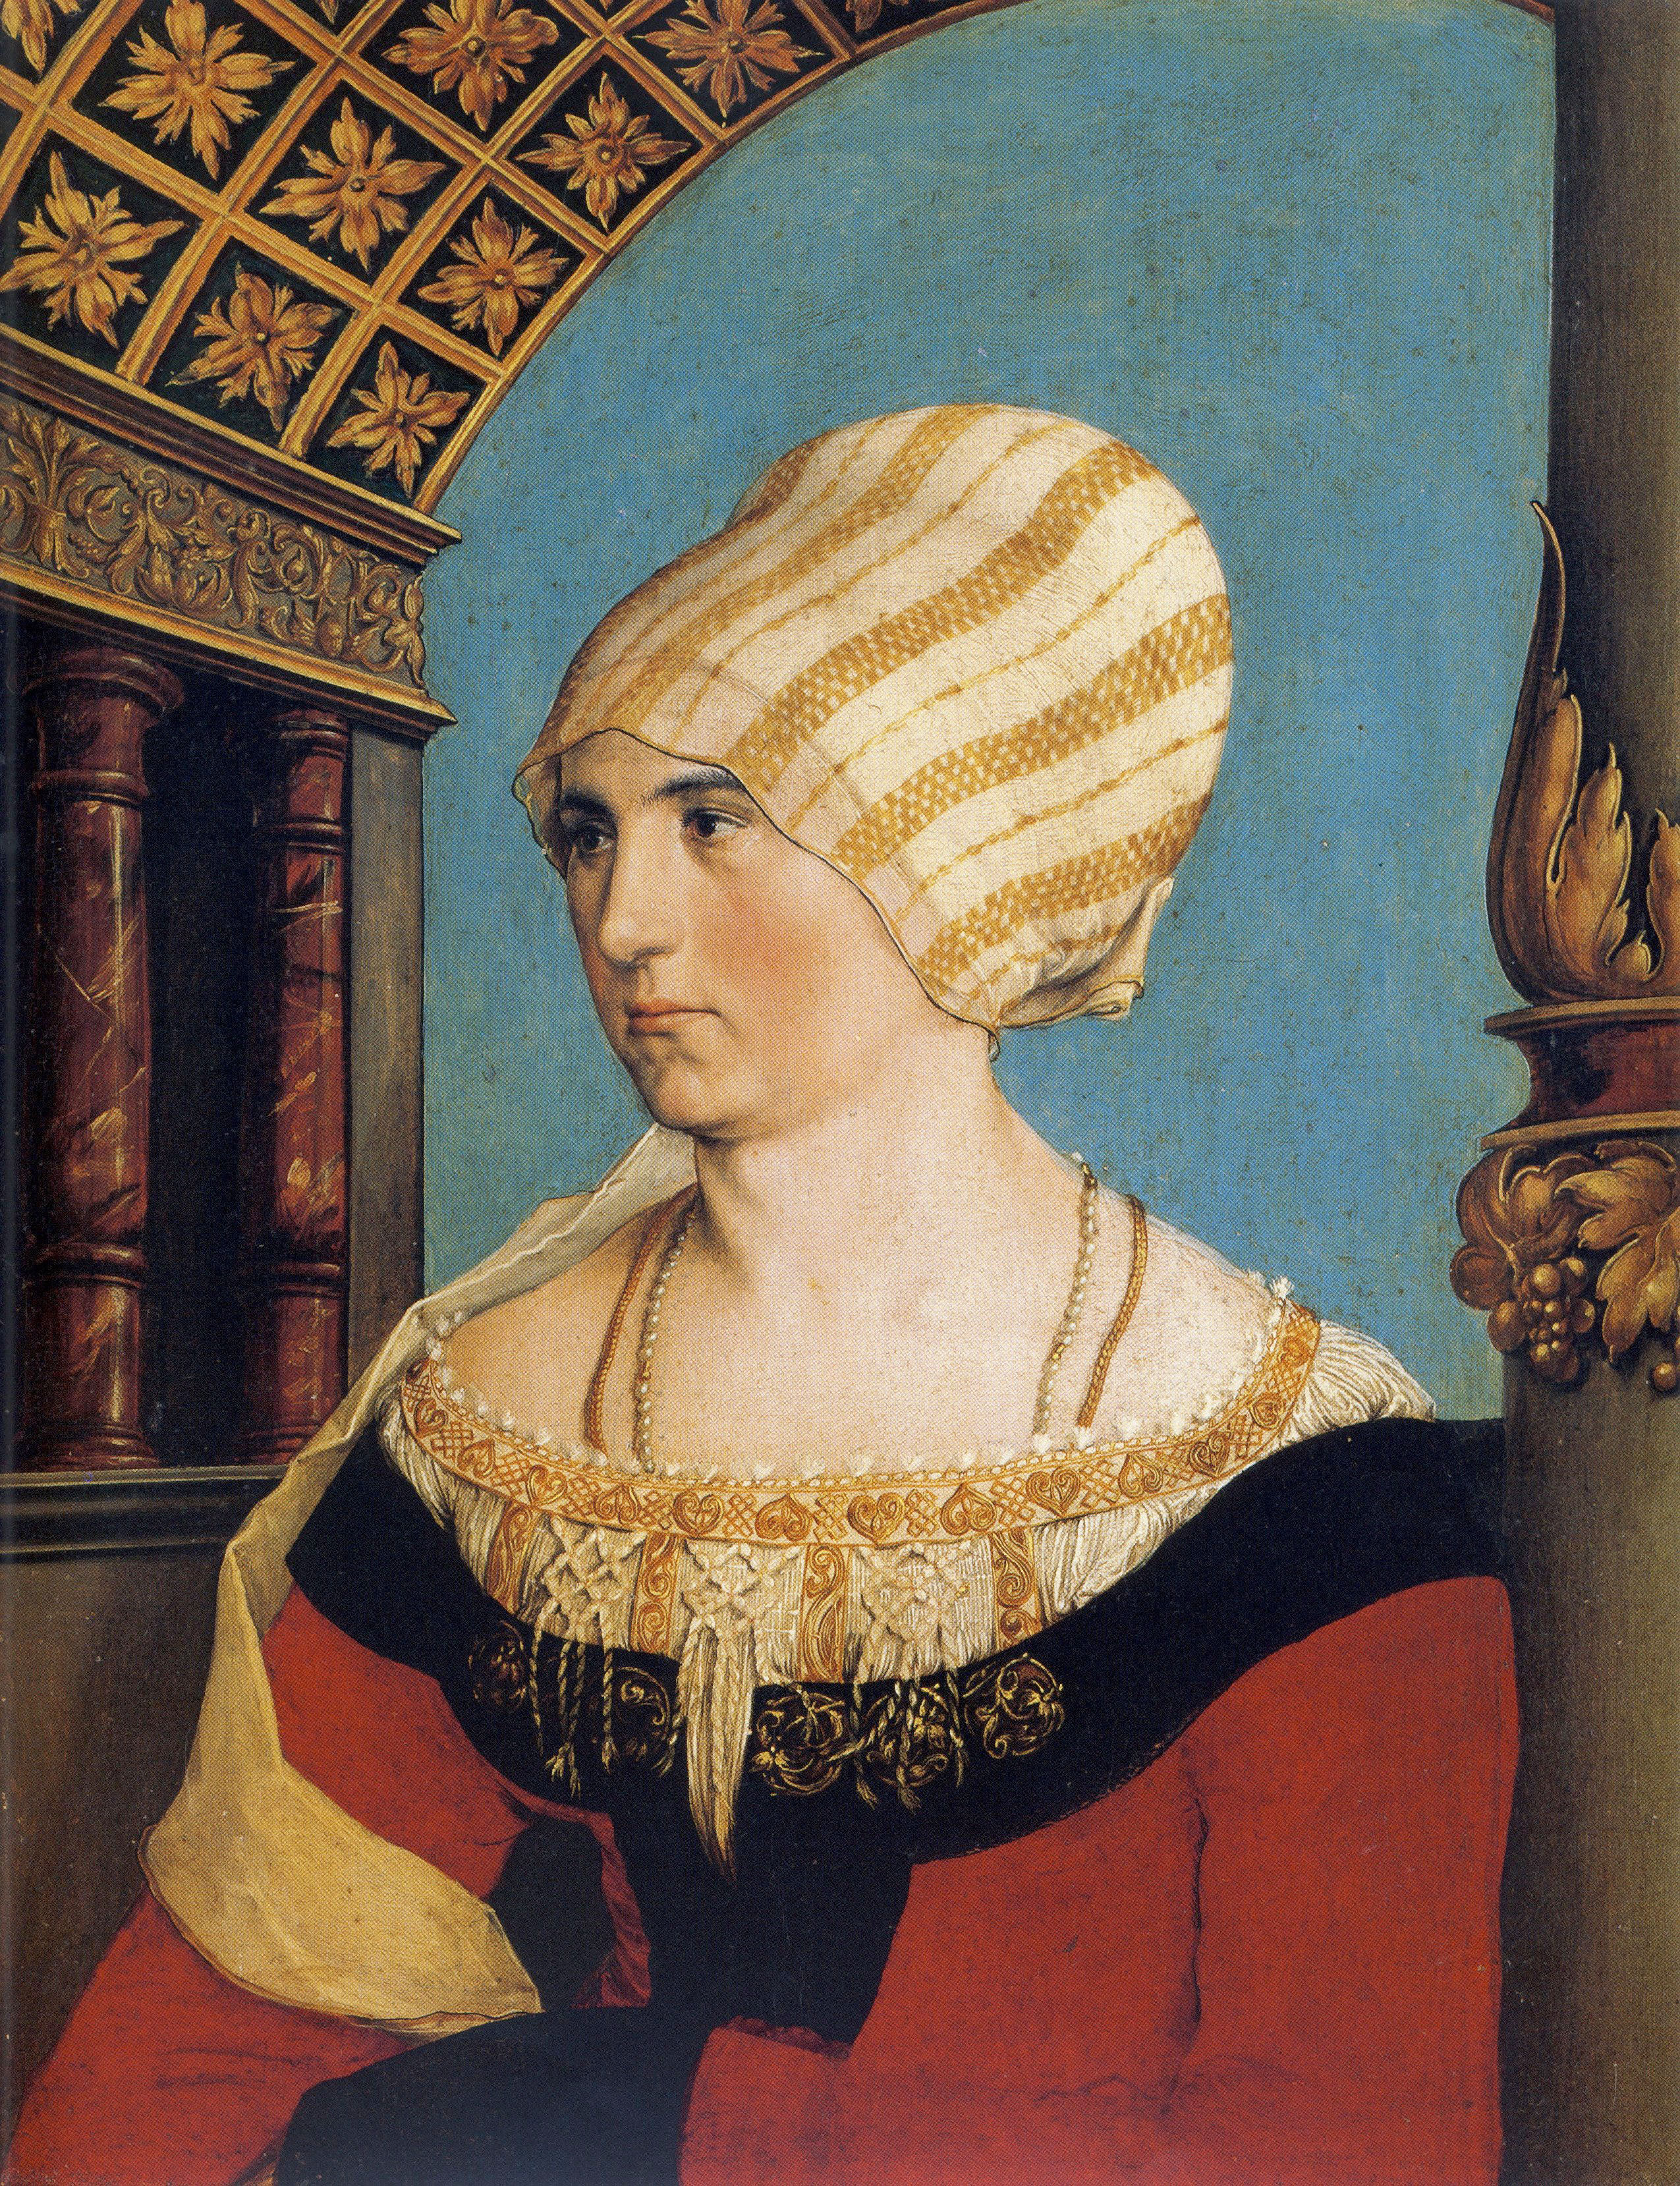
German Saxon court gowns of the first half of the 16th century, made famous by painter Lucas Cranach’s ladies, have one particularly defining feature: a plastron (brustfleck) with a decorative band at the top and a laced-over bottom (usually white, but not always).
I’ve been studying this style for more than a year, trying to work out the construction. After looking at many, many portraits, woodcuts, and photos of reconstructions by other enthusiasts like me, I’ve come to some preliminary conclusions:
1. The brustfleck is sewn, pinned, or hooked into the sides of the bodice.
2. The white material at the bottom seen below the brustfleck is probably distinct from whatever hemd, kirtle, or underdress, and may or may not be attached to the decorative band at the top. I usually do not see any wrinkles in the white section that would lead me to believe it was just a hemd. It appears that the simpler, lower class gowns of this design are more likely to show the wrinkles, and the fancier, court gowns do not.
3. No boning was used; rather canvas and possibly a flexible buckram was used to stiffen it. The brustfleck definitely seems to curve. Plus we have no evidence that boning was used at this point and place in time.
I draw these conclusions from several images I found of women in various states of undress.
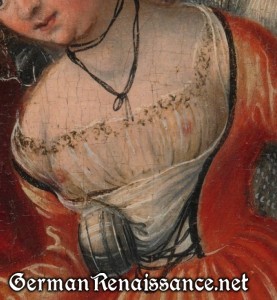
Detail from Christ and the Adulteress by Lucas Cranach, Metropolitan Museum of Art (1982.60.35)
In the above detail image, we can see a woman with her dress partly undone. The main interest for me here is the rectangular piece hanging off her right side. It looks to me like it could be the backside of a brustfleck. [Nope, that looks like the armored hand of the man holding her, which you can see if you click on the image.] Also note she is wearing a very diaphanous hemd as well as a more opaque, separate (and loose) hemd over it. It looks too loose to be a kirtle, though. This is not a court gown; it is a lower class gown.

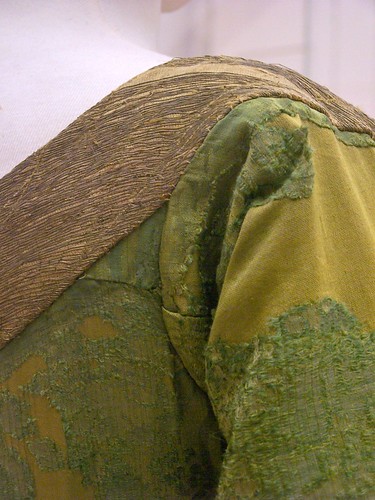
Suicide of Lucretia by Lucas Cranach the Elder (Hoston Gallery of Fine Art)
In the above image, we can see a rectangular piece of fabric pulled down, and a hint of the other side (a golden material that could be the brustflect). This fabric looks flexible (not boned). It appears to be attached to the skirt. This is a court-style gown.
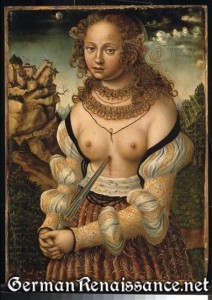
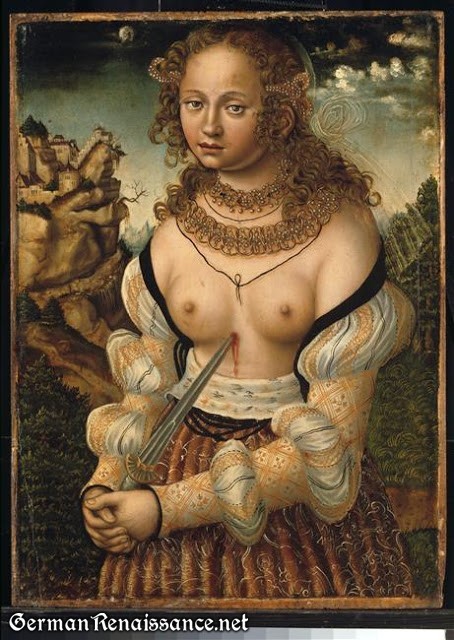
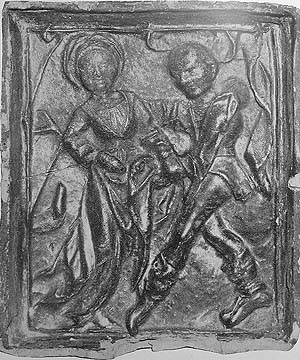
Suicide of Lucretia by Lucas Cranach (location unknown)
And finally in this image, we see a similar rectangle (or trapezoid) hanging down and some black lacings. It also appears to be attached to the skirt. This is also a court-style gown.
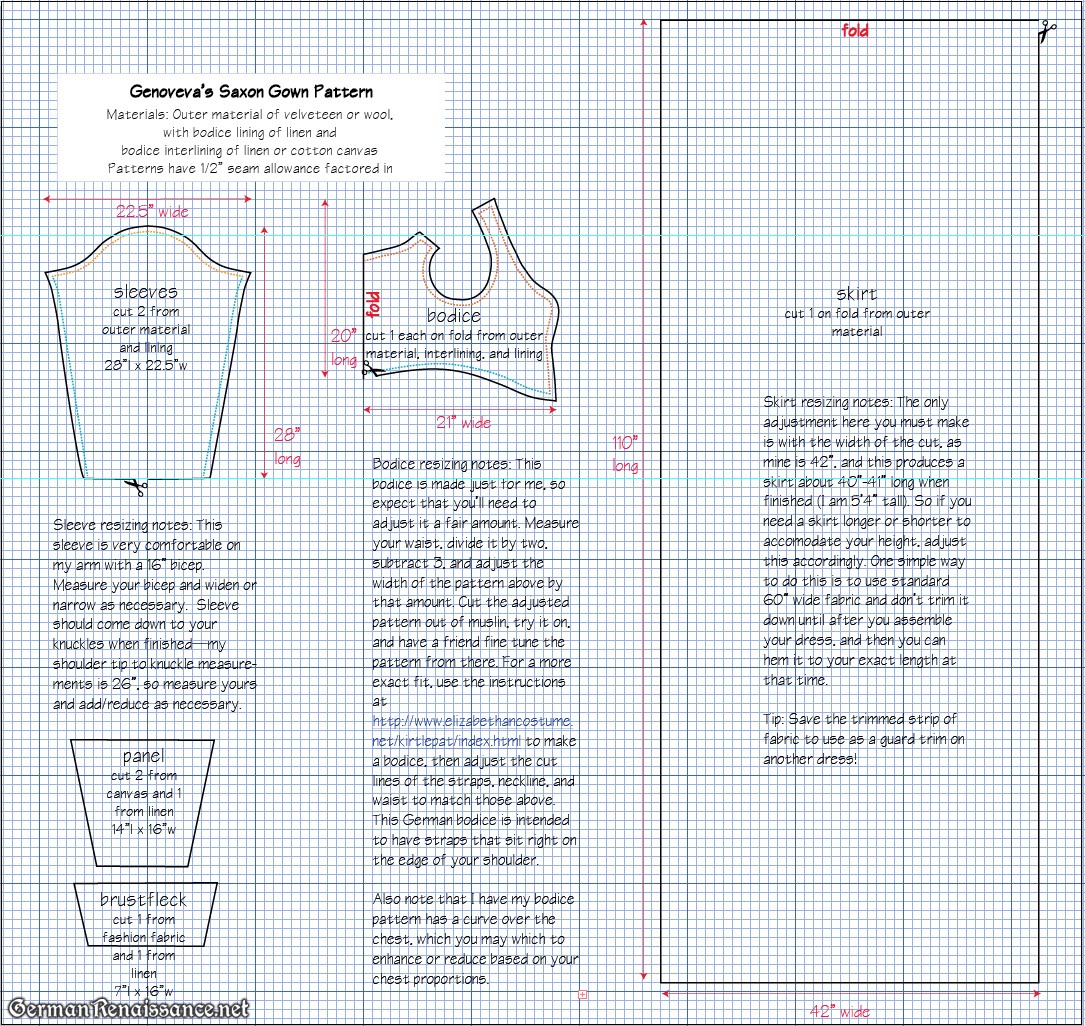
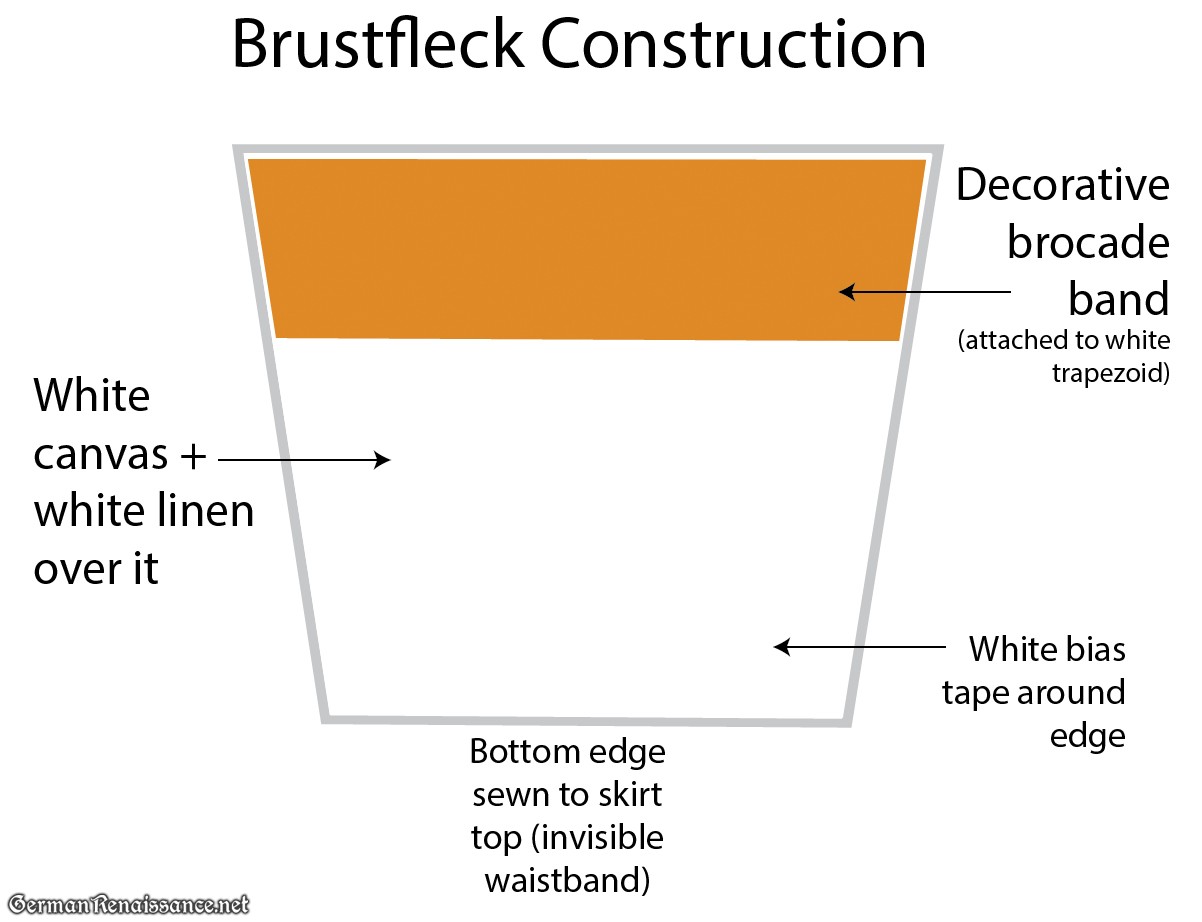
So, based on this pictorial evidence, I’m going to make a rectangular/trapezoidal shape, at the top of which will be the decorative band, and at the bottom attached to the skirt. I will use one-two layers of canvas and a layer of linen to give the brustfleck some stability as that will surely help it stay put, but I will not bone it. Here’s a diagram of what I plan to do:
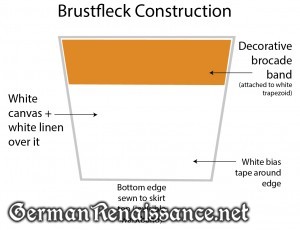
My Brustfleck Construction
Note: I -might- experiment with padding the upper section to give it the rounded chest while keeping the flat tummy. We’ll see!
One other thing — I came across this mention of brustflecks in Textiler Hausrat, Kleidung und Textilien von Nurnberg, 1500 – 1650 by Jutta Zander-Seidel, pages 149-150, translated by Katherine Barich.
6.5 Brusttuch Brustfleck
Breast cloth Breast piece
The breast cloth (brusttuch) or the breast piece (brustfleck)
served to fill in a cut out neckline, where is covered as an
insert any objectionable neckline depth, or as and additional
clothing piece to protect the chest in cold weather. The latter
was valid above all for the wool breast cloth (brusttuch) made
from high quality scarlet (fine wool, not necessarily red), or
less desirably from arlas (high quality wool) or wurschet (middle
quality wool), as in the not better described citation old red
wool breast piece (brustfleck). (435) Besides this are rauhe,
namely fur lined breast cloths (brusttuch) recorded, (436)
however, predominately for men. Breast cloths (brusttuch) are
found with wide borders or smocked with gold (mit Gold
gefitzte), (437) and are referred to until the late 16th
century as the small embellished accessory in Nurnberg womens
pictures, where it covers the cut out areas of the clothing, going
over the white goller (partlet style) or the shirt. In Hans von
Kulmbachs picture of an unknown woman in 1512 the gold border
spreads over the cut out. (Illustration 141) Distinctly visible
connecting stitches connect the breast cloth to the adjoining
linen goller (partlet) as though following the wording of a
clothing mandate of 1490, that a too deep cut out requires a
breast cloth (brusttuch) and an attached goller against one
another. (438) This pattern essentially corresponds further as
shown in the clothing of Barbara Möhringer by Hans Hoffman in
1573, however appearing without the by then usual velvet goller.
(Illustration 133)
In the inventories the decorative inserts stay confined expectedly
proportionately to the upper class bequeaths. Ursual Spengler
left behind in 1529 several smocked breast cloths
(brusttuchlein) and a breast cloth (brusttuch) with a gold
piece; (439) one breast cloth (brusttuch) with gold was in the
record of Helena Schlaudersbach, deceased in 1554, valued at 12
pfennig. (440) In later decades inlay border (einleg
Porten), throat border (Halßoporten) and a virtue border
(fürthue Porten) took their place. (441)
435. Anton Tucher, 1512 (W. Loose, see footnote 14, page
94): Item, A.D. 16 October bought 3 scarlet (schlarlache cloth,
not necessarily red) breast cloths (Prusttücher), one for me, the
other 2 for Anton and Linhart Tucherin, paid for these 21 Pfund.
Ursula Imhoff 1520 (see footnote 10) 1 red scarlet (scharlach)
breast cloth (brusttuch), valued at 6 Pfund, 9 Pfennig.
Margaretha Rieter, born Kress 1548 (see footnote 10).
436. Margaretha Birlinger 1538 (StaN, LI 2, fol. II4r-115r): 3
fur lined (rauhe) breast cloths (brusttucher), 1 trimmed with
squirrel, 2 gulden.
437. Anna Haller, 1528, (footnote 23): 4 breast cloths
(brusttuch) smocked with gold, 1 gulden, 1 wide border from a
breastcloth (prustthuch), 1 gulden.
438. Vgl. Page 48.
439. StaN, LI4, fol 116r-175v.
440. GNM (see footnote 410).
441. Helena Baumgartner 1567 (see footnote 6), 1 virtue border
(fürthue Porten) with a small ruffle/lace (kresslein), 1 pfund, 1
inlay border (einleg Porten) and 1 throat border (Halßoporten) 6
pfund, 9 pfennig.
Illustrations:
141 – Hans von Kulmbach: Picture of a woman with a Linen partlet
(goller) and a breastcloth. 1512
133 – Hans Hoffman picture of the 32 year old Barbara Möhringer,
born Herz, with red cloth covered braids. 1573.
The big question in my mind right now is how to get the sides of the gown to lie flat against the brustfleck. I’ve seen too many re-created gowns where the sides bag and gap, and it doesn’t look good. I can find absolutely no evidence of pins to hold it in place, though I did see one painting with little golden buttons, but they were only shown at the top two corners. I’m hoping that the weight of the dress keeps the bodice down, but I will not know if that is true until I make it.
So let’s make the brustfleck!
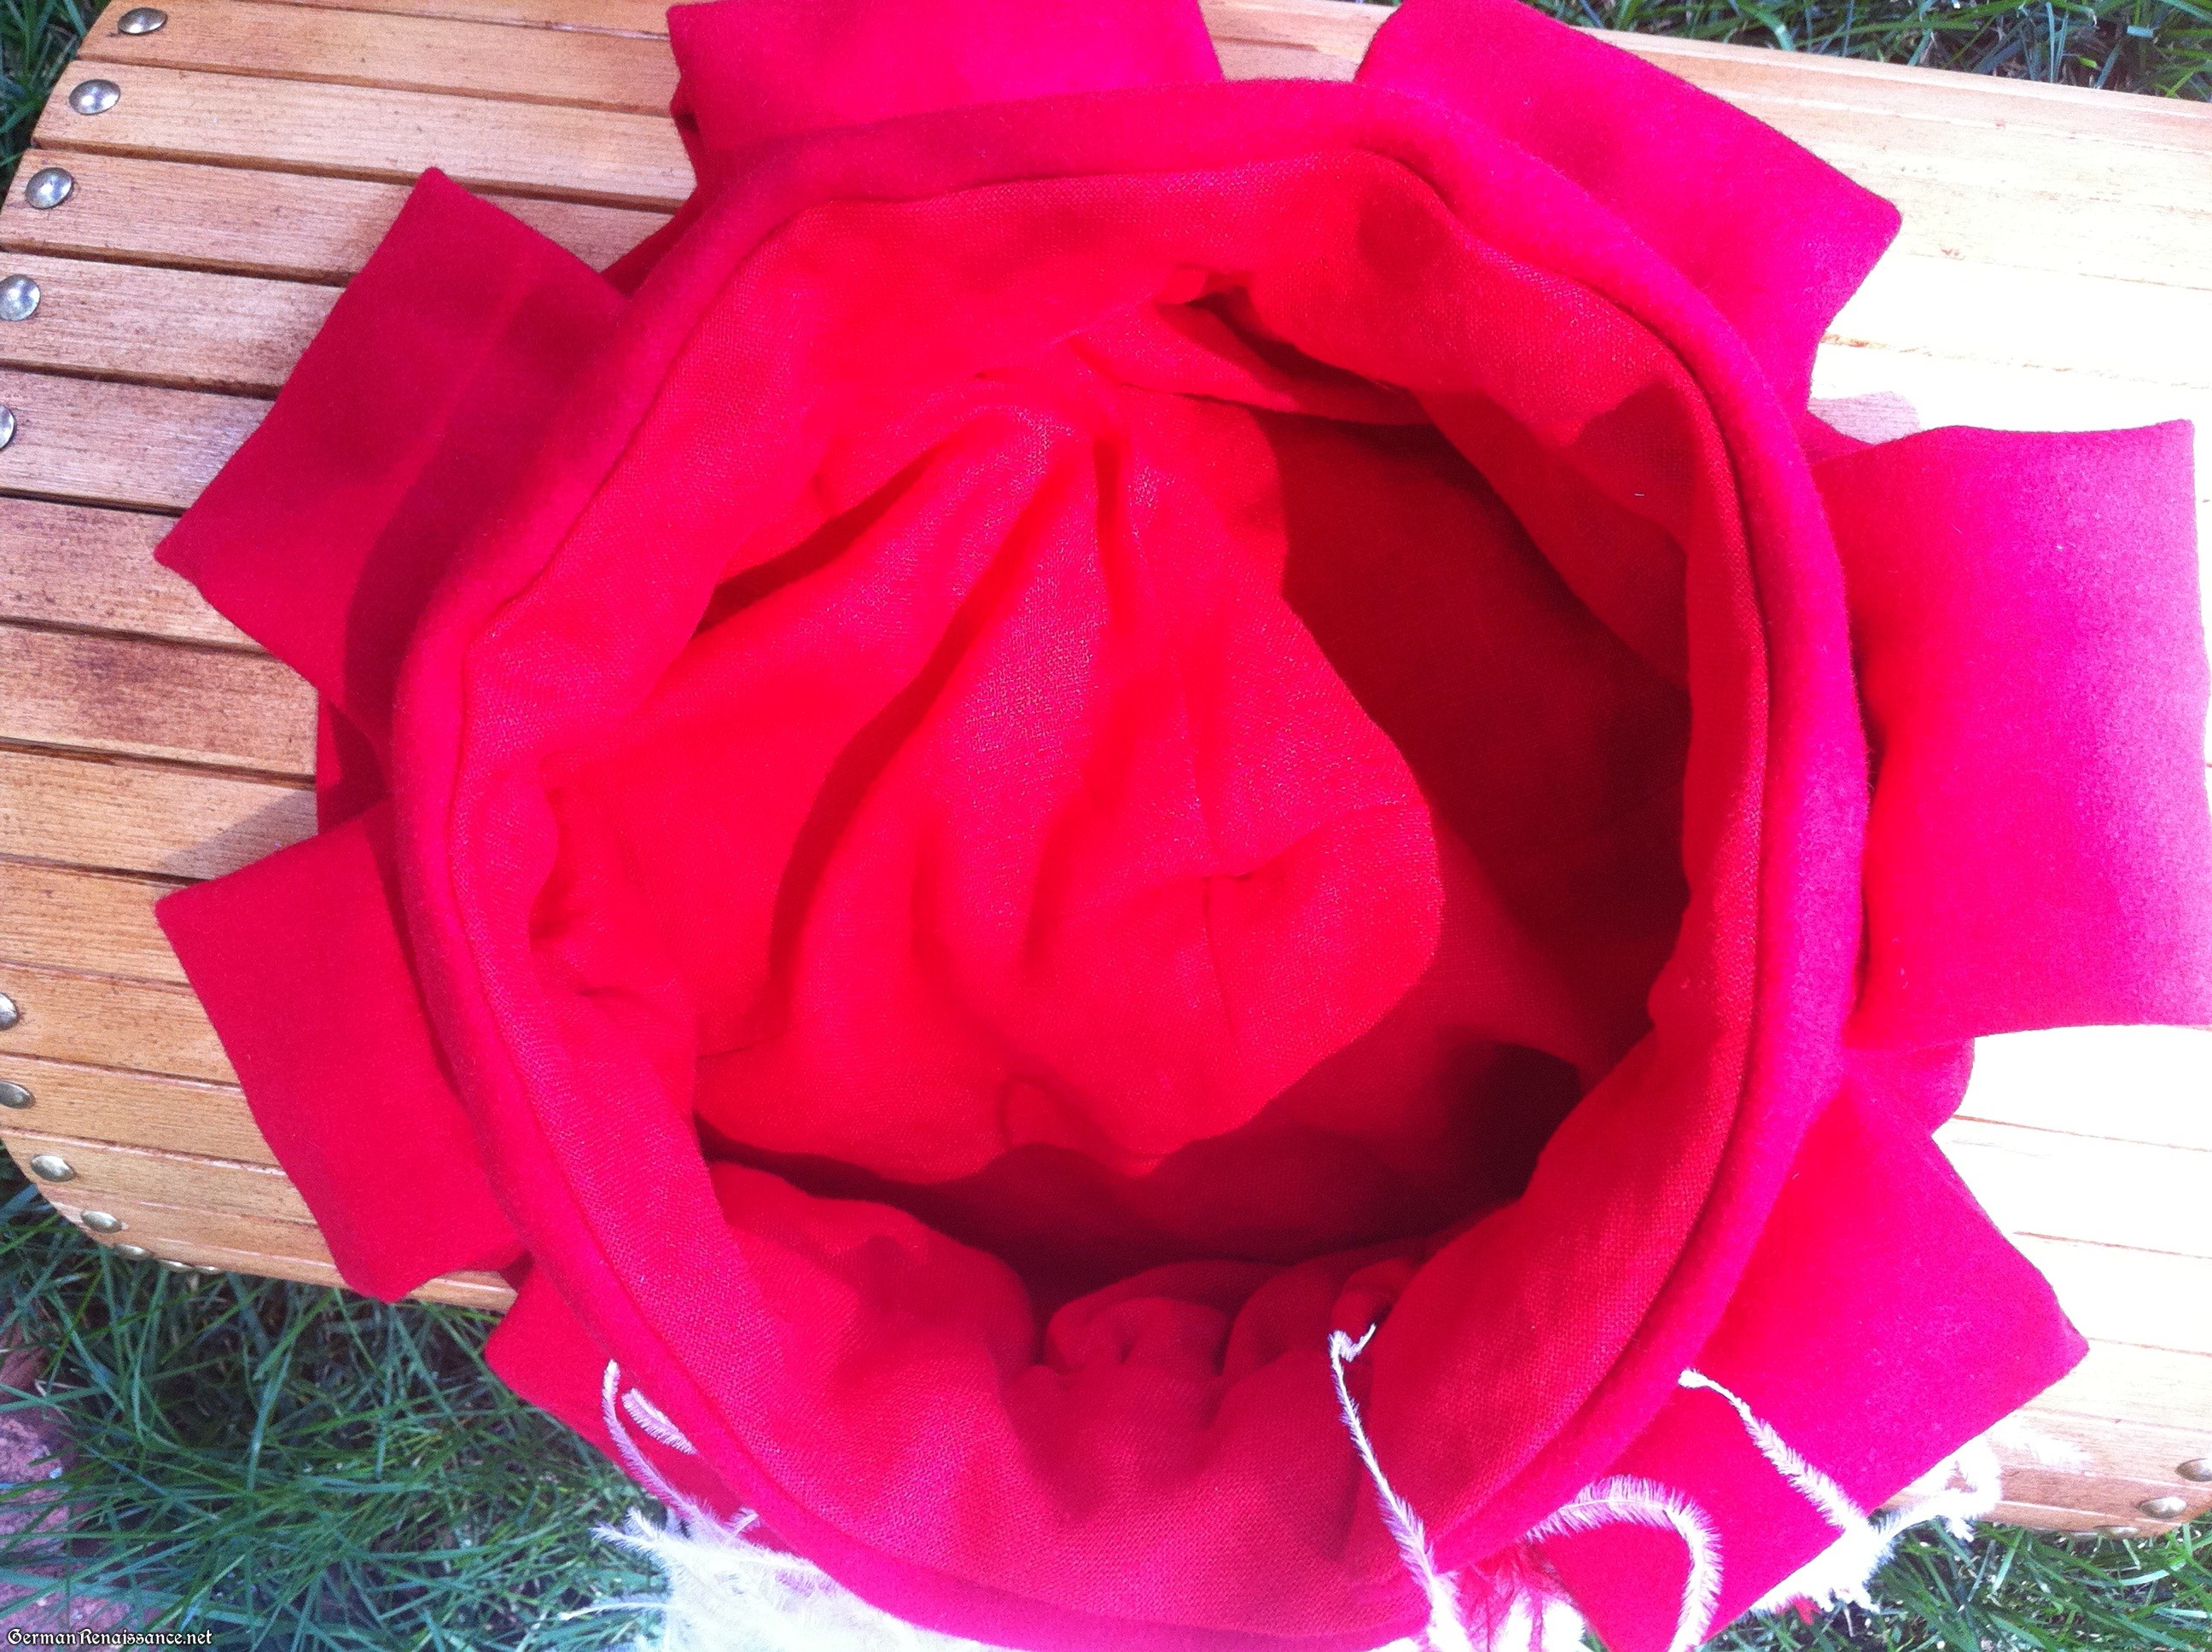
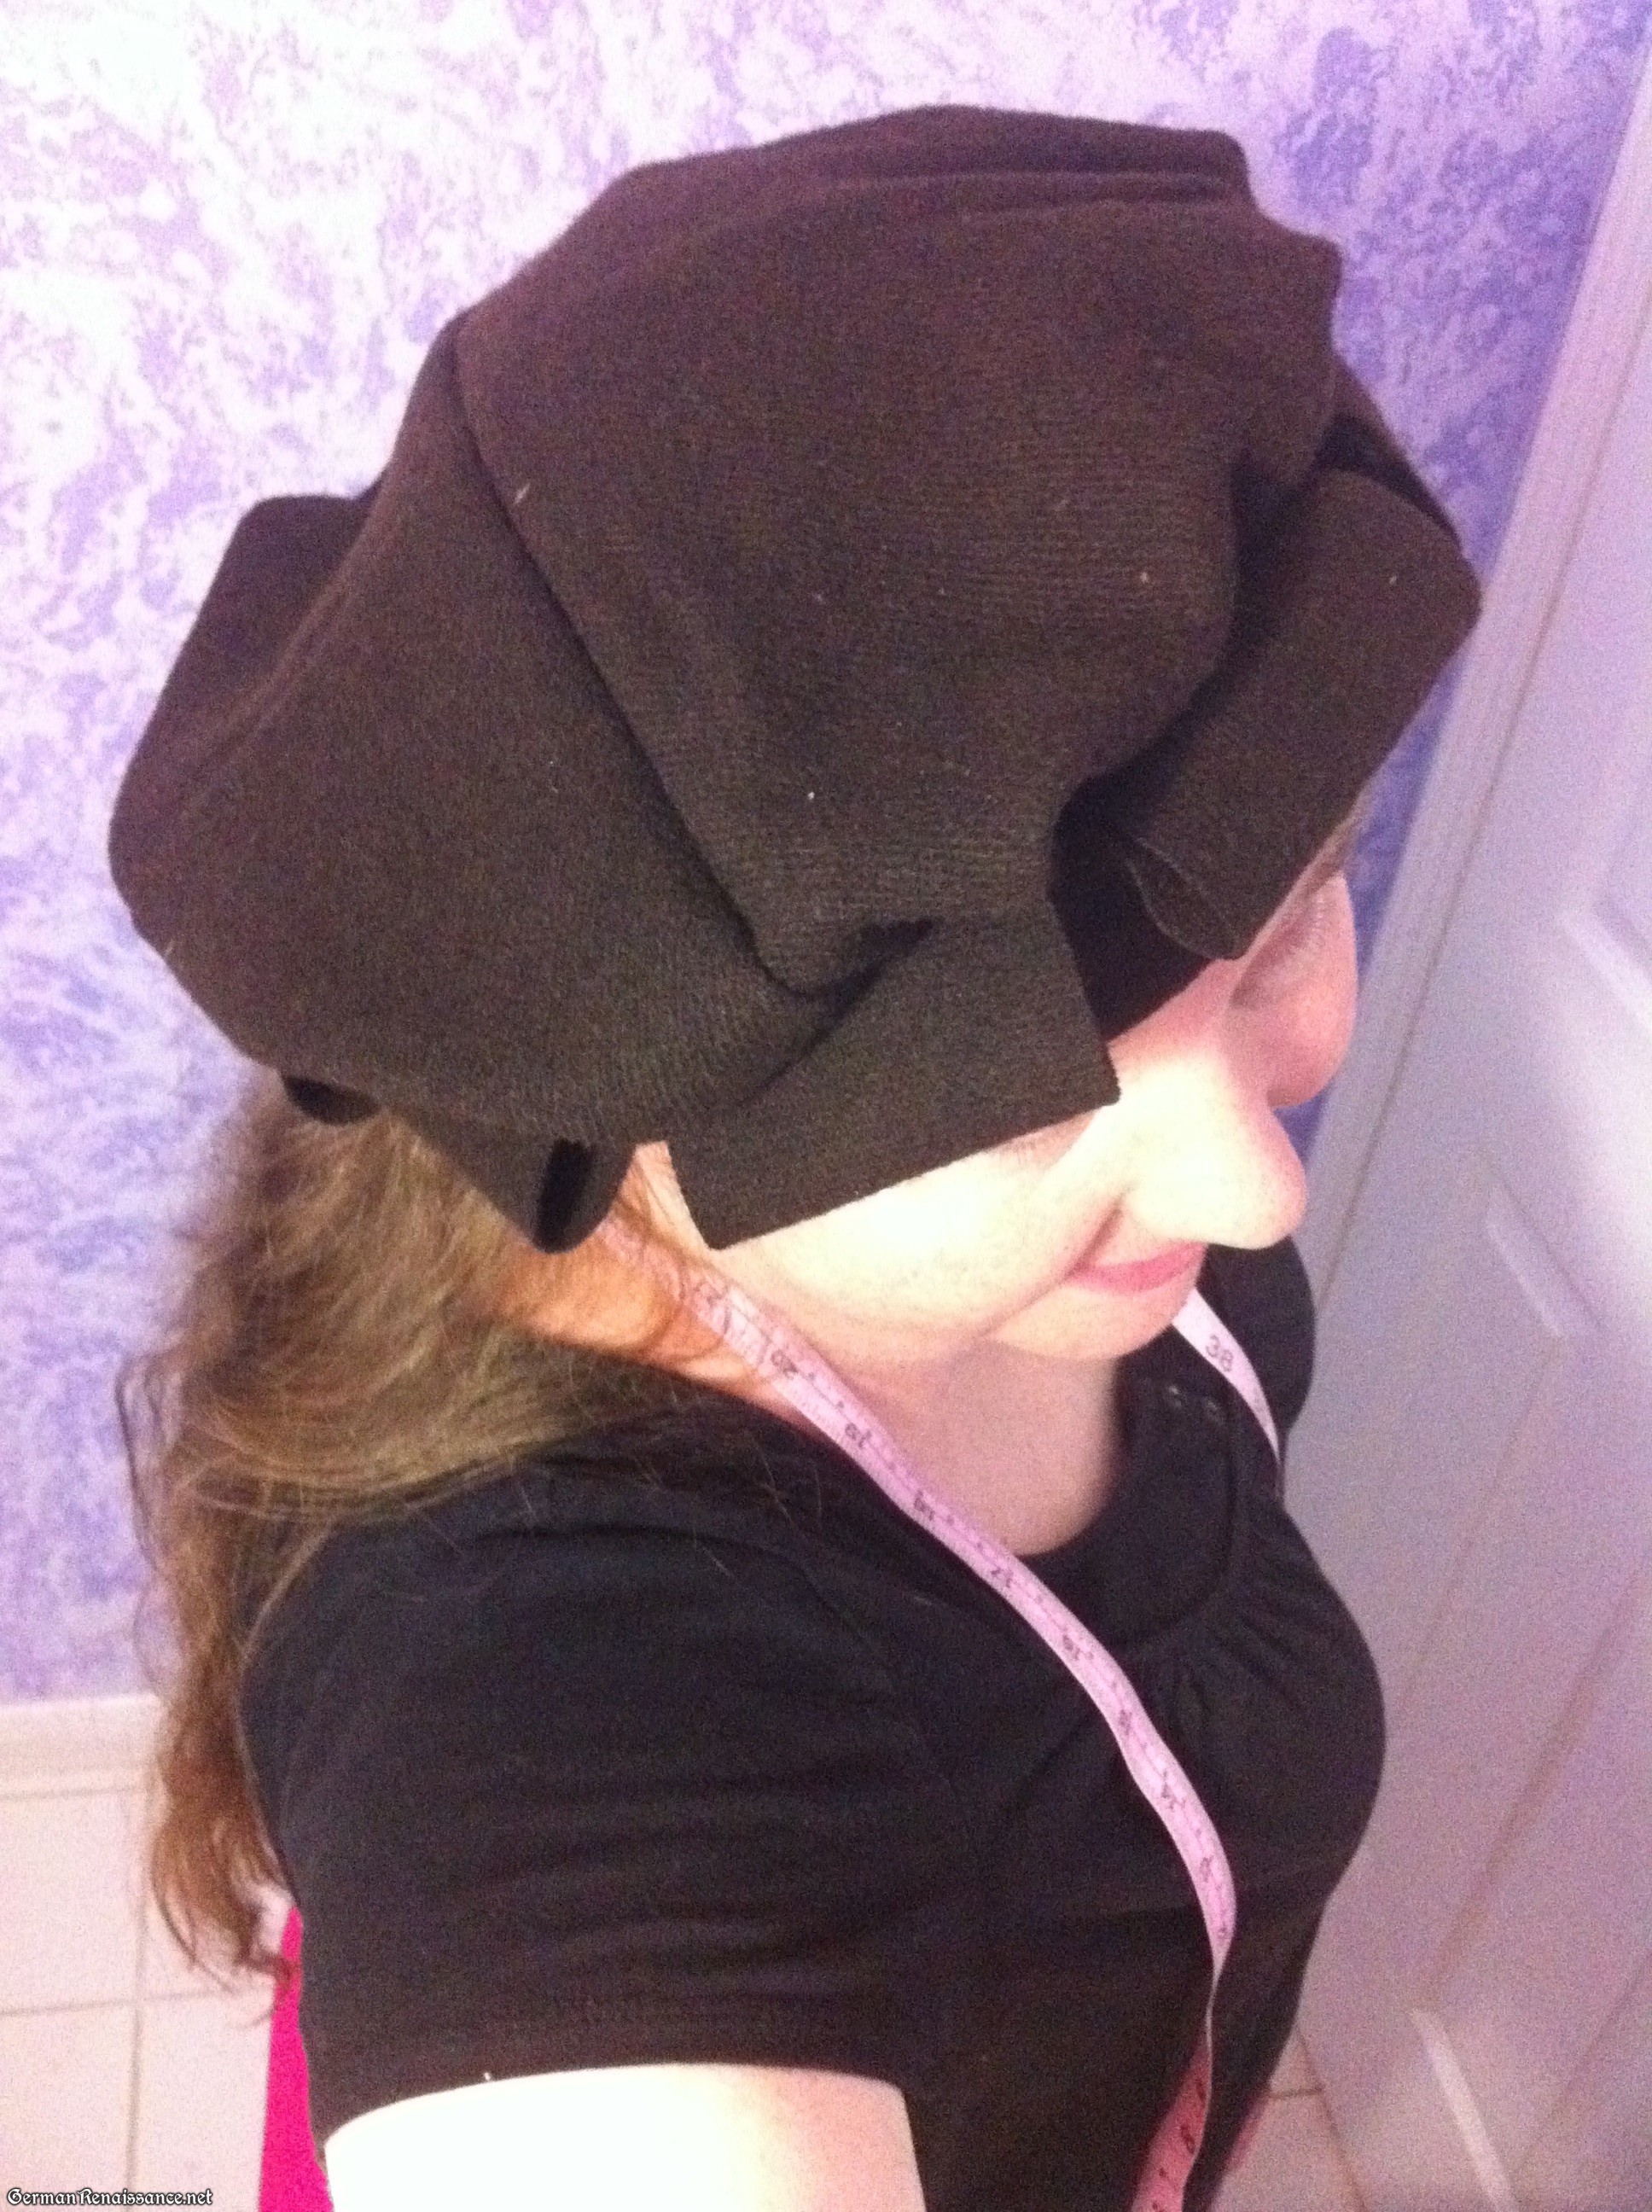
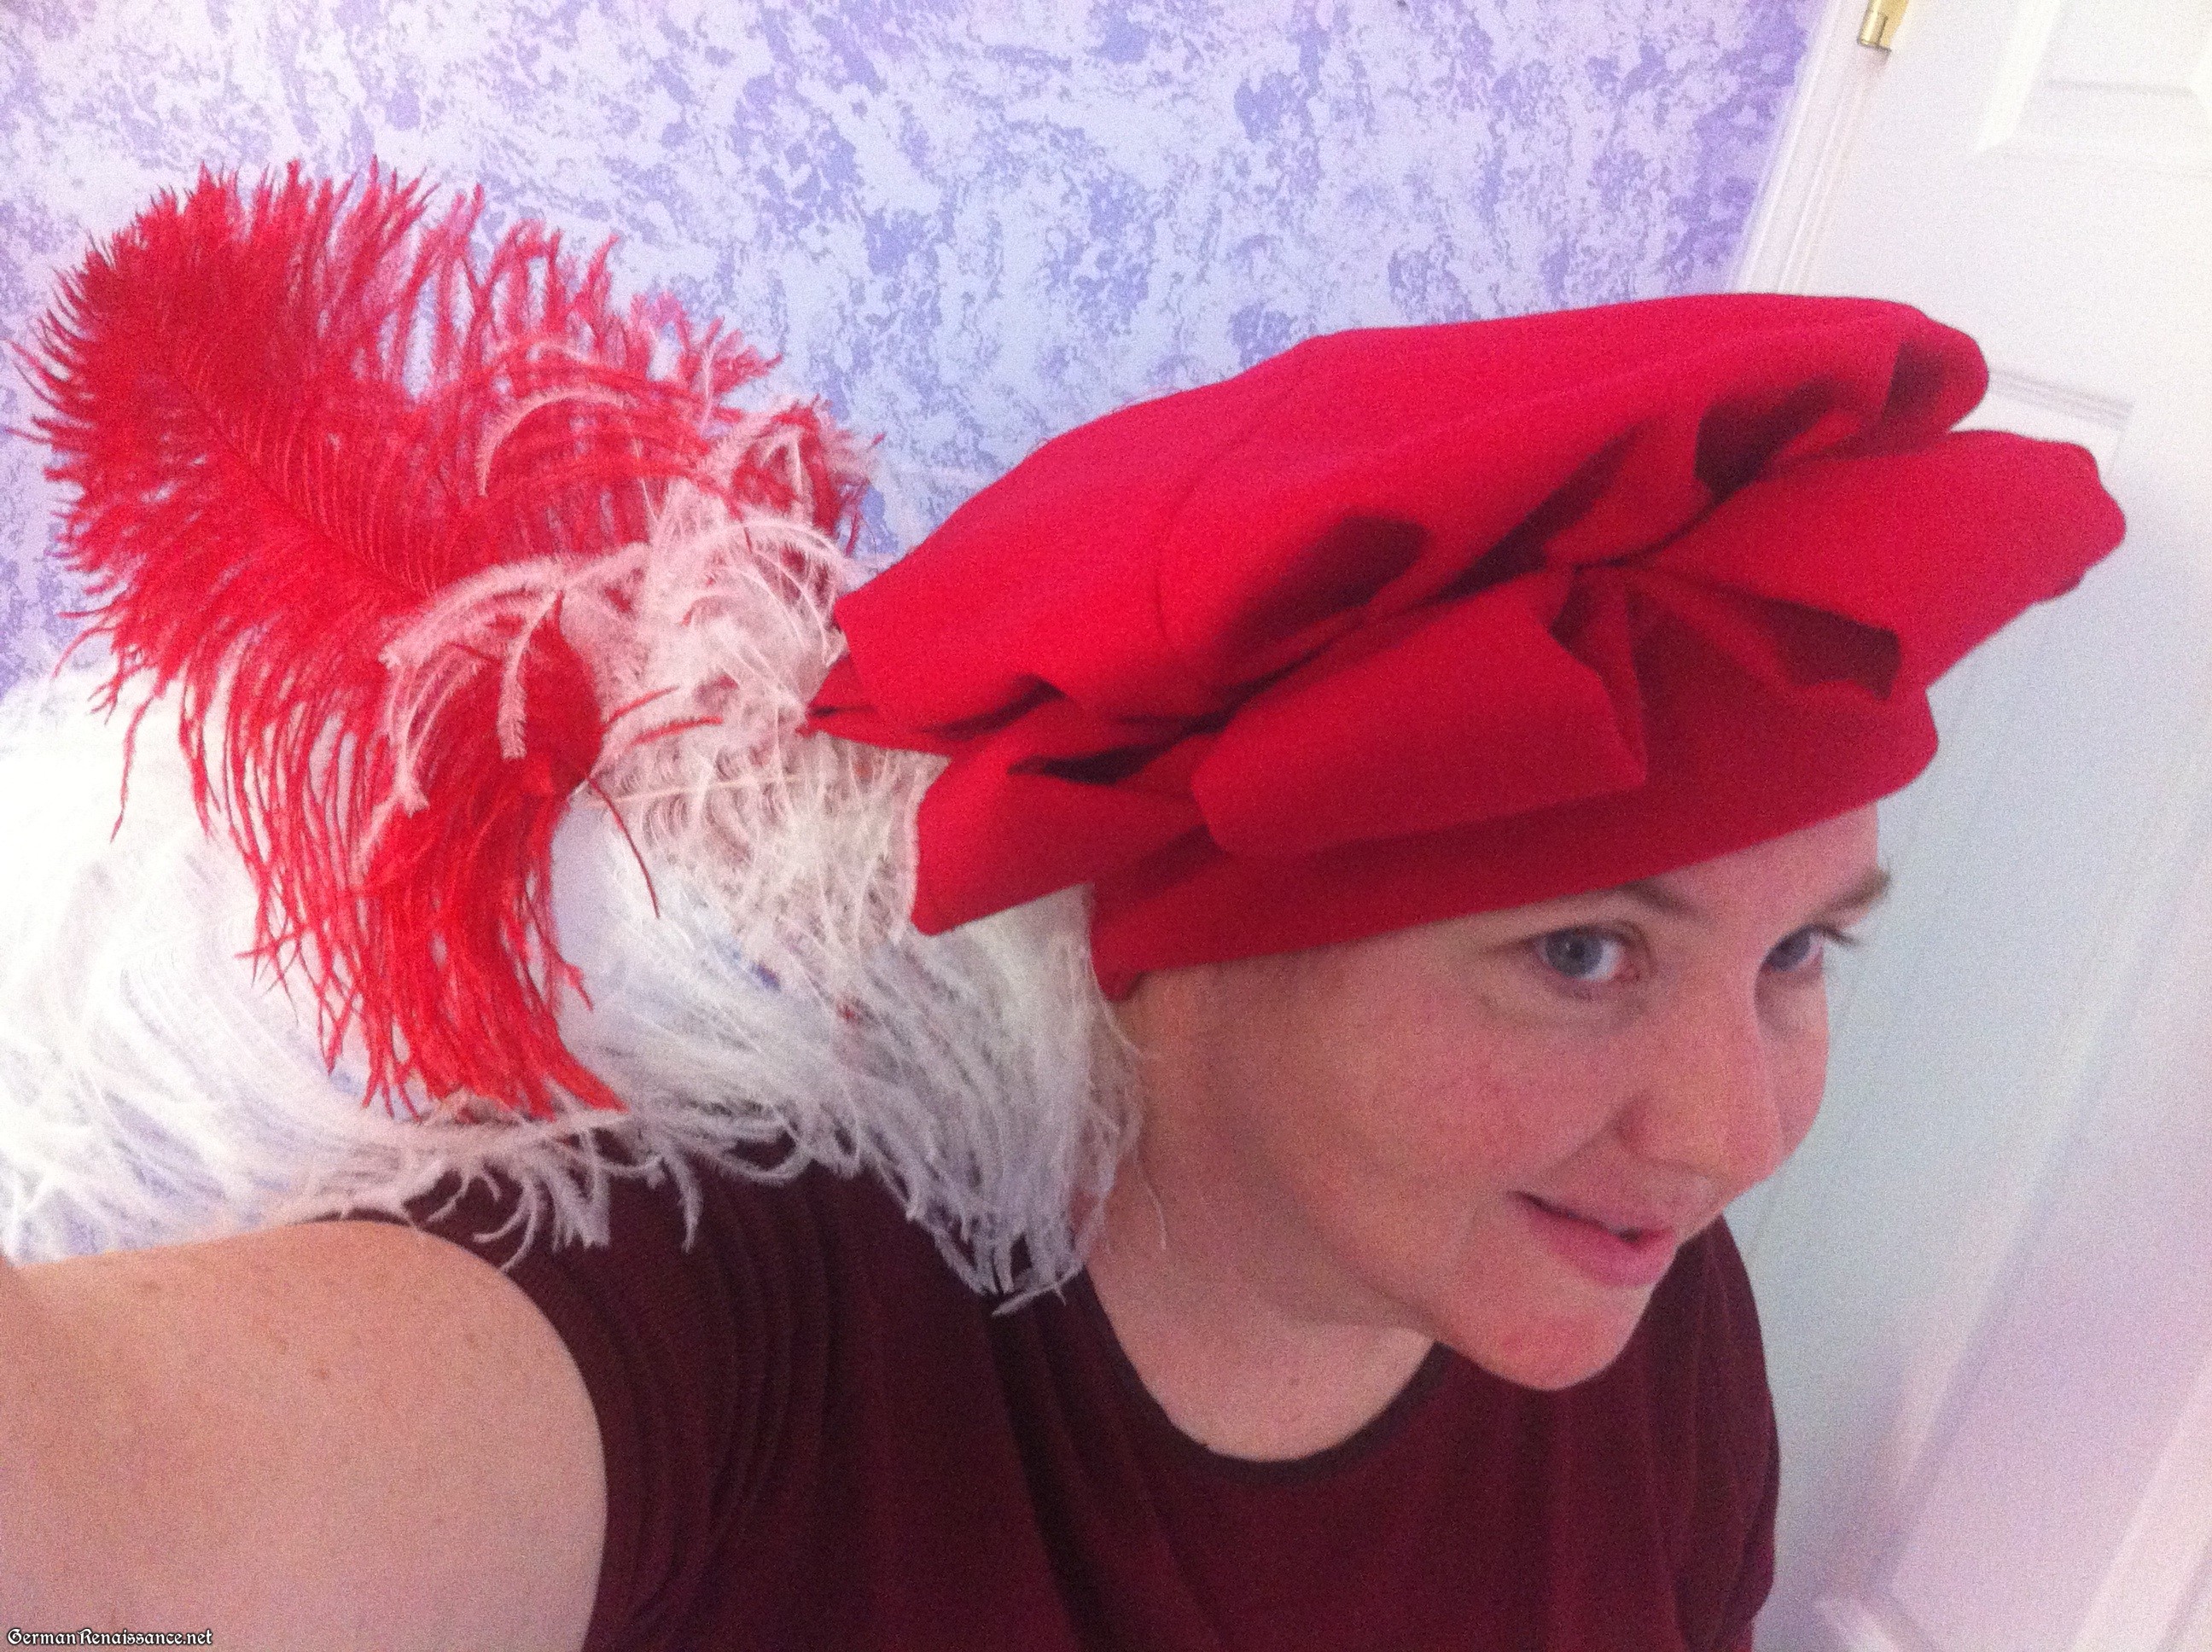
 This Saturday I’ll be teaching my German Tellerbarret Make-and-Take Class at RUM (Royal University of the Midrealm) from 11-1 pm. This year, Royal University of the Midrealm is located at Cleveland Central Catholic High School and St. Stanislaus Church Social Hall, 6550 Baxter Ave., Cleveland, OH 44105 — there is a $12 entry fee ($17 for non-members). If you’re not an SCA member or otherwise familiar with the SCA, this event is open to the public — we just ask that all participants make an attempt at pre-17th century clothing. There are more than 100 classes this Saturday, all are free and some have low-cost material fees. It’s a wonderful opportunity to learn something new!
 2. Sew a 1/2″ casing — with a strong braid or cord inside it — along one edge of your wool strip. Leave the ends of the braid or cord hanging out either end of the casing.


